® Copyright ATH-Heinl GmbH & Co. KG, All rights reserved / Misprints and technical changes reserved / As of: 2020-10
Manufacturer ATH-Heinl GmbH & CO.KG
- 28 -
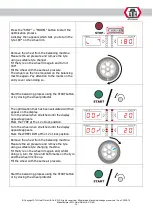
Adjustment of weight attachment:
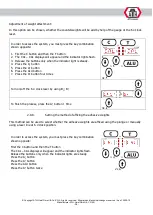
In this option can be chosen, whether the counterweights will be add by help of the gauge or the 6 o’clock
laser.
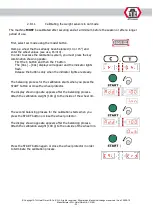
In order to access the system, you must press the key combination
shown opposite:
1.
First the C button and then the T button
2.
The CAL – CAL displays will appear and the indicator lights flash.
3.
Release the buttons only when the indicator light is steady.
4.
Press the A↓ button
5.
Press the A↑ button
6.
Press the ALU button
7.
Press the A↑ button four times
+
>
>
4x
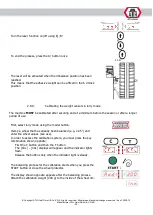
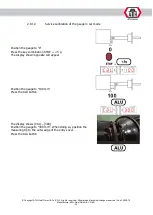
Turn on/off the 6 o´clock laser by using B↓; B↑
To finish the process, press the A↑ button 1 time
4x
2.9.8.
Setting the method of affixing the adhesive weights
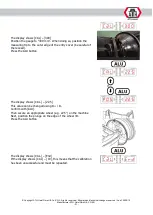
This method can be used to select whether the adhesive weights are affixed using the plunge or manually
using a laser line at 6 o'clock position.
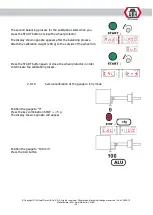
In order to access the system, you must press the key combination
shown opposite:
First the C button and then the T button
The CAL – CAL displays will appear and the indicator lights flash.
Release the buttons only when the indicator lights are steady.
Press the A↓ button
Press the A↑ button
Press the ALU button
Press the A↑ button twice
+
>
>
2x
Summary of Contents for W142
Page 3: ...BEDIENUNGSANLEITUNG ATH W142 ...
Page 59: ...OPERATING INSTRUCTIONS ATH W142 ...
Page 115: ...MANUEL D UTILISATION ATH W142 ...
Page 171: ...NÁVOD K OBSLUZE ATH W142 ...
Page 227: ...MANUAL DE INSTRUCCIONES ATH W142 ...
Page 283: ...BEDIENINGSHANDLEIDING ATH W142 ...
Page 339: ...INSTRUKCJA OBŁSUGI ATH W142 ...
Page 395: ...NÁVOD NA OBSLUHU ATH W142 ...

