


3) In case of assembling, Do reverse way of 2), 1)
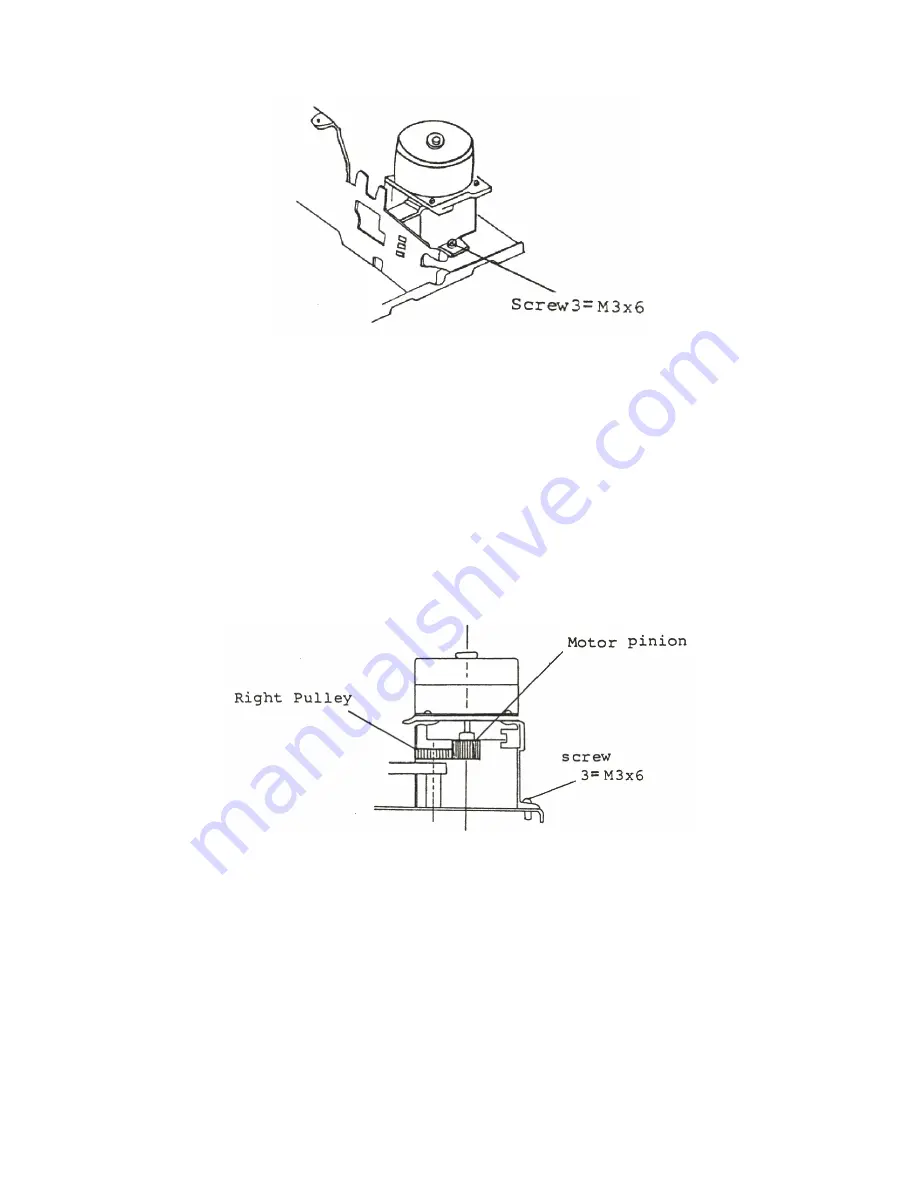
3-2 Adjustment of Carriage Motor Assembly
1) Check the backrash of the mesh part between
pinion gear of the carriage motor and right
pulley by jogging horizontally the Printer Head,
and adjust the carriage motor so sightly that
backrash way not make even with minor force.
2) Fix four M3x6 screws firmly.
3) After above process, check once again the
backrash is minor enough and Printer Head can
move smoothly.
3-3 Lubrication for Carriage Motor Ass'y.
Specified grease (Beacon 325) is required to
the mesh part of pinion gear of Carriage Motor
and the Upper gear of Right Pulley.
-41-
Summary of Contents for XMM801
Page 1: ......
Page 2: ...SERVICE MANUAL PERIPHERAL PRINTER XMM 801...
Page 6: ...Figure 3 Internal Structure 2...
Page 11: ...8 XMM801 Timing chart at Power ON Figure 12 Timing Chart 7...
Page 14: ...Figure 18 Circuit Diagram 10...
Page 15: ...Figure 19 Parts Layout and Pattern Schematic 11...
Page 16: ...Figure 19 cont Parts Layout and Pattern Schematic 11a...
Page 18: ...5 Electric Circuit for Printer Mechanism Figure 22 Connection Diagram 13...
Page 20: ...Figure 23 TROUBLE 1 PRINTER IS TOTALLY OUT OF WORK 15...
Page 21: ...Figure 24 TROUBLE 2 INCORRECT FUNCTION OF PRINTER MECHANISM 16...
Page 23: ...Figure 26 TROUBLE 4 FEED MOTOR IS NOT WORKING 18...
Page 39: ...34...
Page 40: ...35...
Page 41: ...36...