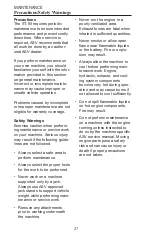
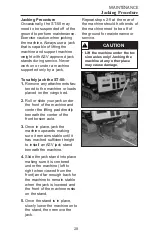


4.
Remove the two front 10”
diameter wheels (second
wheel back in the undercar-
riage from the front) by first
removing the outer snap rings
and grease covers (fig. 8, 9).
Then remove the nuts secur-
ing the wheel assemblies to
the axle (fig. 10). Then
remove the wheels (fig. 11,
12).
Note:
A pry bar may be useful in
helping to free the wheels from
the axles for removal.
5.
Loosen the bleeder bolt once
again and move the front 14”
wheels and axle as far rear-
ward as possible. It may be
necessary to assist in sliding
the wheels rearward by step-
ping down on the inside of the
track as shown (fig. 13).
6.
Grab hold of the track and the
outer front 14” wheel, then
pull them off of the undercar-
riage together, from the inside
to the outside of the machine
(fig. 14, 15).
Note:
Keep the 14” wheel center
in line with the axle as much as
possible during wheel/track
removal to avoid damaging the
inner wheel seal as it passes
over the threads on the axle
shaft.
MAINTENANCE
Undercarriages
41
8
9
10
11
12
Summary of Contents for ST50 Scout
Page 6: ...5 ...
Page 11: ...SAFETY Warning Decal Locations 10 A B B F D C C G E ...
Page 48: ...47 ...
Page 56: ...SERVICE LOG 55 Hours Service Performed Notes ...
Page 57: ...SERVICE LOG 56 Hours Service Performed Notes ...
Page 58: ...Hours Service Performed Notes SERVICE LOG 57 ...
Page 59: ...SERVICE LOG 58 Hours Service Performed Notes ...


