


2-18
Chapter 2: Hardware information
Chapter 2
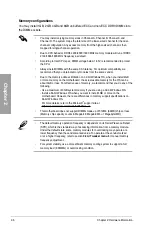
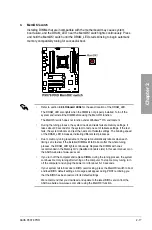
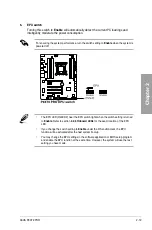
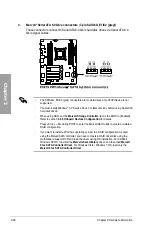
5.
TPU switch
Turning this switch to
Enable
will automatically optimize the system for fast, yet stable
clock speeds.
•
The TPU LED (O2LED1) near the TPU switch lights when the switch setting is turned
to
Enable
. Refer to section
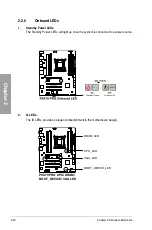
2.2.6 Onboard LEDs
for the exact location of the TPU
LED.
•
If you change the switch setting to
Enable
under the OS environment, the TPU
function will be activated after the next system bootup.
•
You may use the TurboV and Auto Tuning feature in the TurboV EVO application,
adjust the BIOS setup program, or enable the TPU switch at the same time. However,
the system will use the last setting you have made.
For ensuring the system performance, turn the switch setting to
Enable
when the system is
powered off.
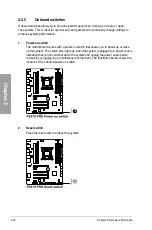
4.
Clear RTC RAM switch
Clear RTC RAM switch
switch
To erase the RTC RAM:
1. Press down the CLR_CMOS switch.
2. Hold down the <Del> key during the boot process and enter BIOS setup to re-
enter data.
Summary of Contents for P9X79 PRO
Page 1: ...Motherboard P9X79 PRO ...
Page 20: ...1 8 Chapter 1 Product Introduction Chapter 1 ...
Page 58: ...2 38 Chapter 2 Hardware information Chapter 2 9 7 8 5 6 Triangle mark B A B A ...
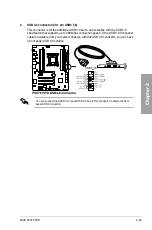
Page 63: ...ASUS P9X79 PRO 2 43 Chapter 2 2 3 6 ATX Power connection 2 OR OR 1 ...
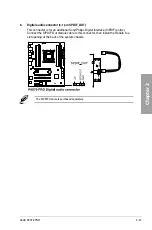
Page 64: ...2 44 Chapter 2 Hardware information Chapter 2 2 3 7 SATA device connection OR 2 OR 1 ...
Page 158: ...4 34 Chapter 4 Software support Chapter 4 ...
Page 166: ...5 8 Chapter 5 Multiple GPU technology support Chapter 5 ...


