background image

5-2

Chapter 5: Software support

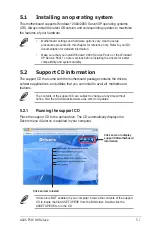
5.2.2 

Drivers menu

The drivers menu shows the available device drivers if the system detects installed 

devices. Install the necessary drivers to activate the devices.

ASUS InstAll -Drivers Installation Wizard

Launches the ASUS InstallAll driver installation wizard.

Intel Chipset Inf Update Program

Installs the Intel

®

 Chipset INF Update Program. This driver enables Plug-n-Play 

INF support for the Intel

®

 chipset components on the motherboard. When installed 

to the target system, this driver provides the method for configuring the chipset 

components.
You can install this utility using three different modes: interactive, silent or 

unattended preload. Installing the driver in interactive mode requires user input 

during installation. User input is not required when installing the driver in silent or 

unattended preload modes. Refer to the online help or readme file that came with 

the utility for details.

Realtek Audio Driver 

Installs the Realtek

®

 ALC882M audio driver and application. See section “5.3.3 

Audio configurations” for details.

JMicron JMB36X RAID Controller Driver

Installs the JMicron

®

 JMB363 RAID controller driver.

Marvell Yukon Gigabit Ethernet Driver

Installs the Marvell Yukon Gigabit Ethernet LAN driver.

Summary of Contents for P5W DH

Page 1: ...Motherboard P5W DH Deluxe ...

Page 2: ...CHANTABILITY OR FITNESS FOR A PARTICULAR PURPOSE IN NO EVENT SHALL ASUS ITS DIRECTORS OFFICERS EMPLOYEES OR AGENTS BE LIABLE FOR ANY INDIRECT SPECIAL INCIDENTAL OR CONSEQUENTIAL DAMAGES INCLUDING DAMAGES FOR LOSS OF PROFITS LOSS OF BUSINESS LOSS OF USE OR DATA INTERRUPTION OF BUSINESS AND THE LIKE EVEN IF ASUS HAS BEEN ADVISED OF THE POSSIBILITY OF SUCH DAMAGES ARISING FROM ANY DEFECT OR ERROR IN ...

Page 3: ...direction 2 2 2 2 2 Screw holes 2 2 2 2 3 ASUS Stack Cool 2 2 3 2 2 4 Motherboard layout 2 4 2 2 5 Layout contents 2 5 2 3 Central Processing Unit CPU 2 7 2 3 1 Installing the CPU 2 8 2 3 2 Installing the CPU heatsink and fan 2 10 2 3 3 Uninstalling the CPU heatsink and fan 2 12 2 4 System memory 2 14 2 4 1 Overview 2 14 2 4 2 Memory configurations 2 14 2 4 3 Installing a DIMM 2 21 2 4 4 Removing ...

Page 4: ... bootable floppy disk 4 4 4 1 3 ASUS EZ Flash 2 utility 4 5 4 1 4 AFUDOS utility 4 6 4 1 5 ASUS CrashFree BIOS 3 utility 4 9 4 2 BIOS setup program 4 10 4 2 1 BIOS menu screen 4 11 4 2 2 Menu bar 4 11 4 2 3 Navigation keys 4 11 4 2 4 Menu items 4 12 4 2 5 Sub menu items 4 12 4 2 6 Configuration fields 4 12 4 2 7 Pop up window 4 12 4 2 8 Scroll bar 4 12 4 2 9 General help 4 12 4 3 Main menu 4 13 4 ...

Page 5: ...C Support 4 32 4 5 5 APM Configuration 4 33 4 5 6 Hardware Monitor 4 35 4 6 Boot menu 4 38 4 6 1 Boot Device Priority 4 38 4 6 2 Hard Disk Drives 4 39 4 6 3 Boot Settings Configuration 4 39 4 6 4 Security 4 41 4 7 Tools menu 4 43 4 7 1 ASUS Music Alarm 4 43 4 7 2 ASUS EZ Flash 2 4 45 4 8 Exit menu 4 46 Chapter 5 Software support 5 1 Installing an operating system 5 1 5 2 Support CD information 5 1...

Page 6: ...RAID 10 set RAID 0 1 with ASUS EZ Backup and Intel ICH7R 5 61 5 5 Creating a RAID driver disk 5 64 5 5 1 Creating a RAID driver disk without entering the OS 5 64 5 5 2 Creating a RAID driver disk in Windows 5 64 Chapter 6 ATI CrossFire technology support 6 1 Overview 6 1 6 1 1 Requirements 6 1 6 1 2 Before you begin 6 1 6 2 Installing CrossFire graphics cards 6 2 6 3 Software information 6 5 6 3 1...

Page 7: ...ause harmful interference to radio or television reception which can be determined by turning the equipment off and on the user is encouraged to try to correct the interference by one or more of the following measures Reorient or relocate the receiving antenna Increase the separation between the equipment and receiver Connect the equipment to an outlet on a circuit different from that to which the...

Page 8: ...cal power company If the power supply is broken do not try to fix it by yourself Contact a qualified service technician or your retailer Operation safety Before installing the motherboard and adding devices on it carefully read all the manuals that came with the package Before using the product make sure all cables are correctly connected and the power cables are not damaged If you detect any dama...

Page 9: ...through the BIOS Setup menus Descriptions of the BIOS items are also provided Chapter 5 Software support This chapter describes the contents of the support CD that comes with the motherboard package Chapter 6 ATI CrossFire support This chapter describes the ATI CrossFire feature and shows the graphics card installation procedures Appendix CPU features The Appendix describes the CPU features and te...

Page 10: ...2 Key3 If you must press two or more keys simultaneously the key names are linked with a plus sign Example Ctrl Alt D Command Means that you must type the command exactly as shown then supply the required item or value enclosed in brackets Example At the DOS prompt type the command line afudos i filename afudos ip5wdh rom DANGER WARNING Information to prevent injury to yourself when trying to comp...

Page 11: ...t QVL Expansion slots 2 x PCI Express x16 slots for discrete graphics card 2 x PCI Express x1 slots 3 x PCI slots CrossFire Supports ATI CrossFire graphics cards both at x8 mode ASUS Two slot thermal design ASUS PEG Link Advanced Thermal Design ASUS 8 Phase Power Design ASUS Stack Cool 2 ASUS Fanless Design Heat pipe thermal solution Storage RAID Intel ICH7R Southbridge supports 1 x Ultra DMA 100 ...

Page 12: ... Features Dolby Master Studio Technology Dolby ProLogic IIX Dolby Headphone Dolby Virtual Speaker Dolby Digital Live IEEE 1394 TI 1394 controller supports 2 x IEEE 1394a connectors 1 at mid board 1 on the rear panel USB Supports up to 8 USB 2 0 1 1 ports ASUS Digital Home features ASUS EZ Backup 2 x Serial ATA 3 0 Gb s support hardware RAID 0 or RAID 1 mode Plug and play Default setting in RAID 1 ...

Page 13: ...ent Stepless Frequency Selection SFS allows FSB tuning from 200 MHz up to 400 MHz at 1 MHz increment PCI Express x16 frequency tuning from 90 MHz to 150 MHz at 1 MHz increment Adjustable FSB DDR ratio Fixed PCI PCI Express frequencies Overclocking protection ASUS C P R CPU Parameter Recall ASUS AI Booster Utility Other ASUS special features ASUS CrashFree BIOS 3 ASUS EZ Flash 2 ASUS Q Fan2 ASUS Mu...

Page 14: ...nnector ASUS EZ Backup RAID selection mode jumper BIOS features 8 Mb Flash ROM AMI BIOS PnP DMI2 0 WfM2 0 SM BIOS 2 3 PXE RPL Manageability WOL by PME WOR by PME Chassis Intrusion Power requirements ATX power supply with 24 pin and 4 pin 12 V plugs ATX 12 V 2 0 compliant Support CD contents Device Drivers Make RAID driver disk for Intel ICH7R and JMicron JMB 363 RAID Manuals for Intel ICH7R ASUS E...

Page 15: ...1 Product introduction This chapter describes the motherboard features and the new technologies it supports ...

Page 16: ...ASUS P5W DH Deluxe Chapter summary 1 1 1 Welcome 1 1 1 2 Package contents 1 1 1 3 Special features 1 2 ...

Page 17: ... motherboard package for the following items If any of the above items is damaged or missing contact your retailer ASUS Digital Home Accessories ASUS DH Remote ASUS DH Remote receiver ASUS WiFi AP Solo antenna ASUS EZ Backup SATA cables 2 2 in 1 SATA power cable ASUS MP3 In Module Accessories 1 x ASUS Q Connector set USB IEEE 1394a system panel for retail version only 1 x IEEE 1394a port module 2 ...

Page 18: ...anteeing enhanced user experience in the digital home and office See page 2 7 for details Intel 65 nm Dual Core Technology CPU support Dual core processors contain two physical CPU cores with dedicated L2 caches to meet demands for more powerful processing Intel s 65 nm process is the most advanced chip manufacturing technology delivering breakthrough performance enhanced media experience and low ...

Page 19: ...tel Pentium 4 CPUs with the Intel EM64T Extended Memory 64 Technology The Intel EM64T feature allows your computer to run on 64 bit operating systems and access larger amounts of system memory for faster and more efficient computing See the Appendix for details Enhanced Intel SpeedStep Technology EIST The Enhanced Intel SpeedStep Technology EIST intelligently manages the CPU resources by automatic...

Page 20: ... Dolby Virtual Speaker and Dolby Digital Live See page 5 18 for details IEEE 1394a support The motherboard supports the IEEE 1394a interface that provides high speed and flexible PC connectivity to a wide range of peripherals and devices compliant to IEEE 1394a standards The IEEE 1394a interface allows up to 400 Mbps transfer rates through simple low cost high bandwidth asynchronous real time data...

Page 21: ...Cross RAID allows you to build a RAID 10 set through a cross configuration of ASUS EZ Backup and Intel ICH7R JMicron RAID Enabled by JMicron JMB363 controller JMicron RAID extends the advantages of software RAID beyond internal hard disk drives to an external disk or external port multiplier enabled enclosure Refer to Chapter 5 for details on how to configure RAID Dual Gigabit LAN solution The mot...

Page 22: ... Serial ATA 3 0 Gb s connectors one at mid board and one on the rear panel provide smart setup and hot plug function See pages 2 29 and 2 34 for details AI Quiet The ASUS AI Quiet function dynamically controls CPU speed and reduces temperature and fan speeds thus minimizing noise and ensuring quiet operation See page 4 35 for details ASUS Stack Cool 2 ASUS Stack Cool 2 is a fan less and zero noise...

Page 23: ... lower overall system temperature resulting in quieter operation and longer system life ASUS has devoted special efforts to address the thermal issues across the motherboard and most notably in the following areas CPU power VGA Northbridge and Southbridge The heat pipe heatsink and strategic board layout were tailor made to dissipate heat in the most efficient manner ASUS exclusive two slot therma...

Page 24: ...Q Fan 2 technology smartly adjusts the fan speeds according to the system loading to ensure quiet cool and efficient operation See page 4 36 for details ASUS Multi language BIOS The multi language BIOS allows you to select the language of your choice from the available options The localized BIOS menus allow easier and faster configuration See page 4 13 for details ASUS MyLogo 2 ASUS My Logo 2 is t...

Page 25: ...gives users unprecedented control over their PCs from the comfort of their couches With the touch of a button users can instantly operate the following functions Refer to the ASUS DH Remote user guide for details Power Turns the computer on off Quick Power Puts the computer quickly into sleep mode Noise Off Reduces the noise coming from the computer EZ WiFi Puts the computer quickly into sleep mod...

Page 26: ... ASUS and the first of its kind in the world EZ Backup allows users to utilize SATA2 technology to build RAID 1 default or RAID 0 without requiring any BIOS setup or any other configuration ASUS EZ Backup is ideal for anyone who wants to secure data on the hard drive but does not want the hassle of complicated software configuration See section 5 4 4 Silicon Image RAID configuration for details ...

Page 27: ... Hardware information This chapter lists the hardware setup procedures that you have to perform when installing system components It includes description of the jumpers and connectors on the motherboard ...

Page 28: ...5W DH Deluxe Chapter summary 2 2 1 Before you proceed 2 1 2 2 Motherboard overview 2 2 2 3 Central Processing Unit CPU 2 7 2 4 System memory 2 14 2 5 Expansion slots 2 22 2 6 Jumpers 2 26 2 7 Connectors 2 28 ...

Page 29: ...rd from the wall socket before touching any component Use a grounded wrist strap or touch a safely grounded object or a metal object such as the power supply case before handling components to avoid damaging them due to static electricity Hold components by the edges to avoid touching the ICs on them Whenever you uninstall any component place it on a grounded antistatic pad or in the bag that came...

Page 30: ...hysical injury and damage motherboard components Do not overtighten the screws Doing so can damage the motherboard 2 2 1 Placement direction When installing the motherboard make sure that you place it into the chassis in the correct orientation The edge with external ports goes to the rear part of the chassis as indicated in the image below 2 2 2 Screw holes Place nine 9 screws into the holes indi...

Page 31: ...erboard comes with the ASUS Stack Cool 2 cooling solution that lowers the temperature of critical heat generating components by 20ºC The motherboard uses a special design on the printed circuit board PCB to dissipate heat that critical components generate ...

Page 32: ...I O 8Mb BIOS TSB43AB22A CD PCIEX1_1 PCIEX16_2 CLRTC SATA_RAID1 Intel ICH7R SB_PWR EATXPWR PRI_IDE CR2032 3V Lithium Cell CMOS Power Intel MCH 975X PCI1 USB56 LAN2_USB12 PS 2KBMS T Mouse B Keyboard LAN1_USB34 AUDIO PCIEX1_2 PCIEX16_1 PCI2 PCI3 MP3IN ALC 882M 88E8053 88E8053 PWR_FAN1 PWR_FAN2 JMicron JMB363 SPDIF_OUT USB78_WFG USB9 LGA775 ESATA_1394 ATX12V GL850A Silicon Image Sil4723 RAID_SEL SATA4...

Page 33: ... Serial port 2 28 3 IEEE 1394a port 2 28 4 LAN1 RJ 45 port 2 28 5 LAN2 RJ 45 port 2 28 6 Center Subwoofer port yellow orange 2 28 7 Rear Speaker Out port black 2 28 8 Line In port light blue 2 29 9 Line Out port lime 2 29 10 Microphone port pink 2 29 11 Side Speaker Out port gray 2 29 12 USB 2 0 ports 1 2 3 and 4 2 29 13 External SATA port 2 29 14 Optical S PDIF Out port 2 30 15 Coaxial S PDIF Out...

Page 34: ...r 4 pin MP3IN 2 35 8 Internal audio connector 4 pin CD 2 36 9 Front panel audio connector 10 1 pin AAFP 2 36 10 USB connector 10 1 pin USB56 USB78 2 37 11 IEEE 1394a port connector 10 1 pin IE1394_1 Red 2 37 12 Chassis intrusion connector 4 1 pin CHASSIS 2 38 13 CPU Chassis and Power Fan connectors 4 pin CPU_FAN 3 pin PWR_FAN1 3 pin PWR_FAN2 3 pin CHA_FAN1 3 pin CHA_FAN2 2 38 14 ATX power connecto...

Page 35: ...s fan to ensure better air flow when overclocking Upon purchase of the motherboard make sure that the PnP cap is on the socket and the socket contacts are not bent Contact your retailer immediately if the PnP cap is missing or if you see any damage to the PnP cap socket contacts motherboard components ASUS will shoulder the cost of repair only if the damage is shipment transit related Keep the cap...

Page 36: ... Retention tab Load lever This side of the socket box should face you PnP cap A B To prevent damage to the socket pins do not remove the PnP cap unless you are installing a CPU 2 3 1 Installing the CPU To install a CPU 1 Locate the CPU socket on the motherboard Before installing the CPU make sure that the cam box is facing towards you and the load lever is on your left P5W DH DELUXE P5W DH DELUXE ...

Page 37: ...N1 2 connector to ensure system stability A B The CPU fits in only one correct orientation DO NOT force the CPU into the socket to prevent bending the connectors on the socket and damaging the CPU The motherboard supports Intel Pentium 4 LGA775 processors with the Intel Enhanced Memory 64 Technology EM64T Enhanced Intel SpeedStep Technology EIST and Hyper Threading Technology Refer to the Appendix...

Page 38: ...ou use only Intel certified multi directional heatsink and fan Your Intel Pentium 4 LGA775 heatsink and fan assembly comes in a push pin design and requires no tool to install If you purchased a separate CPU heatsink and fan assembly make sure that you have properly applied Thermal Interface Material to the CPU heatsink or CPU before you install the heatsink and fan assembly Make sure that you hav...

Page 39: ... fasteners at a time in a diagonal sequence to secure the heatsink and fan assembly in place B B A A A A B B Do not forget to connect the CPU fan connector Hardware monitoring errors can occur if you fail to plug this connector P5W DH DELUXE P5W DH DELUXE CPU fan connector CPU_FAN GND CPU FAN PWR CPU FAN IN CPU FAN PWM ...

Page 40: ...n 1 Disconnect the CPU fan cable from the connector on the motherboard 2 Rotate each fastener counterclockwise 3 Pull up two fasteners at a time in a diagonal sequence to disengage the heatsink and fan assembly from the motherboard B B A A A A B B 4 Carefully remove the heatsink and fan assembly from the motherboard ...

Page 41: ...tation when reinstalling The narrow end of the groove should point outward after resetting The photo shows the groove shaded for emphasis Narrow end of the groove Refer to the documentation in the boxed or stand alone CPU fan package for detailed information on CPU fan installation ...

Page 42: ...nfigurations You may install 256 MB 512 MB 1 GB and 2 GB unbuffered ECC non ECC DDR2 DIMMs into the DIMM sockets For dual channel configuration the total size of memory module s installed per channel must be the same DIMM_A1 DIMM_A2 DIMM_B1 DIMM_B2 Always install DIMMs with the same CAS latency For optimum compatibility it is recommended that you obtain memory modules from the same vendor Visit th...

Page 43: ...ows XP 32 bit version Operating System OS the limitation of this OS version is that it may reserve a certain amount of memory space for system devices We recommend that you install less than 3 GB system memory if you would like to work under Windows XP 32 bit version OS The excess memory installation will not cause any usage problem but it will not give users the benefit of manipulating this exces...

Page 44: ...6 MB A DATA E2508AB GE E SS M20EL6F3G3170A1D0Z 256 MB A DATA E2508AB GE E SS M20EL6F3G3160A1D0Z 256 MB A DATA E2508AB GE E SS M2OEL6F3G3160A1D0Z 512 MB A DATA E2508AB GE E DS M2OEL6F3H4170A1D0Z 256 MB Apacer E2508AB GE E SS 78 81091 420 512 MB Apacer E2508AB GE E DS 78 91091 420 512 MB Crucial Heat Sink Package SS BL6464AA804 8FA 1024 MB Crucial Heat Sink Package DS BL12864AA804 16FA 256 MB TwinMO...

Page 45: ...12821AFP Y5 SS HYMP564U64AP8 Y5 1024MB Hynix HY5PS12821AFP Y5 DS HYMP512U64AP8 Y5 1024MB Hynix HY5PS1G831FP Y5 ECC SS HYMP112U72P8 Y5 512MB Hynix HY5PS12821AFP Y5 ECC SS HYMP564U72AP8 Y5 1024MB Hynix HY5PS12821AFP Y5 ECC DS HYMP512U72AP8 Y5 512MB Hynix HY5PS12821AFP Y4 SS HYMP564U64AP8 Y4 1024MB Hynix HY5PS12821AFP Y4 DS HYMP512U64AP8 Y4 512MB Hynix HY5PS12821AFP Y4 ECC SS HYMP564U72AP8 Y4 1024MB ...

Page 46: ...PE K 1024MB PQI E5108AE 5C E DS MEAD 403LA 512MB WINTEC 4UAI2D9CRZ SS 39127282 1024MB WINTEC 4WAIID9CWX DS 39137282 512MB MDT 18D51280D 30518 SS M512 667 8 1024MB MDT 18D51280D 30528 DS M924 667 16 512MB Kingbox DD2640800 667 SS 1024MB Kingbox DD2640800 667 DS Side s SS Single sided DS Double sided DIMM support A Supports one module inserted into either slot in Single channel memory configuration ...

Page 47: ...HY5PS12821F C4 DS HYMP512U648 C4 1024 MB Hynix HY5PS12821F C4 ECC DS HYMP512U728 C4 1024 MB Hynix HY5PS12821F E3 ECC DS HYMP512U728 C4 512 MB Hynix HY5PS12821FP C4 ECC SS HYMP564U728 C4 1024 MB Hynix HY5PS12821FP C4 DS HYMP512U648 C4 512 MB Hynix HY5PS12821AFP C3 SS HYMP564U64AP8 C3 1024 MB Hynix HY5PS12821AFP C3 DS HYMP512U64AP8 C3 512 MB ELPIDA E5108AB 5C E ECC SS EBE51ED8ABFA 5C E 512 MB ELPIDA...

Page 48: ...M8AF 37B DS NT1GT64U8HA0F 37B 1024 MB PQI 64MX8D2 E DS MEAB 323LA 512 MB PQI 64MX8D2 E SS MEAB 423LA 512 MB TwinMOS K4T51083QB GCD5 SS 8D 22JB5 K2T 256 MB SimpleTech 858S032F25A SS SVM 42DR2 256 512 MB SimpleTech 858S064F25A SS SVM 42DR2 512 1024 MB Patriot Heat Sink Package SS PDC21G5600 XBLK 512 MB MDT 18D51280D 3 70S20 SS M512 533 8 1024 MB MDT 18D51280D 3 70448 DS M924 533 16 DDR2 533 Side s S...

Page 49: ...taining clips snap back in place and the DIMM is properly seated 2 4 4 Removing a DIMM To remove a DIMM 1 Simultaneously press the retaining clips outward to unlock the DIMM 2 Remove the DIMM from the socket A DDR2 DIMM is keyed with a notch so that it fits in only one direction Do not force a DIMM into a socket to avoid damaging the DIMM The DDR2 DIMM sockets do not support DDR DIMMs Do not insta...

Page 50: ...cure the card to the chassis with the screw you removed earlier 6 Replace the system cover 2 5 2 Configuring an expansion card After installing the expansion card configure the it by adjusting the software settings 1 Turn on the system and change the necessary BIOS settings if any See Chapter 4 for information on BIOS setup 2 Assign an IRQ to the card Refer to the tables on the next page 3 Install...

Page 51: ...2 shared USB controller 3 shared USB controller 4 shared USB 2 0 controller shared Serial ATA shared IDE shared HD Audio shared IRQ Priority Standard function 0 1 System Timer 1 2 Keyboard Controller 2 Redirect to IRQ 9 3 11 IRQ Holder for PCI Steering 4 12 Communications Port COM1 5 13 IRQ Holder for PCI Steering 6 14 Floppy Disk Controller 7 15 Printer Port LPT1 8 6 System CMOS Real Time Clock 9...

Page 52: ... PCI Express x1 network cards SCSI cards and other cards that comply with the PCI Express specifications The following figure shows a network card installed on the PCI Express x1 slot 2 5 6 Two PCI Express x16 slots This motherboard supports two ATI CrossFire PCI Express x16 graphics cards that comply with the PCI Express specifications The figure shows two graphics cards installed on the PCI Expr...

Page 53: ...onfigurations Install two ATI graphics cards from the same GPU family that support CrossFire mode The speed of the primary PCIe x16 slot PCIEX16_1 changes to x8 mode after you install any device in the secondary PCIe x16 PCIEX16_2 slot PCI Express x16 slot configurations PCIEX16_1 orange slot PCIEX16_2 black slot Card type Speed Card type Speed Non CrossFire mode PCIe x16 graphics card x16 NA NA P...

Page 54: ... 3 Keep the cap on pins 2 3 for about 5 10 seconds then move the cap back to pins 1 2 4 Reinstall the battery 5 Plug the power cord and turn ON the computer 6 Hold down the Del key during the boot process and enter BIOS setup to re enter data You do not need to clear the RTC when the system hangs due to overclocking For system failure due to overclocking use the C P R CPU Parameter Recall feature ...

Page 55: ...or BIOS setting Install the ASUS EZ Backup Manager utility from the support CD and install two Serial ATA hard disk drives on the EZ_RAID1 and EZ_RAID2 connectors on the motherboard and you are ready to mirror your data For detailed information about ASUS EZ Backup see section 5 4 4 Silicon Image RAID configuration P5W DH DELUXE P5W DH DELUXE RAID Setting RAID_SEL RAID1 Default 1 BIG mode 1 Fast m...

Page 56: ... LED indications 5 LAN2 RJ 45 port This Marvell LAN port allows Gigabit connection to a Local Area Network LAN through a network hub Refer to the table below for the LAN port LED indications LAN port Activity Link Speed LED Status Description Status Description OFF No link OFF 10 Mbps connection ORANGE Linked ORANGE 100 Mbps connection BLINKING Data activity GREEN 1 Gbps connection LAN port LED in...

Page 57: ...This port connects a headphone or a speaker In 4 channel 6 channel and 8 channel configuration the function of this port becomes Front Speaker Out 10 Microphone port pink This port connects a microphone 11 Side Speaker Out port gray This port connects the side speakers in an 8 channel audio configuration 12 USB 2 0 ports 1 2 3 and 4 These 4 pin Universal Serial Bus USB ports are available for conn...

Page 58: ... on the onboard wireless LAN module that allows you to set up a wireless network and exchange information with other wireless devices without tangling cables and wires Connect the moveable omni directional antenna to this jack 14 Optical S PDIF Out port This port connects an external audio output device via an optical S PDIF cable 15 Coaxial S PDIF Out port This port connects an external audio out...

Page 59: ...e provided floppy disk drive FDD signal cable Insert one end of the cable to this connector then connect the other end to the signal connector at the back of the floppy disk drive Pin 5 on the connector is removed to prevent incorrect cable connection when using a FDD cable with a covered Pin 5 P5W DH DELUXE P5W DH DELUXE Floppy disk drive connector NOTE Orient the red markings on the floppy ribbo...

Page 60: ...nsertion when you connect the IDE cable Use the 80 conductor IDE cable for Ultra DMA 100 66 IDE devices Install devices on this connector PRI_IDE first then install on the JMicron IDE connector PRI_EIDE see item 2 on the previous page for the location of the PRI_EIDE connector If any device jumper is set as Cable Select make sure all other device jumpers have the same setting Drive jumper setting ...

Page 61: ... RAID 0 RAID 1 RAID 5 RAID 10 is available only if you are using Windows 2000 XP Server 2003 or later version When using the connectors in Standard IDE mode connect the primary boot hard disk drive to the SATA1 connector 4 Intel ICH7R Serial ATA connectors 7 pin SATA1 red SATA3 black SATA4 black These connectors are for the Serial ATA signal cables for Serial ATA hard disk drives If you installed ...

Page 62: ...ND To build RAID 1 we recommend that you install the hard disk drives on the ASUS EZ Backup connectors EZ_RAID1 and EZ_RAID2 to enjoy the instant setup otherwise you may also install on the ICH7R connectors You may install an extra hard disk drive on the JMicron Serial ATA connector after using up the Intel ICH7R and ASUS EZ Backup connectors The JMicron JMB363 Controller item in the BIOS is set t...

Page 63: ...hree hard disk drives on the ICH7R Serial ATA connectors and one hard disk drive on EZ_RAID1 See section 5 4 5 Cross RAID configuration for details 7 MP3 In connector 4 pin MP3IN red This connector is for the MP3 In module that allows you to connect your MP3 player to the speakers of the computer For more information refer to the MP3 In Module Quick Installation Guide or the ASUS FrontLinker user ...

Page 64: ... a legacy AC 97 front panel audio module to this connector set the Front Panel Support Type item in the BIOS Setup to AC97 See page 4 28 for details 8 Internal audio connector 4 pin CD This connector allows you to receive stereo audio input from a CD ROM P5W DH DELUXE P5W DH DELUXE Internal audio connector CD Right Audio Channel Left Audio Channel Ground Ground P5W DH DELUXE P5W DH DELUXE Analog f...

Page 65: ...0 connectors USB56 USB 5V USB_P6 USB_P6 GND NC USB 5V USB_P5 USB_P5 GND 1 USB78 USB 5V USB_P8 USB_P8 GND NC USB 5V USB_P7 USB_P7 GND 1 11 IEEE 1394a port connector 10 1 pin IE1394_1 Red This connector is for an additional IEEE 1394a port Connect the IEEE 1394a module cable red to this connector then install the module to a slot opening at the back of the system chassis Never connect a USB port mod...

Page 66: ... the chassis intrusion detection feature 13 CPU Chassis and Power Fan connectors 4 pin CPU_FAN 3 pin PWR_FAN1 3 pin PWR_FAN2 3 pin CHA_FAN1 3 pin CHA_FAN2 The fan connectors support cooling fans of 2A 24W max at 12V Connect the fan cables to the fan connectors on the motherboard making sure that the black wire of each cable matches the ground pin of the connector P5W DH DELUXE P5W DH DELUXE Fan co...

Page 67: ...l two VGA cards we recommend that you plug the rear chassis fan cable to the motherboard connector labeled PWR_FAN1 or PWR_FAN2 for better thermal environment Suggestions for installing the chassis fan If you install a fan at the back of the chassis plug the fan cable to PWR_FAN2 or PWR_FAN1 If you install a fan on the side of the chassis plug the fan cable to CHA_FAN1 If you install a fan in fron...

Page 68: ... Volts 5 Volts 3 Volts 12 Volts Ground Ground Ground PSON Ground 5 Volts 12 Volts 3 Volts 5 Volts Ground 12V DC GND 12V DC GND Important notes on motherboard power requirements For a fully configured system we recommend that you use a power supply unit PSU that complies with ATX 12 V Specification 2 0 or later version and provides a minimum power of 400 W Do not forget to connect the 4 pin EATX12 ...

Page 69: ... THERMALTAKE HPC 420 302 DF 400 AUSU S 30EP 300 Bestec ATX0400D5W 400 Silverstone SST ST56ZF 560 Enermax Eg701AX VE 600 Power Supply Unit reference vendors list Loading Heavy Normal Light CPU Extreme Edition 965 Prescott 672 Conroe E6700 DDR2 800 1G 4 1G 2 512M 2 VGA ATI 1900XTX 2 NVIDIA 6800GTX 1 NVIDIA 6600 1 HDD IDE 2 IDE 1 IDE 1 SATA 5 SATA 3 SATA 2 CD ROM 2 2 1 USB 7 6 4 PCI E 1 1 1 PCI 2 2 1...

Page 70: ... warning speaker 4 pin SPEAKER This 4 pin connector is for the chassis mounted system warning speaker The speaker allows you to hear system beeps and warnings ATX power button soft off button 2 pin PWRSW This connector is for the system power button Pressing the power button turns the system on or puts the system in sleep or soft off mode depending on the BIOS settings Pressing the power switch fo...

Page 71: ...t the front panel cables to the ASUS Q Connector Refer to the labels on the Q Connector to know the detailed pin definitions then match them to the respective front panel cable labels 2 Install the ASUS Q Connector to the system panel connector making sure the orientation matches the labels on the motherboard 3 The front panel functions are now enabled The figure shows the Q Connector properly ins...

Page 72: ... the optional fan cables to the NB_FAN and or PWR_FAN connector on the motherboard Make sure the optional fan is installed correctly to prevent damage to the fan and motherboard components Do not tilt the fan Do not install the fan with its rear side facing you Install the optional fan only if you are using a passive cooler or a water cooler Installing the optional fan with an active CPU cooler wi...

Page 73: ...3 Powering up This chapter describes the power up sequence the vocal POST messages and ways of shutting down the system ...

Page 74: ...ASUS P5W DH Deluxe Chapter summary 3 3 1 Starting up for the first time 3 1 3 2 Turning off the computer 3 2 ...

Page 75: ...ds or if it has a power standby feature the monitor LED may light up or switch between orange and green after the system LED turns on The system then runs the power on self tests or POST While the tests are running the BIOS beeps see BIOS beep codes table below or additional messages appear on the screen If you do not see anything within 30 seconds from the time you turned on the power the system ...

Page 76: ...or later version 1 Click the Start button then select Turn Off Computer 2 Click the Turn Off button to shut down the computer 3 The power supply should turn off after Windows shuts down 3 2 2 Using the dual function power switch While the system is ON pressing the power switch for less than four seconds puts the system to sleep mode or to soft off mode depending on the BIOS setting Pressing the po...

Page 77: ...4 BIOS setup This chapter tells how to change the system settings through the BIOS Setup menus Detailed descriptions of the BIOS parameters are also provided ...

Page 78: ... Deluxe Chapter summary 4 4 1 Managing and updating your BIOS 4 1 4 2 BIOS setup program 4 10 4 3 Main menu 4 13 4 4 Advanced menu 4 18 4 5 Power menu 4 32 4 6 Boot menu 4 38 4 7 Tools menu 4 43 4 8 Exit menu 4 46 ...

Page 79: ...re the BIOS in the future Copy the original motherboard BIOS using the ASUS Update or AFUDOS utilities Installing ASUS Update To install ASUS Update 1 Place the support CD in the optical drive The Drivers menu appears 2 Click the Utilities tab then click ASUS Update See page 5 3 for the Utilities screen menu 3 The ASUS Update utility is copied to your system 4 1 1 ASUS Update utility The ASUS Upda...

Page 80: ...rnet To update the BIOS through the Internet 1 Launch the ASUS Update utility from the Windows desktop by clicking Start Programs ASUS ASUSUpdate ASUSUpdate The ASUS Update main window appears 2 Select Update BIOS from the Internet option from the drop down menu then click Next Quit all Windows applications before you update the BIOS using this utility ...

Page 81: ... BIOS from a file option from the drop down menu then click Next 4 From the FTP site select the BIOS version that you wish to download Click Next 5 Follow the screen instructions to complete the update process The ASUS Update utility is capable of updating itself through the Internet Always update the utility to avail of all its features 3 Locate the BIOS file from the Open window then click Save ...

Page 82: ... from the menu then select Format A Format 3 1 2 Floppy Disk window appears e Windows XP users Select Create an MS DOS startup disk from the format options field then click Start Windows 2000 environment To create a set of boot disks for Windows 2000 a Insert a formatted high density 1 44 MB floppy disk into the drive b Insert the Windows 2000 CD to the optical drive c Click Start then select Run ...

Page 83: ...ress Enter 3 You can launch the EZ Flash 2 by two methods 1 Insert the floppy disk USB flash disk that contains the BIOS file to the floppy disk drive or the USB port Press Alt F2 during POST to display the following ASUSTek EZ Flash 2 BIOS ROM Utility B312 FLASH TYPE Winbond W39V080A 8Mb LPC BOARD P5W DH Deluxe VER 0014 0100 DATE 05 19 2006 Current ROM Update ROM BOARD Unknown VER Unknown DATE Un...

Page 84: ...as backup when the BIOS fails or gets corrupted during the updating process Copying the current BIOS To copy the current BIOS file using the AFUDOS utility Main file name Extension name 1 Copy the AFUDOS utility afudos exe from the motherboard support CD to the bootable floppy disk you created earlier 2 Boot the system in DOS mode then at the prompt type afudos o filename where the filename is any...

Page 85: ...file for the motherboard Save the BIOS file to a bootable floppy disk A afudos iP5WDH rom Write the BIOS filename on a piece of paper You need to type the exact BIOS filename at the DOS prompt A afudos iP5WDH rom AMI Firmware Update Utility Version 1 19 ASUS V2 07 03 11 24BB Copyright C 2002 American Megatrends Inc All rights reserved WARNING Do not turn off power during flash BIOS Reading file do...

Page 86: ...sk drive A afudos iP5WDH rom AMI Firmware Update Utility Version 1 19 ASUS V2 07 03 11 24BB Copyright C 2002 American Megatrends Inc All rights reserved WARNING Do not turn off power during flash BIOS Reading file done Reading flash done Advance Check Erasing flash done Writing flash done Verifying flash done Please restart your computer A ...

Page 87: ...sing this utility 4 Restart the system after the utility completes the updating process Only the USB flash disk with FAT 32 16 12 format and single partition can support ASUS CrashFree BIOS 3 The device size should be smaller than 8GB Flash time takes around one 1 minute DO NOT shut down or reset the system while updating the BIOS Doing so can cause system boot failure When found the utility reads...

Page 88: ...ram Press Del during the Power On Self Test POST to enter the Setup utility otherwise POST continues with its test routines If you wish to enter Setup after POST restart the system by pressing Ctrl Alt Del or by pressing the reset button on the system chassis You can also restart by turning the system off and then back on Do this last option only if the first two failed The Setup program is design...

Page 89: ...r changing the advanced power management APM configuration Boot For changing the system boot configuration Exit For selecting the exit options and loading default settings To select an item on the menu bar press the right or left arrow key on the keyboard until the desired item is highlighted 4 2 3 Navigation keys At the bottom right corner of a menu screen are the navigation keys for that particu...

Page 90: ...elect it then press Enter to display a list of options Refer to 4 2 7 Pop up window 4 2 7 Pop up window Select a menu item then press Enter to display a pop up window with the configuration options for that item 4 2 8 Scroll bar A scroll bar appears on the right side of a menu screen when there are items that do not fit on the screen Press the Up Down arrow keys or Page Up Page Down keys to displa...

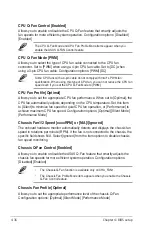
Page 91: ... 4 Language English Allows you to choose the BIOS language version from the options Configuration options English Français Deutsch Japanese Chinese GB Chinese BIG5 Refer to section 4 2 1 BIOS menu screen for information on the menu screen items and how to navigate through them System Time 06 22 54 System Date Fri 05 04 2006 Legacy Diskette A 1 44M 3 5 in Language English Primary IDE Master ST32041...

Page 92: ... or MO drive Configuration options Not Installed Auto CDROM ARMD LBA Large Mode Auto Enables or disables the LBA mode Setting to Auto enables the LBA mode if the device supports this mode and if the device was not previously formatted with LBA mode disabled Configuration options Disabled Auto Block Multi sector Transfer Auto Enables or disables data multi sectors transfers When set to Auto the dat...

Page 93: ... random workloads by allowing the drive to internally optimize the order of commands If you want to create a RAID 0 RAID 1 RAID 5 RAID 10 or the Intel Matrix Storage Technology configuration from the Serial ATA hard disk drives set this item to RAID If you want to use the Serial ATA hard disk drives as Parallel ATA physical storage devices keep the defaul setting Standard IDE If you want the Seria...

Page 94: ...u do not change the default setting for better OS compatibility In this setting you may use legacy OS on the Parallel ATA ports only if you do not install any Serial ATA device The P ATA S ATA and P ATA options are for advanced users only If you set to any of these options and encountered problems revert to the default setting S ATA Configuration options S ATA P ATA S ATA only P ATA only Combined ...

Page 95: ... Build Date 05 25 06 Processor Type Genuine Intel R CPU 3 80GHz Speed 3800 MHz Count 1 System Memory Size 512MB Appropriated 0MB Available 512MB IDE Detect Time Out 35 Selects the time out value for detecting ATA ATAPI devices Configuration options 0 5 10 15 20 25 30 35 The ALPE and ASP and its sub menu item appear only when the Configure SATA As item is set to AHCI ALPE and ASP Disabled Allows yo...

Page 96: ...ds the optimal settings for the system Overclock Profile loads overclocking profiles with optimal parameters for stability when overclocking AI NOS the ASUS AI Non delay Overclocking System feature intelligently determines the system load and automatically boost the performance for the most demanding tasks Take caution when changing the settings of the Advanced menu items Incorrect field values ca...

Page 97: ...ttings Available DRAM frequency options in various FSB settings Provided for overclocking purpose only Selecting a very high DRAM frequency may cause the system to become unstable If this happens revert to the default setting DRAM Frequency Auto Allows you to set the DDR operating frequency Configuration options Auto DDR2 300MHz DDR2 400MHz Performance Mode Auto Allows enhanced system performance ...

Page 98: ...e memory voltage Setting a very high memory voltage may damage the memory module s CPU VCore Voltage Auto Allows you to select the CPU VCore voltage Configuration options Auto 1 7000V 1 6875V 1 6750V 1 6625V 1 6500V 1 6375V 1 6250V 1 6125V 1 6000V 1 5875V 1 5750V 1 5625V 1 5500V 1 5375V 1 5250V 1 5125V 1 5000V 1 4875V 1 4750V 1 4625V 1 4500V 1 4375V 1 4250V 1 4125V 1 4000V 1 3875V 1 3750V 1 3625V ...

Page 99: ...able preset values Configuration options Overclock 5 fsb888 ddr2 667 Overclock 10 fsb960 ddr2 800 Overclock 15 fsb1200 ddr2 800 Overclock 20 fsb1280 ddr2 800 Overclock 30 fsb1333 ddr2 667 fsb1333 ddr2 834 The following item appears only when the AI Overclocking item is set to AI NOS N O S Mode Auto Sets the Non Delay Overclocking System mode Select either of the following configuration options Aut...

Page 100: ...tions Disabled Enabled POST Check LAN Cable Disabled LAN Cable Status Pair Status Length 1 2 Normal N A 3 6 Normal N A 4 5 Normal N A 7 8 Normal N A 1 2 Open 0 0M 3 6 Open 0 0M 4 5 Open 0 0M 7 8 Open 0 0M Check PCI Marvell LAN cable during POST Target Frequency Overclock 3 Allows you to set the maximum overclock percentage for the selected NOS Mode Configuration options Overclock 3 Overclock 5 Ove...

Page 101: ...isabled 2 USB ports 4 USB ports 6 USB ports 8 USB ports Legacy USB Support Auto Allows you to enable or disable support for legacy USB devices Setting to Auto allows the system to detect the presence of USB devices at startup If detected the USB controller legacy mode is enabled If no USB device is detected the legacy USB support is disabled Configuration options Disabled Enabled Auto USB 2 0 Cont...

Page 102: ...AI CPU Lock Free Auto Microcode Updation Enabled Max CPUID Value Limit Disabled Execute Disable Function Disabled CPU Internal Thermal Control Auto Virtualization Technology Enabled Sets the ratio between CPU Core Clock and the FSB Frequency NOTE If an invalid ratio is set in CMOS then actual and setpoint values may differ The AI CPU Lock Free item appears only when you install a CPU that supports...

Page 103: ...appears only when you installed an Intel Pentium 4 CPU that supports the Enhanced Intel SpeedStep Technology EIST Intel R SpeedStep Technology Disabled Allows you to use the Enhanced Intel SpeedStep Technology When set to Automatic you can adjust the system power settings in the operating system to use the EIST feature Set this item to Disabled if you do not want to use the EIST Configuration opti...

Page 104: ...ct When disabled you can manually set the DRAM timing parameters through the DRAM sub items The following sub items appear when this item is Disabled Configuration options Disabled Enabled DRAM CAS Latency 5 Clocks Controls the latency between the SDRAM read command and the time the data actually becomes available Configuration options 6 Clocks 5 Clocks 4 Clocks 3 Clocks DRAM RAS Precharge 4 Clock...

Page 105: ...I PCI Express PEG Buffer Length Auto Sets the length of the PCI Express graphics card buffer Configuration options Auto Long Short Link Latency Auto Sets the PCI Express graphics card link latency Configuration options Auto Slow Normal PEG Root Control Auto Allows you to enable disable or set to automatic the PCI Express graphics card root control Configuration options Auto Disabled Enabled PEG Li...

Page 106: ...PCI Express Gigabit LAN 1 controller Configuration options Disabled Enabled OnBoard PCIE GbE LAN_2 Enabled Allows you to enable or disable the onboard PCI Express Gigabit LAN 2 controller Configuration options Disabled Enabled LAN Option ROM Disabled This item allows you to enable or disable the option ROM in the onboard LAN controller This item appears only when the Onboard PCIE Gbe LAN item is s...

Page 107: ...oller Configuration options Raid Basic AHCI JMicron SATA RAID BOOTROM Enabled Allows you to enable or disable the JMicron Serial ATA RAID boot ROM Configuration options Disabled Enabled Setting the above item to Disabled may cause adverse effects We strongly recommend that you keep the default setting Enabled Serial Port1 Address 3F8 IRQ4 Allows you to select the Serial Port1 base address Configur...

Page 108: ...lay operating system the operating system configures the Plug and Play devices not required for boot Configuration options No Yes PCI Latency Timer 64 Allows you to select the value in units of PCI clocks for the PCI device latency timer register Configuration options 32 64 96 128 160 192 224 248 Allocate IRQ to PCI VGA Yes When set to Yes BIOS assigns an IRQ to PCI VGA card if the card requests f...

Page 109: ...ces Configuration options PCI Device Reserved 4 4 8 DH Feature page EZ Backup RAID Mode Change Disabled Options Enabled Disabled EZ Backup RAID Mode Change Disabled Allows you to enable or disable RAID mode change for the EZ Backup feature For detailed information about building an EZ Backup RAID set see section 5 4 4 Silicon Image RAID configuration Configuration options Disabled Enabled ...

Page 110: ... whether to invoke VGA BIOS POST on S3 STR resume Configuration options No Yes 4 5 3 ACPI 2 0 Support No Allows you to add more tables for Advanced Configuration and Power Interface ACPI 2 0 specifications Configuration options No Yes 4 5 4 ACPI APIC Support Enabled Allows you to enable or disable the Advanced Configuration and Power Interface ACPI support in the Advanced Programmable Interrupt Co...

Page 111: ...n set to Power On the system goes on after an AC power loss When set to Last State the system goes into either off or on state whatever the system state was before the AC power loss Configuration options Power Off Power On Last State Power On By RTC Alarm Disabled Allows you to enable or disable RTC to generate a wake event Configuration options Disabled Enabled The succeeding items appear when th...

Page 112: ...Disabled When set to Enabled this parameter allows you to turn on the system through a PCI LAN or modem card This feature requires an ATX power supply that provides at least 1A on the 5VSB lead Configuration options Disabled Enabled Power On By PCIE Devices Disabled When set to Enabled this parameter allows you to turn on the system through a PCI Express device Configuration options Disabled Enabl...

Page 113: ...Voltage 12 144V Scroll down to display more items AI Quiet Enabled Allows you to enable or disable the ASUS AI Quiet feature ASUS AI Quiet optimizes system performance by automatically adjusting the CPU fan speed according to the system loading Configuration options Disabled Enabled CPU Temperature xxxºC xxxºF MB Temperature xxxºC xxxºF The onboard hardware monitor automatically detects and displa...

Page 114: ...tically adjusts depending on the CPU temperature Set this item to Silent to minimize fan speed for quiet CPU fan operation or Performance to achieve maximum CPU fan speed Configuration options Optimal Silent Mode Performance Mode Chassis Fan1 2 Speed xxxxRPM or N A Ignored The onboard hardware monitor automatically detects and displays the chassis fan speed in rotations per minute RPM If the fan i...

Page 115: ...g PWR Q Fan Control Enabled Allows you to enable or disable the ASUS Q Fan feature that smartly adjusts the power fan speeds for more efficient system operation Configuration options Disabled Enabled PWR Fan Profile Optimal Allows you to set the appropriate performance level of the power Q Fan Configuration options Optimal Silent Mode Performance Mode VCORE Voltage 3 3V Voltage 5V Voltage 12V Volt...

Page 116: ...able devices The number of device items that appears on the screen depends on the number of devices installed in the system Configuration options xxxxx Drive Disabled Boot Device Priority 1st Boot Device 1st FLOPPY DRIVE 2nd Boot Device PM ST330620A 3rd Boot Device ATAPI CD ROM Specifies the Boot Device Priority sequence A virtual floppy disk drive Floppy Drive B may appear when you set the CD ROM...

Page 117: ... from available Hard Drives 4 6 3 Boot Settings Configuration Boot Settings Configuration Quick Boot Enabled Full Screen Logo Enabled AddOn ROM Display Mode Force BIOS Bootup Num Lock On PS 2 Mouse Support Auto Wait For F1 If Error Enabled Hit DEL Message Display Enabled Interrupt 19 Capture Disabled Allows BIOS to skip certain tests while booting This will decrease the time needed to boot the sys...

Page 118: ...k Configuration options Off On PS 2 Mouse Support Auto Allows you to enable or disable support for PS 2 mouse Configuration options Disabled Enabled Auto Wait for F1 If Error Enabled When set to Enabled the system waits for the F1 key to be pressed when error occurs Configuration options Disabled Enabled Hit DEL Message Display Enabled When set to Enabled the system displays the message Press DEL ...

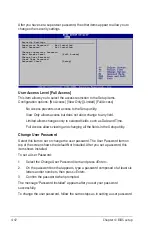
Page 119: ...ter you set a password this item shows Installed To set a Supervisor Password 1 Select the Change Supervisor Password item then press Enter 2 From the password box type a password composed of at least six letters and or numbers then press Enter 3 Confirm the password when prompted The message Password Installed appears after you successfully set your password To change the supervisor password foll...

Page 120: ...assword Select this item to set or change the user password The User Password item on top of the screen shows the default Not Installed After you set a password this item shows Installed To set a User Password 1 Select the Change User Password item and press Enter 2 On the password box that appears type a password composed of at least six letters and or numbers then press Enter 3 Confirm the passw...

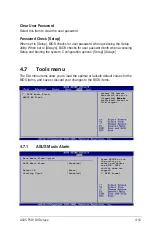
Page 121: ... Always ASUS Music Alarm HASUS EZ Flash 4 7 Tools menu The Exit menu items allow you to load the optimal or failsafe default values for the BIOS items and save or discard your changes to the BIOS items Onboard IDE Operate Mode should be set to Compatible Mode to enable Music Alarm for Intel chipset Asus Music Alarm Option ASUS Music Alarm Disabled Detect CD Enter Starting Track Disabled Press ENTE...

Page 122: ...b to select the field then use or to change the value Audio CD Device Primary IDE Slave Allows you to select the connection configuration of the optical storage device from which the alarm music will play from Configuration options Primary IDE Master Primary IDE Slave Detect CD Press Enter to search the CD track number Starting Track Allows you to choose the starting track from the CD from which y...

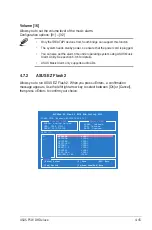
Page 123: ...ts audio CDs 4 7 2 ASUS EZ Flash 2 Allows you to run ASUS EZ Flash 2 When you press Enter a confirmation message appears Use the left right arrow key to select between Ok or Cancel then press Enter to confirm your choice ASUSTek EZ Flash 2 BIOS ROM Utility B312 FLASH TYPE Winbond W39V080A 8Mb LPC BOARD P5W DH Deluxe VER 0014 0100 DATE 05 19 2006 Current ROM Update ROM BOARD Unknown VER Unknown DAT...

Page 124: ...e values to the non volatile RAM Exit Save Changes Once you are finished making your selections choose this option from the Exit menu to ensure the values you selected are saved to the CMOS RAM An onboard backup battery sustains the CMOS RAM so it stays on even when the computer is turned off When you select this option a confirmation window appears Select OK to save the changes and exit If you at...

Page 125: ...5 Software support This chapter describes the contents of the support CD that comes with the motherboard package ...

Page 126: ...ASUS P5W DH Deluxe Chapter summary 5 5 1 Installing an operating system 5 1 5 2 Support CD information 5 1 5 3 Software information 5 10 5 4 RAID configurations 5 29 5 5 Creating a RAID driver disk 5 64 ...

Page 127: ...abled in your computer Motherboard settings and hardware options vary Use the setup procedures presented in this chapter for reference only Refer to your OS documentation for detailed information Make sure that you install Windows 2000 Service Pack 4 or the Windows XP Service Pack1 or later versions before installing the drivers for better compatibility and system stability If Autorun is NOT enabl...

Page 128: ...vides the method for configuring the chipset components You can install this utility using three different modes interactive silent or unattended preload Installing the driver in interactive mode requires user input during installation User input is not required when installing the driver in silent or unattended preload modes Refer to the online help or readme file that came with the utility for d...

Page 129: ...pplication that diagnoses and reports LAN cable faults and shorts using the Time Domain Reflectometry TDR technology WiFi AP Solo Installs the WiFi AP Solo utility which allows a new level of versitility for your PC enabling it to create a complete wireless home network in either AP or wirelesss client mode ASUS DH Remote Installs the utility for the ASUS DH Remote a handy remote controller that l...

Page 130: ... mirror your data instantaneously EZ Backup leverages the Serial ATA 2 3 0 1 5 Gb s technology to deliver handy plug and play RAID without requiring any configuration or setup Choose from either the default RAID 1 configuration or RAID 0 setting See section 5 4 4 Silicon Image RAID configuration for more information ADOBE Acrobat Reader The Adobe Acrobat Reader V7 0 is for opening viewing and prin...

Page 131: ...ASUS P5W DH Deluxe 5 Click to view the previous screen ASUS Screen Saver Bring life to your idle screen by installing the ASUS screen saver ...

Page 132: ...isks for Intel ICH7R and JMicron software RAID Intel ICH7R 32 bit RAID Driver Disk Intel ICH7R 64 bit RAID Driver Disk Allows you to create an Intel ICH7R RAID driver disk for a 32 64 bit system Make JMicron JMB36X 32 64 bit RAID Driver Allows you to create a JMicron JMB363 RAID driver disk for a 32 64 bit system ...

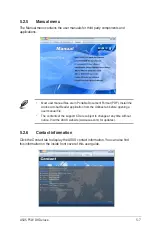
Page 133: ...l the Adobe Acrobat Reader application from the Utilities tab before opening a user manual file The contents of the support CD are subject to change at any time without notice Visit the ASUS website www asus com for updates 5 2 6 Contact information Click the Contact tab to display the ASUS contact information You can also find this information on the inside front cover of this user guide ...

Page 134: ...hical format 5 2 7 Other information The icons on the top right corner of the screen provide additional information on the motherboard and the contents of the support CD Click an icon to display the specified information Motherboard Info Displays the general specifications of the motherboard ...

Page 135: ...W DH Deluxe 5 Technical Support Form Displays the ASUS Technical Support Request Form that you have to fill out when requesting technical support Filelist Displays the contents of the support CD in text format ...

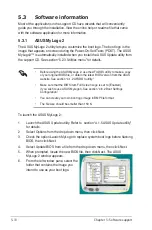
Page 136: ...ate utility for details 2 Select Options from the drop down menu then click Next 3 Check the option Launch MyLogo to replace system boot logo before flashing BIOS then click Next 4 Select Update BIOS from a file from the drop down menu then click Next 5 When prompted locate the new BIOS file then click Next The ASUS MyLogo 2 window appears 6 From the left window pane select the folder that contain...

Page 137: ...OS to load the new boot logo 10 After flashing the BIOS restart the computer to display the new boot logo during POST 8 Adjust the boot image to your desired size by selecting a value on the Ratio box 7 When the logo images appear on the right window pane select an image to enlarge by clicking on it ...

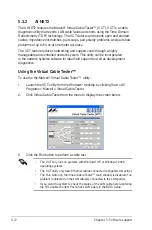
Page 138: ...d in the network systems sofware for ideal field support as well as development diagnostics Using the Virtual Cable Tester To use the the Marvell Virtual Cable Tester utility 1 Launch the VCT utility from the Windows desktop by clicking Start All Programs Marvell Virtual Cable Tester 2 Click Virtual Cable Tester from the menu to display the screen below The VCT only runs on systems with Windows XP...

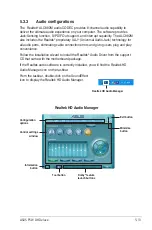
Page 139: ...able connection errors and giving users plug and play convenience Follow the installation wizard to install the Realtek Audio Driver from the support CD that came with the motherboard package If the Realtek audio software is correctly installed you will find the Realtek HD Audio Manager icon on the taskbar From the taskbar double click on the SoundEffect icon to display the Realtek HD Audio Manage...

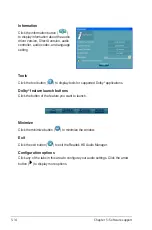
Page 140: ... the tool button to display tools for supported Dolby applications Dolby feature launch buttons Click the button of the feature you want to launch Minimize Click the minimize button to minimize the window Exit Click the exit button to exit the Realtek HD Audio Manager Configuration options Click any of the tabs in this area to configure your audio settings Click the arrow button to display more op...

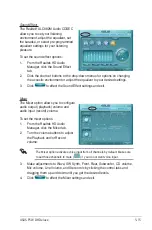
Page 141: ...effect the Sound Effect settings and exit Mixer The Mixer option allows you to configure audio output playback volume and audio input record volume To set the mixer options 1 From the Realtek HD Audio Manager click the Mixer tab 2 Turn the volume buttons to adjust the Playback and or Record volume The Mixer option activates voice input from all channels by default Make sure to set those channels t...

Page 142: ...tering a numeric value in the boxes or clicking the up down arrow 4 Click to test your settings 5 Click to effect the Bass Management settings and exit Audio I O The Audio I O option allows you configure your input output settings To set the Audio I O options 1 From the Realtek HD Audio Manager click the Audio I O tab 2 Click the drop down menu to select the channel configuration 3 The control set...

Page 143: ... noise when recording 3 Click the Acoustic Echo Cancellation option button to reduce the echo from the front speakers when recording 4 Click to effect the Microphone settings and exit 3D Audio Demo The 3D Audio Demo option gives you a demonstration of the 3D audio feature To start the 3D Audio Demo 1 From the Realtek HD Audio Manager click the 3D Audio Demo tab 2 Click the option buttons to change...

Page 144: ...ual Speaker and Dolby Digital Live Dolby Headphone Allows you to wear any pair of headphones and listen to music with the dramatic surround effects of a 5 1 channel audio configuration Dolby Pro Logic IIx expands any stereo audio or 5 1 channel audio for a 6 1 or 7 1 channel playback creating a seamless natural surround soundfield that immerses you in the entertainment experience Dolby Virtual Spe...

Page 145: ...s through the AC 3 encoder 1 2 The AC 3 encoder converts the sound into Dolby Digital streams Realtek ALC882M CODEC 3 The audio CODEC processes the streams then passes it to an AC 3 decoder through the S PDIF out port 4 The AC 3 decoder processes the streams then plays them back on a multi channel speaker system To enable the Dolby Digital Live 1 Connect an AC 3 decoder to the coaxial optical S PD...

Page 146: ...tup exe file from the ASUS PC Probe II folder Double click the setup exe file to start installation 2 Click the Utilities tab then click ASUS PC Probe II 3 Follow the screen instructions to complete installation Launching PC Probe II You can launch the PC Probe II right after installation or anytime from the Windows desktop To launch the PC Probe II from the Windows desktop click Start All Program...

Page 147: ...ge window Shows Hides the Preference section Minimizes the application Closes the application Sensor alert When a system sensor detects a problem the main window right handle turns red as the illustrations below show When displayed the monitor panel for that sensor also turns red Refer to the Monitor panels section for details Preferences You can customize the application using the Preference sect...

Page 148: ...desktop click the arrow down button of the Scheme options then select another position from the list box Click OK when finished Moving the monitor panels All monitor panels move together using a magnetic effect If you want to detach a monitor panel from the group click the horseshoe magnet icon You can now move or reposition the panel independently Adjusting the sensor threshold value You can adju...

Page 149: ...displays various Windows management information Click an item from the left panel to display on the right panel Click the plus sign before WMI Information to display the available information You can enlarge or reduce the browser size by dragging the bottom right corner of the browser DMI browser Click to display the DMI Desktop Management Interface browser This browser displays various desktop an...

Page 150: ...nd memory usage Click to display the Usage browser CPU usage The CPU tab displays real time CPU usage in line graph representation If the CPU has an enabled Hyper Threading two separate line graphs display the operation of the two logical processors Hard disk drive space usage The Hard Disk tab displays the used and available hard disk drive space The left panel of the tab lists all logical drives...

Page 151: ...ust the sensor threshold values The Config window has two tabs Sensor Threshold and Preference The Sensor Threshold tab enables you to activate the sensors or to adjust the sensor threshold values The Preference tab allows you to customize sensor alerts or change the temperature scale Loads the default threshold values for each sensor Applies your changes Cancels or ignores your changes Loads your...

Page 152: ...outhbridge support this feature Hardware setup To set up the hardware 1 Connect the analog audio cable from the optical drive to the 4 pin CD In connector labeled CD on the motherboard See section 2 7 2 Internal connectors for the connector location 2 Connect speakers or a headphone to the Line Out lime colored port on the front or rear panel for audio output You may also connect speakers or a hea...

Page 153: ...section shows the drive letter of the chosen optical drive and the starting track number to use as music alarm Minimize button Exit button Options section shows playing options 5 Click the arrow next to Time for Next Alarm in the Alarm information section The Alarm Time Setting panel appears Set the days and time of the alarm or enable disable the Music Alarm feature When done click OK 6 Click the...

Page 154: ...Use the Up or Down arrow key to increase or decrease the volume Turning off the music alarm To turn off the music alarm Press any key to stop playing the CD and turn off the system While the music alarm is playing the system wake up features LAN keyboard mouse PCI PCIE device modem are deactivated If the system loses connection or if it does not detect any optical drive or audio CD the ASUS Music ...

Page 155: ...or this setup RAID 1 Data mirroring copies and maintains an identical image of data from one drive to a second drive If one drive fails the disk array management software directs all applications to the surviving drive as it contains a complete copy of the data in the other drive This RAID configuration provides data protection and increases fault tolerance to the entire system Use two new drives ...

Page 156: ...ID driver disk for details Intel Matrix Storage The Intel Matrix Storage technology supported by the ICH7R chip allows you to create a RAID 0 RAID 1 RAID 5 and RAID 10 function to improve both system performance and data safety You can also combine two RAID sets to get higher performance capacity or fault tolerance provided by the difference RAID function For example RAID 0 and RAID 1 set can be c...

Page 157: ...M v5 0 0 1032 ICH7R wRAID5 Copyright C 2003 05 Intel Corporation All Rights Reserved MAIN MENU 1 Create RAID Volume 2 Delete RAID Volume 3 Reset Disks to Non RAID 4 Exit DISK VOLUME INFORMATION RAID Volumes None defined Physical Disks Port Drive Model Serial Size Type Status Vol ID 0 XXXXXXXXXXX XXXXXXXX XX XXGB Non RAID Disk 1 XXXXXXXXXXX XXXXXXXX XX XXGB Non RAID Disk 2 XXXXXXXXXXX XXXXXXXX XX X...

Page 158: ...NFORMATION Enter a string between 1 and 16 characters in length that can be used to uniquely identify the RAID volume This name is case sensitive and cannot contain special characters Change TAB Next ESC Previous Menu Enter Select Name RAID Level Disks Strip Size Capacity Volume0 RAID0 Stripe Select Disks 128KB 0 0 GB Create Volume SELECT DISKS Previous Next SPACE Selects ENTER Selection Complete ...

Page 159: ...ate this volume Y N 9 Press Y to create the RAID volume and return to the main menu or N to go back to the Create Volume menu 7 Key in the RAID volume capacity that you want then press Enter The default value indicates the maximum allowed capacity 8 Press Enter when the Create Volume item is highlighted This warning message appears TIP We recommend a lower stripe size for server systems and a high...

Page 160: ...lume item is highlighted This warning message appears Intel R Matrix Storage Manager Option ROM v5 0 0 1032 ICH7R wRAID5 Copyright C 2003 05 Intel Corporation All Rights Reserved CREATE ARRAY MENU DISK VOLUME INFORMATION Enter a string between 1 and 16 characters in length that can be used to uniquely identify the RAID volume This name is case sensitive and cannot contain special characters Change...

Page 161: ...e Capacity Volume5 RAID5 Parity Select Disks 64KB 0 0 GB Create Volume Change TAB Next ESC Previous Menu Enter Select 2 Enter a name for the RAID 5 set then press Enter 3 When the RAID Level item is highlighted press the up down arrow key to select RAID 5 Parity then press Enter 4 The Disks item is highlighted press Enter to select the hard disk drives to configure as RAID The following pop up scr...

Page 162: ...tripe size is 64 KB WARNING ALL DATA ON SELECTED DISKS WILL BE LOST Are you sure you want to create this volume Y N 9 Press Y to create the RAID volume and return to the main menu or N to go back to the Create Volume menu TIP We recommend a lower stripe size for server systems and a higher stripe size for multimedia computer systems used mainly for audio and video editing 7 Key in the RAID volume ...

Page 163: ... Copyright C 2003 05 Intel Corporation All Rights Reserved DELETE VOLUME MENU Name Level Drives Capacity Status Bootable Volume0 RAIDX xxxxx X XXX XGB Normal Yes HELP Deleting a volume will destroy the volume data on the drive s and cause any member disks to become available as non RAID disks WARNING EXISTING DATA WITHIN THIS VOLUME WILL BE LOST AND NON RECOVERABLE Select ESC Previous Menu Del Del...

Page 164: ...RAID then press Enter to display this screen 2 Use the up down arrow key to highlight the RAID set drive you want to reset then press Space to select 3 Press Enter to reset the RAID set drive A confirmation message appears 4 Press Y to reset the drive or press N to return to the utility main menu RESET RAID DATA Resetting RAID data will remove internal RAID structures from the selected RAID disks ...

Page 165: ...s the drive will revert back to a Non RAID disk RESET RAID DATA WARNING Resetting a disk causes all data on the disk to be lost Port Drive Model Serial Size Status 0 STXXXXXXXXX XXXXXXXX XX 0GB Member Disk 1 STXXXXXXXXX XXXXXXXX XX 0GB Member Disk Select the disk that should be reset Previous Next Space Selects Enter Selection Complete 2 Use the up or down arrow keys to highlight the RAID set driv...

Page 166: ...4 6 Onboard Devices Configuration for details Select Screen Select Item Change Option F1 General Help F10 Save and Exit ESC Exit v02 58 C Copyright 1985 2005 American Megatrends Inc BIOS SETUP UTILITY Advanced Configure Win627EHF Super IO Chipset HD Audio Controller Enabled Front Panel Support Type HD Audio Onboard 1394 Controller Enabled Onboard PCIE GbE LAN_1 Enabled Onboard PCIE GbE LAN_2 Enabl...

Page 167: ...tp www jmicron com HDD0 HDS722516VLSA80 164 GB Non RAID HDD1 HDS722516DLA380 164 GB Non RAID Press Ctrl J to enter RAID Setup Utility Main Menu Create RAID Disk Drive Delete RAID Disk Drive Revert HDD to Non RAID Repair Mirror Conflict Save and Exit Setup Exit Without Saving JMicron Technology Corp PCI to SATA II IDE RAID Controller BIOS v0 97 TAB Switch Window Select Item ENTER Action ESC Exit Ha...

Page 168: ...sign before it 4 Key in the RAID volume capacity Use the up down arrow to choose the block size The default value indicates the maximum allowed capacity Create New RAID Name JRAID Level 0 Stripe Disks Select Disk Block 128 KB Size 319 GB Confirm Creation Create New RAID Name JRAID Level 1 Mirror Disks Select Disk Block N A Size 159 GB Confirm Creation Hard Disk Drive List Model Name Capacity Type ...

Page 169: ...he RAID set you created RAID Disk Drive List Model Name RAID Level Capacity Status Members HDDx RDD0 JRAID 0 Stripe XXX GB Normal 01 JMicron Technology Corp PCI to SATA II IDE RAID Controller BIOS v0 97 Hard Disk Drive List Model Name Capacity Type Status HDD0 HDS722516VLSA80 164 GB Non RAID HDD1 HDS722516DLA380 164 GB Non RAID RAID Disk Drive List Create New RAID Name JRAID Level 0 Stripe Disks S...

Page 170: ... RAID Disk Drive Revert HDD to Non RAID Repair Mirror Conflict Save and Exit Setup Exit Without Saving JMicron Technology Corp PCI to SATA II IDE RAID Controller BIOS v0 97 Hard Disk Drive List Model Name Capacity Type Status HDD0 HDS722516VLSA80 164 GB RAID Inside HDD1 HDS722516DLA380 164 GB RAID Inside RAID Disk Drive List Model Name RAID Level Capacity Status Members HDDx RDD0 JRAID 0 Stripe XX...

Page 171: ... Disk Drive Delete RAID Disk Drive Revert HDD to Non RAID Repair Mirror Conflict Save and Exit Setup Exit Without Saving Pressing Y deletes all the data in the HDD An HDD that has been previously configured as part of another RAID set in another platform is called a broken RAID HDD When you install a broken RAID HDD you cannot select this HDD when configuring a RAID set through the JMB363 utility ...

Page 172: ... a sign before it 3 Using the TAB move to the RAID Disk Drive List menu and highlight the RAID set that you want to rebuild Press Del to begin rebuilding the Mirror configuration A status bar at the bottom of the screen shows the progress of the rebuilding Main Menu Create RAID Disk Drive Delete RAID Disk Drive Revert HDD to Non RAID Repair Mirror Conflict Save and Exit Setup Exit Without Saving J...

Page 173: ...e finished highlight Save Exit Setup using the up down arrow key then press Enter to save the current RAID configuration and exit the JMB363 RAID BOS utility A dialogue box appears to confirm the action Press Y to confirm otherwise press N to return to the JMB RAID BIOS menu ...

Page 174: ...ne drive fails the Safe volume is in a vulnerable state because its mirrored hard drive is inaccessible When the offline drive comes back online the firmware begins a rebuild process immediately to restore data redundancy A message box appears in the ASUS EZ Backup Manager graphical user interface GUI to notify you that a rebuild is in progress Although the volume remains available during the rebu...

Page 175: ...cy power connector from the power supply unit to the rear power connector on each drive Using both the SATA power cable and 4 pin power connector simultaneously will cause damage to the system 3 Install the operating system 4 Install the ASUS EZ Backup Manager utility from the support CD that came with the motherboard package 5 Reboot the computer 3 BIG is storage policy in which multiple physical...

Page 176: ...efault RAID mode which is RAID 1 2 Prepare two Serial ATA hard disk drives HDDs Plug one end of the Serial ATA cable to the rear interface on each drive and plug the other end of the cable to the motherboard connectors labeled EZ_RAID1 and EZ_RAID2 colored light orange Refer to section 2 7 2 Internal connectors for the location of the connectors 3 Connect a Serial ATA power cable or a 4 pin legacy...

Page 177: ...a on the hard disk drives Backup existing data before changing RAID modes 4 Enter the BIOS setup during POST Go to Advanced menu DH Feature page Set the EZ Backup RAID Mode Change item to Enabled Make sure you have made the above BIOS setting If you changed the jumper settings but did not enable the EZ Backup RAID Mode Change the system applies the default RAID mode which is RAID 1 5 Press F10 to ...

Page 178: ...ckupManager Status window The ASUS EZ Backup Manager status window allows you to monitor the devices connected to the host computer Configure pop ups Serial number Drive status and information Capacity information Volume information Event log Specify firmware Refresh button Quit button When you create a RAID 10 set through a cross configuration you cannot use the EZ Backup Manager utility to view ...

Page 179: ...min To change this key in a new password then retype the new password Press OK to set Serial number Displays the serial number of the ASUS EZ Backup Manager Drive status and information Displays the current status and serial number of each drive member of the RAID set Below is a list of possible drive states 1 Normal 2 Rebuilding 3 Verifying 4 Unplugged 5 Needs rebuild 6 New drive 7 Wrong slot 8 U...

Page 180: ...utton to view the current firmware version or to update the firmware Configure pop ups Click this button to open a window that allows you to enable or disable pop up display and specify the number of seconds for the pop ups to remain on screen Edit menu The File menu allows you to configure pop ups view event logs and view update the current firmware ...

Page 181: ...ackup data on the drive Before partitioning volumes back up your data and delete any previously defined partition 3 Under Storage select Disk Management The Windows Disk Manager opens To partition volumes 1 Boot your computer and enter the Windows operating system 2 Right click My Computer on your desktop Select Manage from the pop up window ...

Page 182: ...you select the correct disk by checking the total disk capacity information 5 Right click the disk s unallocated space then select New Partition 4 Select the disk you want to partition The screen captures in this section are provided for your reference only The appearance of the screen and items in it may vary depending on the operating system you installed ...

Page 183: ... The Partition Wizard opens Click Next to start the partition process 7 Select the type of partition you want to create Click Next 8 Specify your desired partition size The default partition size is the entire volume Click Next ...

Page 184: ...ve path to the partition Click Next 11 The New Partition Wizard displays the file system settings Make sure the settings are correct Click Finish to create the partition otherwise click Back to make the necessary changes 10 Name and format the partition Click Next ...

Page 185: ... a working hard disk drive is removed then returned This function applies only to a RAID 1 SAFE set The following message pops up when a hard disk drive is unplugged To rebuild 1 Plug in the Serial ATA cable to the available EZ_RAID connector 2 Rebuilding starts The Box Status cell displays the rebuilding progress Note that the box is colored orange 3 When done the following message pops up Click ...

Page 186: ...5 60 Chapter 5 Software support 4 When done click Refresh to update the information If rebuilding is successful the status displays Normal and the box color changes to green ...

Page 187: ...e setup 1 Install one Serial ATA HDD on the motherboard connector labeled EZ_RAID1 2 Install three Serial HDDs on the motherboard connectors labled SATA1 SATA3 and SATA4 EZ Backup jumper setting and BIOS configuration For information on EZ Backup jumper setting and BIOS configuration see section 5 4 4 Silicon Image RAID configuration 1 After installing the Serial ATA hard disks set the jumper sett...

Page 188: ...AID volume This name is case sensitive and cannot contain special characters Name RAID Level Disks Strip Size Capacity Volume10 RAID10 RAID0 1 Select Disks 128KB XXX X GB Create Volume Change TAB Next ESC Previous Menu Enter Select 4 Enter a name for the RAID 10 set then press Enter 5 When the RAID Level item is highlighted press the up down arrow key to select RAID 10 RAID0 1 then press Enter 6 W...

Page 189: ... v5 1 2 1002 ICH7R wRAID5 Copyright C 2003 05 Intel Corporation All Rights Reserved 1 Create RAID Volume 2 Delete RAID Volume 3 Reset Disks to Non RAID 4 Exit DISK VOLUME INFORMATION RAID Volumes ID Name Level Strip Size Status Bootable 0 Volume0 RAID10 RAID0 1 XXKB XXX XX GB Normal Yes Physical Disks Port Drive Model Serial Size Type Status Vol ID 0 XXXXXXXXXXX XXXXXXXX XX XXGB Member Disk 0 1 Ex...

Page 190: ...river is required when installing Windows 2000 XP and later operating system on a hard disk drive that is included in a RAID set You do not need to create a RAID driver disk if you will create a Safe Big or Fast RAID set through the ASUS EZ Backup 5 5 1 Creating a RAID driver disk without entering the OS To create a RAID driver disk without entering the OS 1 Boot your computer 2 Press Del during P...

Page 191: ...hird party SCSI or RAID driver 2 Press F6 then insert the floppy disk with RAID driver into the floppy disk drive 3 When prompted to select the SCSI adapter to install make sure you select Intel R 82801GH GM SATA RAID Controller Desktop ICH7R DH and JMicron JMB363 4 Follow the succeeding screen instructions to complete the installation ...

Page 192: ...5 66 Chapter 5 Software support ...

Page 193: ...6 This chapter tells how to install ATI CrossFire graphics cards to avail of ATI s Multi Video Processing technology ATI CrossFire technology support ...

Page 194: ...ASUS P5W DH Deluxe Chapter summary 6 6 1 Overview 6 1 6 2 Installing CrossFire graphics cards 6 2 6 3 Software information 6 5 ...

Page 195: ... your system To uninstall other graphics card drivers 1 Close all current applications 2 Go to Control Panel Add Remove Programs 3 Select your current graphics card driver s 4 Select Add Remove 5 Restart your system Visit the ATI website or download the Radeon X850 Crossfire Edition User s Guide from the support CD for detailed hardware requirements and installation procedures The ATI CrossFire te...

Page 196: ...x16 orange slot Make sure that the card is properly seated on the slot 6 2 Installing CrossFire graphics cards Before ins talling a CrossFire system refer to the user guide that came with the ATI CrossFire Edition graphics card To install the graphics cards 1 Prepare one CrossFire Edition Master graphics card and one CrossFire ready Slave graphics card ...

Page 197: ...6 3 Insert the CrossFire ready Slave graphics card into the PCI Express x16 black slot Make sure that the card is properly seated on the slot 4 Connect an auxiliary power source from the power supply to the graphics cards ...

Page 198: ...nology support 6 Connect the other end of the external cable to the Slave graphics card 7 Connect the loose end to the corresponding port on your monitor 5 Connect one end of the external cable to the Master graphics card 7 6 ...

Page 199: ...it Home or Professional with Service Pack 2 SP2 Windows XP Professional 64 bit Edition 1 Turn on your system and log in with administrator rights 2 Windows auto detects the CrossFire graphics cards and displays the Found New Hardware Wizard window Click Cancel 3 Place the CrossFire installation CD in your optical drive and install drivers from the opening menu 4 Click Next to continue from the ins...

Page 200: ...ntrol Center The status windows indicates the progress of the installation 7 The Setup Complete window appears indicating that the driver files have been copied to your computer Click Yes to restart your computer now or No to restart later 8 Click Finish Select Express to install the HydraVision multi monitor and desktop management software as well as the ATI driver Select Custom to individually c...

Page 201: ... your graphic settings enable disable connected devices and change your desktop orientation Launching the Catalyst Control Center There are several ways to launch the Catalyst Control Center On the Windows task bar click Start ATI Catalyst Control Center Catalyst Control Center Double click the Catalyst Control Center desktop shortcut On the Windows task bar double click the Catalyst Control Cente...

Page 202: ...Center Dialog Box View The Catalyst Control Center provides two views Standard simple view with wizards for beginners Advance allows advanced users to access and configure the complete features of the software Set to Advance view to enable the CrossFire function ...

Page 203: ...ettings 3 In the CrossFire Settings dialog tick the box opposite Enable CrossFire 4 Click OK to effect the setting 2 3 4 Hotkeys Click the Hotkeys tab on the Catalyst Control Center to access the Hotkeys Manager which allows you to create key combinations as shortcuts for performing certain functions quickly ...

Page 204: ...trol Center to access the Profiles Manager which allows you to create customized environments for your desktop video and 3D applications Preferences Click the Preferences tab on the Catalyst Control Center to select a language restore defaults change skins or enable disable the System Tray icon ...

Page 205: ...ASUS P5W DH Deluxe 6 11 Help Click the Help tab on the Catalyst Control Center to access the online help system generate a Problem Report and get the Catalyst Control Center version information ...

Page 206: ...6 12 Chapter 6 ATI MVP technology support ...

Page 207: ...A CPU features The Appendix describes the CPU features and technologies that the motherboard supports ...

Page 208: ...ASUS P5W DH Deluxe Chapter summary A A 1 Intel EM64T A 1 A 2 Enhanced Intel SpeedStep Technology EIST A 1 A 3 Intel Hyper Threading Technology A 3 ...

Page 209: ...ww asus com support download if you need to update the BIOS file See Chapter 4 for details Visit www intel com for more information on the EM64T feature Visit www microsoft com for more information on Windows 64 bit OS Refer to the expansion card or add on device s documentation or visit the related website to verify if the card device supports a 64 bit system The motherboard comes with a BIOS fil...

Page 210: ... blank space on the desktop then select Properties from the pop up menu 6 When the Display Properties window appears click the Screen Saver tab 7 Click the Power button on the Monitor power section to open the Power Options Properties window 8 On the Power schemes section click then select any option except Home Office Desktop or Always On 9 Click Apply then click OK 10 Close the Display Propertie...

Page 211: ...ndows XP Service Pack 1 or later version is recommended Make sure to enable the Hyper Threading Technology item in BIOS before installing a supported operating system For more information on Hyper Threading Technology visit www intel com info hyperthreading Using the Hyper Threading Technology To use the Hyper Threading Technology 1 Install an Intel Pentium 4 CPU that supports Hyper Threading Tech...

Page 212: ...A Appendix CPU features ...

Reviews: