background image

ASUS CX200 Internet Camera

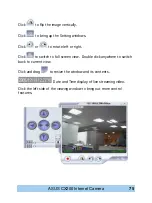
1. Show the current IP and iCAMView name.
2. Show number of user viewing and current zoom level.
3. Click and drag to resize this window.
4. Click to switch to full screen or double click anywhere on the video 

screen.
5. Bring up the Settings option.
6. Rotate the image left or right.
7. Flip the image vertically.
8. Click to record the current video onto your local PC. See below for 

recording options.
9. Show current FPS.
10. Click to bring out zoom, resolution, direction and auto P/T controls. 

See below.
11. Show the current date and time.

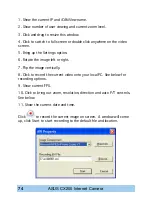
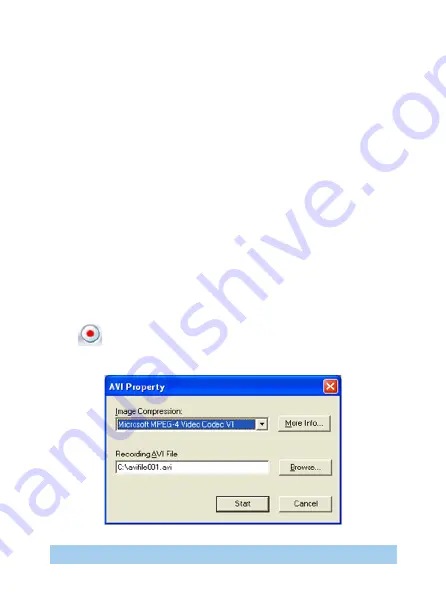
Click 

 to record the current image on screen.  A window will come 

up, click Start to start recording to the default file and location.

Summary of Contents for Mimic Internet Camera CX200

Page 1: ...ASUS CX200 Internet Camera E2864 CX200 Mimic CX200 Internet Camera User Manual Copyright 2006 ASUSTeK COMPUTER INC All Rights Reserved ...

Page 2: ...ion 2 Installation Procedure With PoE Injector 6 Chapter 3 Web Interface Section 1 Introduction 7 Section 2 Using the Web Interface 8 2 1 To View Video 9 2 2 Information 12 2 2 1 System Status 12 2 2 2 Current Connections 13 2 2 3 Event Log 14 2 3 Basic Settings 14 2 3 1 Camera Settings 14 2 3 2 Network 16 2 3 3 Account Settings 21 2 4 Advanced Settings 25 2 4 1 Event Notification 26 2 4 2 Motion ...

Page 3: ...y Program 50 2 1 Setup Wizard 50 2 2 Launch Mimic CX200 55 2 3 IP Configuration 56 2 3 1 IP Address 57 2 3 2 Advanced for password and HTTP configuration 58 2 4 Upgrade Firmware 60 2 5 About 60 2 6 Refresh 61 Chapter 6 MultiMonitor Section 1 Installating MultiMonitor 62 Section 2 Using MultiMonitor 62 2 1 Device 65 2 2 View 78 2 3 System 79 2 4 User 79 2 5 Help 81 2 6 Drag and Drop Feature 81 ...

Page 4: ...ASUS CX200 Internet Camera iv Appendix A Methods to Update ASUS Mimic CX200 Firmware 83 Appendix B IP Address Subnet and Gateway 84 Appendix C Glossary 87 ASUS Contact Information ...

Page 5: ...SUS Mimic CX200 features a Windows based software that allows the user to archive streaming video directly to the hard drive The same software also allows the user to monitor multiple cameras on one screen Chapter 1 Introduction Features LCD display Built in Web Server Built in Power over Ethernet PoE Built in CMOS Camera Extra Mini USB Port for USB PC Camera Support Pan Tilt and Infrared USB PC C...

Page 6: ...ing required for outdoor use Network Protocol HTTP TCP IP UDP SMTP PPPoE Dynamic DNS DNS Client SNTP BOOTP DHCP FTP SNMP Support USB PC Camera with VIMICRO ZC0301 Plus processor built in Resolution available 640x480 VGA 352x288 CIF 320x240 QVGA 176x144 QCIF 160x120 QQVGA Frame Rate Up to 15fps in 640x480 Up to 20fps in 320 x 240 Motion JPEG streaming video ...

Page 7: ...llance System Once ASUS Mimic CX200 is installed the user can check any of the connected PC cameras using a standard web browser The user can monitor and control these cameras simply by entering the IP address shown on the LCD into a Browser ASUS Mimic CX200 Network Diagram ...

Page 8: ...ick Installation Guide 3 Utility CD containing a Utility to configure IP address update the firmware etc b MultiMonitor to monitor multiple ASUS Mimic CX200 cameras c Time Server Time adjustment utility d Adobe Acrobat 5 0 Reader e ASUS Mimic CX200 User Manual f Camera Windows Driver 4 Power adaptor ASUS Mimic CX200 LCD displayed information ...

Page 9: ... ASUS CX200 Internet Camera ASUS Mimic CX200 Front and Back view ...

Page 10: ...cted Chapter 2 Hardware Installation The following details the hardware installation procedure for ASUS Mimic CX200 IP camera Section 1 Installation Procedure Without PoE Injector 1 Connect power and LAN cable into the PoE Data In port Next connect ASUS Mimic CX200 LAN cable to the PoE Data Out port 2 Wait a moment and the LCD will display the IP Address Subnet and Gateway Use a Browser to log int...

Page 11: ... Mimic CX200 is designed to work without having to install any software All the necessary functions are built into the unit 1 Once you have finished the hardware setup shown in Chapter 2 note down the IP address shown on the LCD 2 On a PC located in the same LAN open a Web Brower eg Internet Explorer Netscape Mozilla Firefox or Opera 3 Enter the IP Address as shown on the ASUS Mimic CX200 LCD disp...

Page 12: ...intend to point the camera outside Click Apply to save the configuration b Manually adjust the camera lens for best results ASUS Mimic CX200 Main Menu Section 2 Using the Web Interface The ASUS Mimic CX200 webpage main menu is divided into two sections The selection menu on the left and display menu on the right The selection menu consists of the following options 2 1 View Video 2 2 Information 2 ...

Page 13: ...connected to ASUS Mimic CX200 will be Camera A ActiveX can only function in Windows platform When using for the first time ActiveX plug in will setup automatically on the client s computer Click Install ActiveX Controls to install If this cannot be installed you will have to use Sun Java to view the video feed Using ActiveX Controls Once you click on camera A ActiveX the following window will appe...

Page 14: ...in the following format CMV2006071 0123058 avi CMV yyyy mm dd ttmmss avi To change the saved location and filename Click and the Save As window will pop up Choose an alternate location or filename To change Video Codec click Click Save to confirm changes Digital Zoom In Digital Zoom Out Rotate Left Rotate Right Flip the image vertically ...

Page 15: ...that area Click this to reduce the image resolution Click this to increase the image s resolution Click to digitally zoom in or out Click to rotate the image Flip the image vertically Using ActiveX Controls Once you click on camera A Sun Java the following window will appear ...

Page 16: ...plays all the information relating to ASUS Mimic CX200 i System Information This section shows general hardware information such as the Hardware and Firmware Version the serial number current local System Time the system name contact location and uptime ii System Information This section shows the network information The MAC Address is unique to each ASUS Mimic CX200 system ASUS Mimic CX200 System...

Page 17: ...ven disable the account of any errant viewer An administrator privilege will be required for this feature If you do not have Administrator s privilege the IP and Account details will be hidden Current Connections When logged in with Operator Permission Click Block IP to block or disable the account of any errant viewer To unblock the IP goto Basic Settings Account Settings Blocked IP List and dele...

Page 18: ...Type ASUS Mimic CX200 can log up to 2 000 events If you do not have Administrator privilege the User Name and IP Address will be hidden Example Camera A user connected from IP ASUS Mimic CX200 Event Log 2 3 Basic Settings The following option allows the user to customize their unit 2 3 1 Camera Settings 2 3 2 Network 2 3 3 Account Settings 2 3 1 Camera Settings Use this section to set up the USB c...

Page 19: ...20 240 d CIF 352 288 e VGA 640 480 Anti Flicker Choose between Indoors 50Hz 60Hz or Outdoors For best results when directing the camera to bright sources windows select Outdoors Maximum Number of Connections 1 30 Use this to limit the total number of users that can view this camera at the same time Location Enter a suitable location name for the camera ...

Page 20: ...a Position Use this option to right the image when ASUS Mimic CX200 is installed on the ceiling or wall Select either 0 degree upright 90 180 upside down or 270 degree Pan Control Use this function to reverse the Pan direction Tilt Control Use this function to reverse the Tilt controls if necessary If you do not choose the right frequency the image will flicker or lines will appear on the images A...

Page 21: ...ove see Appendix C IP address Subnet and Gateway Obtain an IP address This allows the user to choose either to set ASUS Mimic CX200 LAN IP address manually using DHCP default or using Bootp protocol Click Apply to confirm ASUS Mimic CX200 will reboot You MUST manually enter the NEW IP address in your Browser in order to open the Web Interface ii DNS Server IP Primary DNS Server IP This item sets A...

Page 22: ...termines the LAN port from which the webpage is accessible thru your Router By default the LAN port number is 80 If this port is changed say to 82 then http xxx xxx xxx xxx 82 where xxx xxx xxx xxx is iCAMView LAN IP address as shown on the LCD must be used in order to access ASUS Mimic CX200 web interface in LAN Communication to Camera Port Number This determines the LAN port from which the video...

Page 23: ...t Connection Type This sets ASUS Mimic CX200 communication speed By default it is set to Auto Sense ASUS Mimic CX200 will reboot if this setting is changed ASUS Mimic CX200 Ethernet Settings v Dynamic DNS ASUS Mimic CX200 Dynamic DNS Settings ...

Page 24: ...ervice Providers In general to register a Domain Name a Go to the DDNS provider website listed above b Register a new user account and password with the DDNS provider c Choose a Domain Name to point to your current Dynamic IP d Enter information obtained in b and c into ASUS Mimic CX200 DDNS fields Domain Name This is the Domain Name you have created from the above selected DDNS provider Login Nam...

Page 25: ...ing through a router The LCD will display the current WAN Public IP instead of the LAN IP address ASUS Mimic CX200 PPPoE setting When Connection should be made Disabled Default setting Connect always ASUS Mimic CX200 will automatically dial up and maintain continuous connection Login Name Enter the login name assigned by your ISP Login Password Enter the password assigned by your ISP 2 3 3 Account...

Page 26: ...e Assign a User Name Account The administrator can set up to 32 case sensitive character names Password Assign a password to the account The administrator can set up to 32 case sensitive passwords Permission This sets the access level to individual user accounts ...

Page 27: ...r can only view camera within the time specified in Permit Hours The user does not have write permission can only view Camera A B and read the Information section No Access This disables either of the above two permission levels given to a user An Administrator account must be set before setting up either an Operator or Viewer account IP Filter Use this feature to ensure that the user only login f...

Page 28: ...either Operator or Viewer the Administrator can set the time to which the camera can be viewed ASUS Mimic CX200 Permit Hours Configuration Click Configure to set the hours The Administrator can set up to 4 different Permit Hours in 24hr format Click Apply to save Click Close to exit without saving The Reset button only revert the fields to initial values prior to any changes being made If Apply ha...

Page 29: ...s in dotted decimal notation and click Add Block IP The blocked LAN IP address will be listed at the bottom Click Delete to remove it from the list 2 4 Advanced Settings This section allows the Administrator to set up some of the features available in the server 2 4 1 Event Notification 2 4 2 Motion Detection 2 4 3 Image Recording 2 4 4 Email FTP 2 4 5 System Settings 2 4 6 About ...

Page 30: ...otal of 8 email recipients can be assigned to receive notification ASUS Mimic CX200 Event Notification Page Send Email Select Yes to activate this feature Default is No Email Server A valid Email Server User name and password must be setup for this feature to work If this has not been setup click Edit and to go to Email FTP setup page see Section 2 4 4 Email function can only work using standard E...

Page 31: ...cation To add an email address to the recipient list click To remove click Only Email addresses that are listed in the Email Address Book can be added Events This section determines the events that the selected recipient s will receive by email There are three types of events Information Warning and Error Click Select to select the list of events the recipients will be notified By default all the ...

Page 32: ...28 ASUS CX200 Internet Camera ...

Page 33: ...n WITHOUT any picture attached For email notification with images the Administrator has to setup the Motion Detection page see Section 2 4 2 and Image Recording page see Section 2 4 3 ASUS Mimic CX200 will email the following notification depending on which event was selected Event Notification User Login Details Date Time Camera IP ...

Page 34: ...Camera Event Notification PPPoE Connect Successful with Public IP shown 2 4 2 Motion Detection This page allows the Administrator to set Motion Detection functions for the cameras i Camera A or Camera B Motion Detection page ...

Page 35: ... s Select either 0 5 1 2 3 4 or 5 seconds Stop sending after email s or image idle for second s ASUS Mimic CX200 will stop sending emails on the lower of the two conditions The Administrator can set between 1 3 5 7 and 10 seconds Emails can be set from 1 to 99999 pieces or 0 for stop sending email only when image idle occurred Schedule When the unit is set to On Schedule the Administrator can conf...

Page 36: ...strator can also determine to either have the system automatically assign the filenames for the pictures saved Or manually assign the filename Filename Specify a prefix filename for the motion detected JPG images The default prefix is image_ Loop from to This will determine the number of files in the sequence Once the last file number is reached it ll loop and replace the first file in the sequenc...

Page 37: ...tect Email Notification Email Server The Email server will be shown here If not click Edit to go to the Email FTP configuration page Click on Motion Detection to return here See Section 2 4 4 on Email FTP configuration Email Address Book The available Email addresses are listed here See Section 2 4 4 on how to add an Email address to the Address Book ...

Page 38: ...list click To remove a recipient from the list click To remove all the recipients from the list click Click Apply to confirm and save the settings 2 4 3 Image Recording Image recording allows the user to receive a string of JPG images to either their email account or FTP account The images will be sent over a predetermined interval i Camera A or Camera B Image Recording webpage ...

Page 39: ...minute s The Administrator can determine the interval between 1 to 99 minutes at which ASUS Mimic CX200 capture and send an image Send to FTP Server Send Email This is similar to the function available in Motion Detection page Please refer to section 2 4 2 above for details The image size received by email FTP from depends on the resolution set in Basic Settings Camera Settings Image Size Email of...

Page 40: ... folder Click Apply when done 2 4 4 E mail FTP This webpage sets up the necessary Email and FTP server information The Administrator will have to enter a valid Account Name and Password to the Email server and or FTP server These information has to be setup in order for Event Notification Motion Detection and Image Recording function to work Email FTP settings page ...

Page 41: ...ter the FTP login account name here Password Enter the account password Click Apply to save the above settings FTP settings ii Email Settings Email settings E mail Server The Administrator will have to enter the Email server address here Email function can only work using standard Email Server and not Web based Email Server such as yahoo com ...

Page 42: ...Account name and Password field below Account Name Enter the full account name example image asus com Password Enter the password for the above account name Click Apply to save the changes In most cases Sender s Email Address and Account Name field is the same iii Sending Test Mail Sending a test mail a Click Test Mail to check that the Email Setting has been correctly configured Saving configurat...

Page 43: ...email address b Click Yes to save configurations and proceed to the following window c Enter the Test mail Recipient email address and click Send d If the Test Mail is successful the Recipient will receive the following email message Confirmation email ...

Page 44: ...Entry Enter an Email address in the box provided and click Add Email Address The listed emails will be available for use in Event Notification Motion Detection and Image Recording webpage Up to 20 email addresses can be stored Click Delete to remove an Email address 2 4 5 System Settings This page allows the Administrator to set ASUS Mimic CX200 SNMP settings so it can be used by a NMS Network Man...

Page 45: ... 30 days Time Server Choose the nearest Time Server to your ASUS Mimic CX200 location The Administrator can choose from the list of a maximum of 30 Time Servers To add a new Time Server the Administrator must first make space by deleting existing Time Servers from the list Once this is done the Add dialog box will appear as below Click Back to return to the System Settings webpage ...

Page 46: ...S Mimic CX200 System Time The format is pre determined to yyyy mm dd hh mm ss in 24hr format Click Manual Adjust to save the changes ii System Restart Auto Restart setting Auto Restart System Every The Administrator can choose to restart ASUS Mimic CX200 at certain intervals choose between minutes and hours only Click Apply to save any changes Manual Restart Click Restart Now to restart the system...

Page 47: ... is not applicable iv SNMP Settings SNMP Settings System Name This is to give ASUS Mimic CX200 a name identifiable in a SNMP network System Contact This is to give the Administrator an identity in the SNMP network System Location This is to set ASUS Mimic CX200 SNMP location ...

Page 48: ...leave the field as Community This is to set a Community name for NMS The community name has to be the same as that set in NMS Permission This is to set the Administrator s authority Options are Read Read Write and No Access Description This is for an Administrator to make notes 2 4 6 About The administrator can use this section to check firmware information save restore settings upgrade firmware a...

Page 49: ... The text file will have a default format of YYYY_MMDD_ cfg The Administrator can change this if necessary Restore Previous Configuration This function is only available if a cfg configuration file has been saved earlier Click Browse to the location the file and click Restore Reset to factory default This function will reset all settings to its default value ASUS Mimic CX200 will request for the m...

Page 50: ...bled PDA PPC Symbian mobile device To view the images a Make sure that the PDA PPC Mobile unit is connected to LAN or Internet c The following login page will appear Enter the Login Name and Login Password if applicable Otherwise click Apply to proceed d The following Camera Selection will appear Click on either Camera A or Camera B ...

Page 51: ...cation The downloaded image size depends on the resolution set in Basic Settings Camera Settings Image Size Approximately 6KB 320x240 vs 17KB 640x480 resolution f The images are downloaded and displayed one at a time Click Refresh to download the next image Click Back to go to the camera page to select a different camera ...

Page 52: ...on the left to install the programs you want Utility This is a program that helps the user perform quick installation It will detect the current configuration and take the user through the necessary network setup a Click the Utility button to commence installation b After the installation is completed the Utility program will appear in Windows Start Utility Click this to start the program ...

Page 53: ...ation b After the installation is completed iMultiView program will appear in Windows Start All Programs ASUS MultiMonitor Read User s Manual Click to read ASUS Mimic CX200 s User Manual You will need Adobe Acrobat Reader v5 0 or higher Adobe Acrobat Reader v5 0 This will install Acrobat Reader v5 0 on your local hard drive Sun Jave ActiveX Install Sun Java for viewing the video image by Java or i...

Page 54: ...tions Choose the appropriate frequency Indoor 60 Hz Indoor 50 Hz or Outdoor to prevent flickering on the video feed Enter a name for the camera in the Location box to identify the camera Section 2 Using the Utility Program The Utility main menu is shown below The selection menu is located on the left The Serial Number current Firmware and IP Address of every ASUS Mimic CX200 connected to the LAN w...

Page 55: ...tain an IP address by DHCP Choose this if you want your Router to assign an IP address to ASUS Mimic CX200 Use the following IP Address Choose this if you want to enter a fix IP address Subnet Mask and Gateway for ASUS Mimic CX200 Refer to Appendix C for explanation on IP Addresses ...

Page 56: ...nd password details as provided by your internet service provider ISP c ASUS Mimic CX200 will be able to dial up automatically once setup is completed 6 Click Next to proceed with DDNS setup Obtain an IP address by Bootp Choose this if you want to allow ASUS Mimic CX200 to obtain an IP address using Bootp protocol 5 Click Next to proceed to xDSL Cable modem setup ...

Page 57: ...ur device over the internet For more details see Chapter 4 Section 2 3 2 part v 7 Click Next to change your administrator account and password information An administrator account is necessary to ensure privacy If you do not want to set one clear the data in both fields The fields are case sensitive 8 Click Next to confirm these configuration ...

Page 58: ...54 ASUS CX200 Internet Camera 9 Click Next to save and restart ASUS Mimic CX200 with the new configurations ...

Page 59: ...net Camera 2 2 Launch Mimic CX200 Click Launch Mimic CX200 or double click the ASUS Mimic CX200 listed in the table to launch it Click either one to Launch ASUS Mimic CX200 camera ASUS Mimic CX200 login screen will appear ...

Page 60: ... one then just click Apply to login The ASUS Mimic CX200 webpage will appear Click ActiveX beside Camera A to view the video images 2 3 IP Configuration This section allows you to configure the IP address for ASUS Mimic CX200 You do not have to edit this section if you have gone through Setup Wizard earlier ...

Page 61: ...Mimic CX200 Obtain an IP address by DHCP Choose this if you want to assign a fixed IP address to ASUS Mimic CX200 This is the default setting Obtain an IP address by Bootp Choose this if you want to allow ASUS Mimic CX200 to obtain an IP address using Bootp protocol Use the following IP Address Choose this if you want to assign a fix IP address Subnet Mask and Gateway for ASUS Mimic CX200 Refer to...

Page 62: ...events unauthorised access to devices through this Utility Device Password can only be set for ASUS Mimic CX200 from within the same LAN i Device Password when accessing from Utility Use this to set an access password when accessing ASUS Mimic CX200 from this Utility Once set the IP Address will not be shown on the right display panel see below ...

Page 63: ... either Setup Wizard Launch Mimic CX200 or IP Configuration button To remove the password a Select the ASUS Mimic CX200 unit from the Utility list b Click IP Configuration c Enter the unit s Device Password d Go to Advanced Device Password and delete both the entries e Click OK to confirm If the password is lost you must use the Master Password to reset the Password field ...

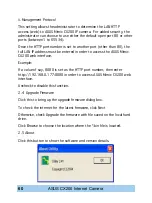
Page 64: ...ed in order to access the ASUS Mimic CX200 web interface Example If a value of say 8080 is set as the HTTP port number then enter http 192 168 0 177 8080 in order to access ASUS Mimic CX200 web interface Uncheck to disable this function 2 4 Upgrade Firmware Click this to bring up the upgrade firmware dialog box To check the internet for the latest firmware click Next Otherwise check Upgrade the fi...

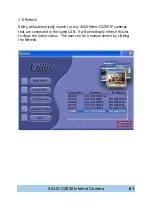
Page 65: ... Refresh Utility will automatically search for any ASUS Mimic CX200 IP cameras that are connected in the same LAN It will periodically refresh this list to show the latest status The user can do a manual search by clicking the Refresh ...

Page 66: ...ed on WAN the administrator will have to manually add these in Section 1 Installing MultiMonitor Click on setup exe and follow the installation wizard After installation there will be a ASUS group in the Windows Start group Click MultiMonitor MultiMonitor for Windows to start using MultiMonitor Section 2 Using MultiMonitor When using MultiMonitor for the first time it will as you to enter the CD K...

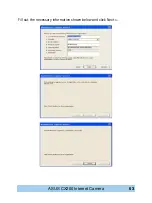
Page 67: ...63 ASUS CX200 Internet Camera Fill out the necessary information shown below and click Next ...

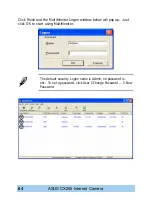
Page 68: ...era Click Finish and the MultiMonitor Logon window below will pop up Just click OK to start using MultiMonitor The default security Logon name is Admin no password is set To set a password click User Change Password New Password ...

Page 69: ... list them in the main window Once detected the following will show in the main window This shows that the camera is online and active This shows that ASUS Mimic CX200 is online but image can not be transmitted Check and see if the UDP port setting is correct This shows that the camera is off line and ASUS Mimic CX200 is not powered on Click and the following page will show up ...

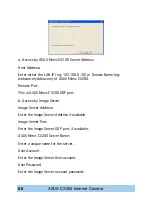
Page 70: ...mic CX200 Remote Port This is ASUS Mimic CX200 UDP port b Access by Image Server Image Server Address Enter the Image Server Address if available Image Server Port Enter the Image Server UDP port if available ASUS Mimic CX200 Server Name Enter a unique name for the server User Account Enter the Image Server User account User Password Enter the Image Server account password ...

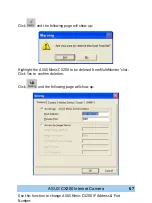
Page 71: ...the following page will show up Highlight the ASUS Mimic CX200 to be deleted from MultiMonitor s list Click Yes to confirm deletion Click and the following page will show up Use this function to change ASUS Mimic CX200 IP Address Port Number ...

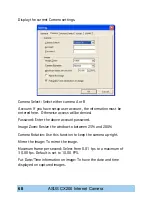
Page 72: ...ss will be denied Password Enter the above account password Image Zoom Resize the window to between 25 and 200 Camera Rotation Use this function to keep the camera up right Mirror the Image To mirror the image Maximum frame per second Select from 0 01 fps to a maximum of 30 00 fps Default is set to 10 00 FPS Put Date Time information on image To have the date and time displayed on captured images ...

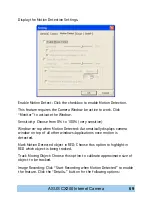
Page 73: ...sitive Window on top when Motion Detected Automatically displays camera window on top of all other windows applications once motion is detected Mark Motion Detected object in RED Choose this option to highlight in RED which object is being tracked Track Moving Object Choose this option to calibrate approximate size of object to be tracked Image Recording Click Start Recording when Motion Detected ...

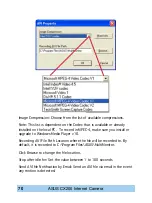
Page 74: ... in MPEC 4 make sure you install or upgrade to Windows Media Player v10 Recording AVI File Path Location where the file will be recorded to By default it is recorded to C Program Files ASUS MultiMonitor Click Browse to change the file location Stop after idle for Set the value between 1 to 100 seconds Send AVI file Notification by Email Send an AVI file via email in the event any motion is detecte...

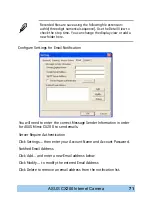
Page 75: ... Configure Settings for Email Notification You will need to enter the correct Message Sender Information in order for ASUS Mimic CX200 to send emails Server Require Authentication Click Settings then enter your Account Name and Account Password Notified Email Address Click Add and enter a new Email address below Click Modify to modify the entered Email Address Click Delete to remove an email addre...

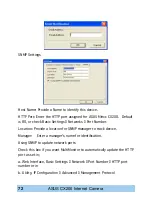
Page 76: ...ngs Networks Port Number Location Provide a location for SNMP manager to track device Manager Enter a manager s name for identification Using SNMP to update network ports Check this box if you want MultiMonitor to automatically update the HTTP port as set in a Web Interface Basic Settings Network Port Number HTTP port number or in b Utility IP Configuration Advanced Management Protocol ...

Page 77: ...73 ASUS CX200 Internet Camera Click to view the radio stream and Highlight the ASUS Mimic CX200 unit in the main windows display 1 2 3 4 5 6 7 8 9 10 11 ...

Page 78: ...5 Bring up the Settings option 6 Rotate the image left or right 7 Flip the image vertically 8 Click to record the current video onto your local PC See below for recording options 9 Show current FPS 10 Click to bring out zoom resolution direction and auto P T controls See below 11 Show the current date and time Click to record the current image on screen A window will come up click Start to start r...

Page 79: ...ows Click or to rotate left or right Click to switch to full screen view Double click anywhere to switch back to current view Click and drag to resize the window and its contents Date and Time display of live streaming video Click the left side of the viewing window to bring out more control features ...

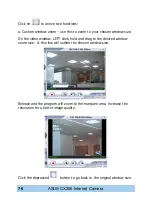
Page 80: ...osen window size On the video window LEFT click hold and drag to the desired window zoom size A thin line will outline the chosen window size Release and the program will zoom to the marquee area Increase the resolution for a better image quality Click the depressed button to go back to the original window size ...

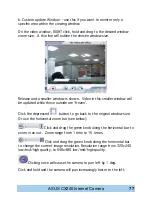
Page 81: ...e those outside are frozen Click the depressed button to go back to the original window size Or use the horizontal zoom bar see below Click and drag the green knob along the horizontal bar to zoom in an out Zoom range from 1 time to 16 times Click and drag the green knob along the horizontal bar to change the current image resolution Resolution range from 320x240 low mid high quality to 640x480 lo...

Page 82: ...y faster to the left Click once to tilt the camera up by 1 deg Click and hold and the camera will tilt increasingly faster upwards Click once to tilt the camera down by 1 deg Click and hold and the camera will tilt increasingly faster downwards Auto Pan if camera which support this function 2 2 View Switch between Large or Small icon view ...

Page 83: ...IP address Port date Time description of event of the selected ASUS Mimic CX200 unit Set the SNMP Parameter 2 4 User Change Password Use this feature to change the User s login password to MultiMonitor Either Administrator or User can change their Account passwords ...

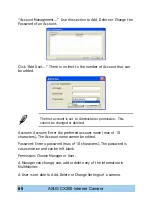
Page 84: ...rator permission This cannot be changed or deleted Account Account Enter the preferred account name max of 10 characters The Account name cannot be edited Password Enter a password max of 10 characters The password is case sensitive and can be left blank Permission Choose Manager or User A Manager can change see add or delete any of the information in MultiMonitor A User is not able to Add Delete ...

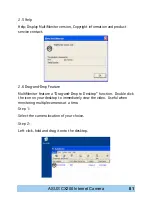
Page 85: ...ice contact 2 6 Drag and Drop Feature MultiMonitor feature a Drag and Drop to Desktop function Double click the icon on your desktop to immediately view the video Useful when monitoring multiple cameras at a time Step 1 Select the camera location of your choice Step 2 Left click hold and drag it onto the desktop ...

Page 86: ...82 ASUS CX200 Internet Camera Step 3 Release the mouse button anywhere on the desktop and a new desktop icon is created there Step 4 Double click on the icon on the desktop to view the images ...

Page 87: ...ware You can update ASUS Mimic CX200 firmware using any of the following methods Method 1 Through ASUS Mimic CX200 Web Page 1 Enter the ASUS Mimic CX200 Web Page 2 Go to About click update software and you will be automatically linked for update Method 2 Using the Utility software ...

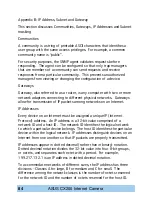
Page 88: ...on of IP packets among networks on an Internet IP Addresses Every device on an Internet must be assigned a unique IP Internet Protocol address An IP address is a 32 bit value comprised of a network ID and a host ID The network ID identifies the logical network to which a particular device belongs The host ID identifies the particular device within the logical network IP addresses distinguish devic...

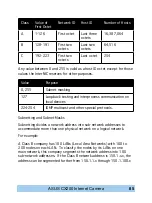
Page 89: ...esting and interprocess communication on local devices 224 254 IGMP multicast and other special protocols Subnetting and Subnet Masks Subnetting divides a network address into sub network addresses to accommodate more than one physical network on a logical network For example A Class B company has 100 LANs Local Area Networks with 100 to 200 nodes on each LAN To classify the nodes by its LANs on o...

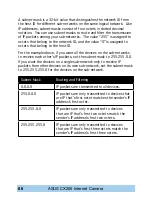
Page 90: ...receive each other s IP packets set the subnet mask to 255 255 0 0 If you want the devices on a single sub network only to receive IP packets from other devices on its own sub network set the subnet mask to 255 255 255 0 for the devices on the sub network Subnet Mask Routing and Filtering 0 0 0 0 IP packets are transmitted to all devices 255 0 0 0 IP packets are only transmitted to devices that ar...

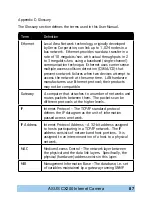
Page 91: ... use Ethernet protocol their products may not be compatible Gateway A computer that attaches to a number of networks and routes packets between them The packets can be different protocols at the higher levels IP Internet Protocol The TCP IP standard protocol defines the IP datagram as the unit of information passed across a network IP Address Internet Protocol Address A 32 bit address assigned to ...

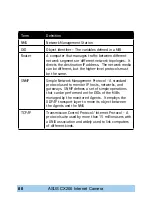
Page 92: ...vel protocols must be the same SNMP Simple Network Management Protocol A standard protocol used to monitor IP hosts networks and gateways SNMP defines a set of simple operations that can be performed on the OIDs of the MIBs managed by the monitored Agents It employs the UDP IP transport layer to move its object between the Agents and the NMS TCP IP Transmission Control Protocol Internet Protocol A...

Page 93: ...10 608 4555 Web site address usa asus com Technical support General support 1 502 995 0883 Support fax 1 502 933 8713 Online support http vip asus com eservice techserv aspx ASUS COMPUTER GmbH Germany Austria Company address Harkort Str 25 D 40880 Ratingen Germany General tel 49 2102 95990 Web site address www asuscom de General fax 49 2102 959911 Online contact www asuscom de sales Technical supp...

Page 94: ...90 ASUS CX200 Internet Camera ...

Reviews: