background image

71

Appendix

For body worn operation, this phone has 
been tested and meets the FCC RF exposure 
guidelines for use with an accessory that 
contains no metal and the positions the 
handset a minimum of 1.5 cm from the body. 
Use of other enhancements may not ensure 
compliance with FCC RF exposure guidelines. 
If you do not use a body-worn accessory and 
are not holding the phone at the ear, position 
the handset a minimum of 1.5 cm from your 
body when the phone is switched on.

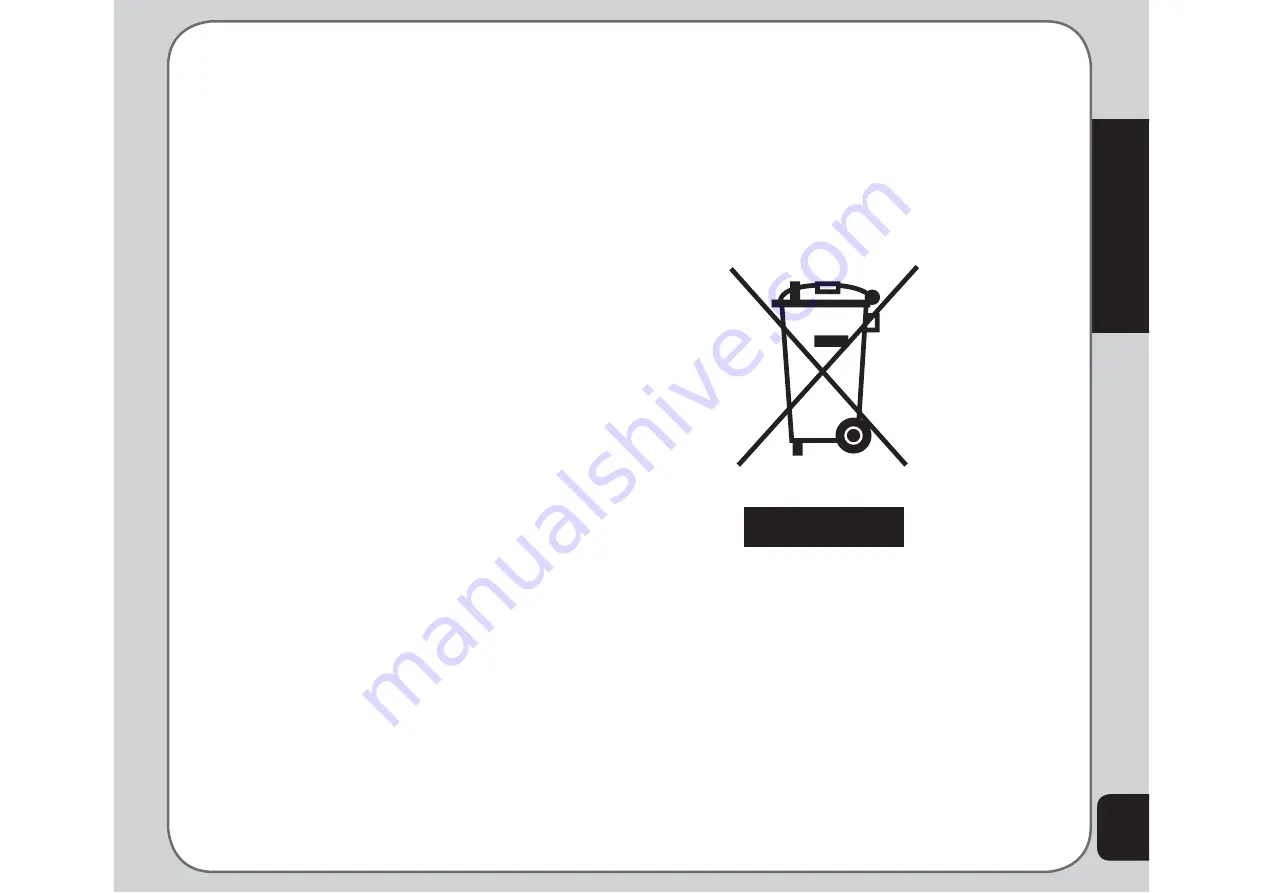
Proper Disposal

When the phone reaches the end of its 
lifetime, do not dispose of it by throwing it 
into the trash. Cell phones contain potentially 
hazardous materials which are dangerous to 
the environment if not disposed of properly. 
Dispose of the phone by taking it to a cell 
phone collection or recycling point. Contact 
your dealer for information or assistance.

This mobile phone complies with part 15 of the 
FCC Rules. Operation is subject to the 
following two conditions: (1) This device may 
not cause harmful interference, and (2) this 
device must accept any interference received, 
including interference that may cause 
undesired operation.The FCC has granted an 
EquipmentAuthorizationfor this model phone 
with all reported SARlevels evaluated as in 
compliance with the FCCRF exposure 
guidelines. SAR information onthis model 
phone is on file with the FCC andcan be found 
under the Display Grant section of
tap://www.fcc.gov/oet/fccid after searching on
FCC ID: MSQJ201

Summary of Contents for J201

Page 1: ...Asus J201 User Manual ...

Page 2: ...ng International Calls 22 Answering a Call 22 Answer Mode 22 Canceling an Incoming Call 23 Diverting a Call 23 Redialing a Number 23 Call Logs 23 Returning a Missed Call 23 Call Log Options 24 Deleting Call Logs 24 Call Time Cost 24 Options During a Call 25 Other call options 25 Phonebook 26 Adding Contacts 26 Adding a New Entry 26 Searching for a Contact 26 Quick Find 26 Search Entry 26 Copying a...

Page 3: ...r 43 Power On Animation 43 Power Off Animation 43 Main Idle Screen 43 Tone Settings 44 Call Settings 44 Hide My Number 45 Call Waiting 45 Call Forwarding 45 Call Barring 45 Line Switching 45 Call Time Reminder 46 Call Time Display 46 Auto Redial 46 Closed User Group 46 Call Filter 47 Network Settings 47 Preferred Network 47 Network Selection 47 Band Selection 47 GPRS Connection 47 Bluetooth Settin...

Page 4: ...55 Video Capture Settings 55 Camcorder Settings 55 Video Settings 55 Effect 56 Restore Default 56 Photo Artist 56 Media Center 58 Audio Player 58 Adding music files 58 Editing Music Files 58 FM Radio 59 FM Radio Options 59 Java 60 Java Settings 60 Games 60 Game Setting 61 Melody Composer 61 Tone Settings 61 Organizer 62 Alarm 62 Calendar 62 Tasks List 63 Calculator 63 World Clock 63 Voice Recorder...

Page 5: ...WAP Settings 67 WAP Push 68 Data Account 68 Appendix 69 Additional Information 69 European Notice 69 RF Exposure Information SAR 69 Proper Disposal 70 ...

Page 6: ...power on or off ends a call exits menu Right joystick key Displays the Media Center menu scrolls right through menu items Down joystick key Displays your shortcuts menu scrolls down through menu items Left soft key Displays the main menu selects left menu items Call key Answers a call displays previously dialed numbers Left joystick key Displays the camera menu scrolls left through menu items Ente...

Page 7: ...andset 720 mAh Li ion battery Travel charger Stereo headset Handset Manager manual Warranty card User manual Quick start guide Handset Manager CD ROM Captures photos Increases or decreases the volume for calls key tones or playing media files USB cable HandsetManager Manual Headset In ...

Page 8: ...games audio player WAP and GPRS The J201 s audio player enables you to play back your favorite music Features Wide variety of calling and messaging functions Built in mega pixel camera Media center with audio player FM radio receiver and games for your entertainment MMS and SMS messaging capability Bluetooth capability Personal information organizer with alarm calendar calculator and other useful ...

Page 9: ...ts WAP Supports WAP 1 2 1 and WAP 2 0 Java Supports J2ME CLDC 1 0 MiDP 2 0 Built in Java games Messaging Supports SMS EMS MMS Ring tone 64 polyphonic ring tones Supports SMF standard MIDI format and MP3 Phone book 300 sets SIM card Caller ID with photos 10 sets for speed dialing Record Record an unlimited number of files up to memory capacity Calendar 100 Sets Internal Memory 128MB PIM tool Alarm ...

Page 10: ...Speed Dial Auto Datetime Update LED Display Settings Themes Wallpaper Sub Wallpaper Screen Saver Power On Animation Power Off Animation Show Date and Time Main Idle Screen Brightness Sub LCD Contrast Backlight Timer Tone Settings Incoming Ringtone Alarm Tone Power On Power Off Flip Open Flip Close Message Tone Key Tone Call Settings Hide My No Call Waiting Call Forwarding Call Barring Line Switch ...

Page 11: ...watch File Manager Units Converter Currency Converter Health Manager BMI Menstrual Network Settings Network Selection Preferred Networks Band Selection GPRS Connection Bluetooth Power Search Audio Device My Device Settings Security Settings SIM Lock Phone Lock Auto Keypad Lock Fixed Dial Barred Dial Change Password Restore Factory Settings Camera Capture My Album Camera Settings Image Settings Eff...

Page 12: ...ll Delete All Delete Caller Group Extra number My Phone Number Service Number SOS Number Settings Memory Status Default Storage Fields My vCard Calls Missed Calls Dialed Calls Received Calls Delete Call Log Call Time Call Cost SMS Counter GPRS Counter ...

Page 13: ...t the card follow these steps 3 Insert the SIM card into the holder with the correct orientation The gold contacts of the SIM card should face down 1 Press the back cover and slide the cover off to remove it 2 Remove the battery The battery compartment has a notch at the top to make it easier to grasp and remove it 4 Place the battery back into the battery compartment noting the correct polarity 5...

Page 14: ... phone turned on or off See the Organizer section for details about setting an alarm Charging the battery 1 Connect the charger plug to a power outlet 2 Connect the charger to the socket at the bottom of the phone The connector can only be inserted one way 3 The phone will be turned on and charge the battery Note If the battery has been deeply discharged it may take several minutes before the phon...

Page 15: ...ne is in idle mode Press to perform the function currently displayed in the lower right corner of the screen Press to move right while navigating menus Up joystick key Press to scroll up through menu items Press to display the SMS inbox when the phone is in standby mode Down joystick key Press to scroll down through menu items Press to display a list of your shortcuts when the phone is in standby ...

Page 16: ...dby screen icons are as follows Line 1 or line 2 is selected for calls Indicates the ring mode selected for the phone Ring Only Vibrate Vibrate and Ring Vibrate then Ring Lights only Unlocking the keypad The keypad of the phone can be locked automatically after a specific time interval to prevent tampering or accidental pressing of any buttons Refer to Security Setup in the Settings section to lea...

Page 17: ... joystick keys to move through the various menu items The lower left corner of the screen displays the name of the menu item currently selected while the lower right corner displays Back Press the left soft key situated under the name of the menu item to select the menu item Press the right soft key which is situated under Back to exit the menu Each menu item also displays a small number beneath i...

Page 18: ...ert units or currency Phonebook Enables you to manage names and telephone numbers for easy access and caller recognition submenu items and options The right and left soft keys can also be used for selecting various options in submenus For example to view missed calls do the following 1 Use the joystick keys to select Calls from the main menu 2 Press the left soft key to confirm the selection The C...

Page 19: ...symbol Press the enter key or press the left soft key to select and enter a space You can also view select and enter other symbols by pressing the 0 key Key Assigned Characters 1 _ 1 2 A B C 2 3 D E F 3 4 G H I 4 5 J K L 5 6 M N O 6 7 P Q R S 7 8 T U V 8 9 W X Y Z 9 0 0 opens symbol table Choosing text entry methods From any text entry screen such as a text message window select Options Input Meth...

Page 20: ... settings in your phone match the language you want to type in For setting language see Phone Setup under Settings adding a phonebook entry or entering a WAP address When you press a key the characters assigned to the key appear in the lower center of the screen Press the key repeatedly to scroll through these characters Pause for a moment and the selected letter appears on the screen For practice...

Page 21: ...hen select Numeric Now you can directly input the numbers using the keypad Symbols text entry With this method you can enter various types of symbols Select Option Input Method Insert Symbols A list of symbols is displayed Use the joystick keys to select the desired symbol and select OK when done You can also press the 0 key as a shortcut to open the symbol table ...

Page 22: ...ny Key option to On to enable the setting Remember to Activate the manner setting to make sure that the answer mode is set Calls Making a call Follow these steps to place a call 1 Enter the number you wish to dial using the keypad If you make a mistake select Clear to delete at any time The right soft key is just under the word Clear on the lower right screen use this key to clear a number 2 Press...

Page 23: ...A list of numbers dialed previously appears with the last number dialed at the beginning of the list 2 Select the number you wish to dial and press the Call key to dial the number Dialed numbers can also be accessed from Calls Dialed Calls Call Logs Call logs consist of information about missed dialed and received calls To view lists of missed dialed calls or received calls select Calls from the m...

Page 24: ... main menu and then select Delete Call Log 2 Select from one of the following options Missed Calls Dialed Calls Received Calls Delete All Call Time Cost Depending on the type of service package you have you may pay according to the length of your calls Some users like to monitor the length of their calls Your phone offers a convenient and accurate way to keep track of length and costs of calls usi...

Page 25: ...one Book Displays the phone book menu You can use this function to check a contact phone number during a call SMS Displays the messages menu This is convenient in loud speaker mode if you want to send an SMS during a call Sound Recorder Starts recording the conversation To stop recording select Stop Mute Mutes a call DTMF Allows the recipient to hear key press tones H Free Switches to hands free l...

Page 26: ... your SIM card to another phone If you choose to add the new entry to the SIM card you can add only a name and a number 3 Enter a name and number using the keypad If you are adding the new entry to the phone you can also add a home number company name e mail address office number fax number an associated sound or picture stored in the phone memory and put the contact in a caller group Searching fo...

Page 27: ...n screen OR 1 From Idle menu press the right soft key then Option Copy and choose to SIM or to Handset 2 From Idle menu press the right soft key then Option Move and confirm Deleting Contacts You can delete individual contacts using the Delete function To delete individual contacts 1 From the main menu select Phonebook Delete The list of contacts in the phonebook appears 2 Select a contact to dele...

Page 28: ...d The chosen ringtone will sound when someone from the current caller group calls the phone To change the picture 1 Select the caller group to modify as described in the previous procedures 2 Use the joystick to select the picture option third in the list 3 Use the right and left joystick option to cycle through the picture options This option determines which picture is displayed when someone fro...

Page 29: ...t and a text entry screen appears Enter the desired number You can input both text and numbers Use the left soft key to select Option if you need to change the input method When you have finished typing press the Enter key to confirm 4 To edit or delete previous entries select an entry then the left soft key to select Option NOTE There are two lines under My Phone Number so when line1 is in use My...

Page 30: ...layed 2 Highlight a field and press the left soft key to deactivate or activate a field My vCard A vCard is a virtual calling card that you can send to people It can contain your name number home number company name e mail address office number and fax number To edit and send your vCard 1 From the main menu select Phonebook Settings My vCard 2 Select the Edit or Send to option The edit option enab...

Page 31: ... Format Input Method A template is predefined section of text that you can use in any SMS message Inserted objects can include a picture an animation or a sound Some phones may not be able to receive SMS messages that contain anything other than text Use the Text Format option to adjust the size and style of the text 1 Highlight an option and select OK 2 When your message is complete select the Do...

Page 32: ...words phrase to edit then press the enter key to confirm 3 Use the joystick to highlight the Edit or Delete option then press the enter key to confirm The Edit option displays existing common words phrases and gives you the option to change them The Delete option deletes the entry entirely Message Settings The message settings menu enables you to configure your SMS message settings Up to three pro...

Page 33: ...t the Sent or Received option The number of sent or received messages is displayed MMS MMS messages are like SMS messages but they can also contain sounds and pictures Writing an MMS Message Writing an MMS message is not very different from creating an SMS message MMS messages are made up of slides Each slide contains a combination of text images or audio To create an MMS message 1 From the main m...

Page 34: ...age Some MMS messages are longer than the screen To move up or down a page press and hold the up or down joystick key Using Templates There are templates stored on your phone which contain text images and sound You can create MMS messages based on templates stored on your phone You can also edit any of the existing templates To use a template 1 From the main menu select Messages MMS Templates A li...

Page 35: ...work Deny Download and Manual Download The default value is As Home Read Report users can choose if they want to send a read report to the sender or not The read report will report if the user read the MMS message or not The choices are On Request Send and Never Send The default value is On Request Delivery Report users can choose if they want to send delivery reports to the sender or not The deli...

Page 36: ...creen 5 Auto Signature This option lets users configure their auto signature and allows them to switch it on and off The default value is Off 6 Memory Status This screen lists the memory status of MMS Usage current message number maximum message number Total the total space occupied by MMS messages Free the space left to store MMS messages To configure message settings 1 From the main menu select ...

Page 37: ...each field and press the enter key to change any field Once your e mail profile is complete you need to activate it 1 From the main menu select Messages Email Email Profile A list of profiles is displayed 2 Use the joystick to highlight a profile to use then press the enter key to confirm 3 Press the enter key to activate the selected profile Once your profile is activated you can send and receive...

Page 38: ...e the joystick to highlight the Languages option then press the enter key to display the language menu Use the joystick to check the language options that you want to receive 5 Use the joystick to highlight the Topics option then press the enter key to confirm 6 Use the joystick to select add edit or delete channels Input Methods The input methods setting lets you define the default input method w...

Page 39: ...ners are Normal Meeting Indoor Outdoor Headset Manner Settings Each manner can be personalized to suit your own needs To personalize a manner 1 From the main menu select Manner Option Personalize A list of customizable features is displayed including volume ring mode ring tone type connect notice answer mode and more 2 Select a feature to customize from the list and press the enter key to confirm ...

Page 40: ...can be defined Highlight a number from the list using the joystick and press the enter key Use the right and left joystick keys to change settings for each field The Status field sets the status of the phone to On or Off at the time of the scheduled power on off The Power field sets whether the phone is to turn On or Off The Time field sets the time for the power to turn on or off In the submenu u...

Page 41: ...tem on the shortcut list Greeting Text The Settings Phone Settings Greeting Text option sets a short phrase that appears each time the phone is turned on Greeting text can be entered and edited Set the status to On if you want the text to appear or to Off if you do not want it to appear Speed Dial The Settings Phone Settings Speed Dial option assigns single keys to numbers in your phone book so th...

Page 42: ...an option and press the enter key to confirm The Activate option activates the selected theme The Theme Timer option defines how often the theme is updated The Set Order option defines the order in which the themes are updated Wallpaper A wallpaper is the image displayed in the background of your phone You can choose between default and custom wallpapers To set a wallpaper 1 From the main menu pre...

Page 43: ... key to select it 3 Use the joystick to highlight a picture and press the enter key to view it 4 Press the left soft key to confirm the screensaver file or the right soft key to go back and choose another Power On Animation Here you can choose the animation video or picture that is displayed when the phone is powered on To set the Power On Animation 1 From the main menu press Settings Display Sett...

Page 44: ...ght joystick keys and press the left soft key to save Sub LCD Contrast Here you can choose the contrast level for the phone s sub screen Highlight the Sub LCD Contrast option from the Display Settings menu and press the left soft key to enter the Sub LCD Contrast settings then adjust the contrast level manner with the left and right joystick keys and press the left soft key to save Backlight Timer...

Page 45: ... option from the Call Settings menu and press the center joystick button to confirm 2 You can choose to Activate Deactivate or Query the current setting To use the call waiting feature 1 When you receive a call during another call press the Call key to receive the second call 2 Press the Call key to switch back to the first call or to switch between calls Call Forwarding The Settings Call Settings...

Page 46: ...er key 2 A time field appears Fill in the number of seconds after which a reminder should sound then select OK You can choose to turn the function off turn it on to sound once during a call or turn it on periodically Call Time Display If you would like to monitor or keep track of the length of your calls use the Settings Call Settings Call Time Display option When enabled the screen displays the t...

Page 47: ...hen press the Enter key To turn filters on you must have previously set one or more numbers to block in the Ignore List Network Settings The default network settings in the phone are for automatic detection of the best available lines for the type of content you are sending Your phone also offers the flexibility to let you manually select various network options to suit your preferences Network me...

Page 48: ...ect a Bluetooth device to your phone for the first time 1 Turn on the Bluetooth device and then click Bluetooth Settings Search Audio Device to search for Bluetooth Headphones or click Bluetooth Settings My Device Option Search New Device to search for BT enables PDA or PC and press OK 2 Once the Bluetooth device is detected it is shown on the list of found devices Select the BT device you wish to...

Page 49: ...earch New Device you can let the phone search for available Bluetooth devices and select the one you wish to connect to from the list that is displayed once the search has finished By pressing Option and Connect you connect the phone with the new device Settings With the Bluetooth Settings Settings option you can determine whether or not the phone can be detected by other Bluetooth devices Visibil...

Page 50: ...ption then press the enter key 2 Select to lock the keypad after 5 seconds 30 seconds 1 minute or 5 minutes of inactivity Select None to disable the function For information on unlocking the keypad see the section Unlocking the Keypad in the Getting Started chapter of this manual Fixed Dialing The Security Settings Fixed Dial function limits dialing to the numbers that you specify Fixed dialing is...

Page 51: ... you have forgotten a PIN password or need further assistance with PIN passwords Restore Factory Settings The Settings Restore Factory Settings option restores all settings to factory default just as they were when you purchased the phone To restore factory default settings Highlight the Restore Factory Default option from the Security Setup menu and press the enter key All factory default setting...

Page 52: ...e image in your album Capture button Zoom Function The phone has an easy to use zoom function To zoom in on an object press the up joystick key To zoom out press the down joystick key You can preview the zoom effect on the phone s screen In addition a slide bar on the right of the screen moves as zoom is applied Viewing and Managing Photos Use the My Album option to view and manage the still image...

Page 53: ...r keys also act as shortcut keys for the camera settings The keys are assigned as follows Effect White Balance LED Highlight Capture Timer Multi Capture Night Mode Image Quality 8 Image Size 8 Self capture Press the respective keys repeatedly to change a given setting For example if you press 5 for Multi Capture pressing again enables you to apply 4 Shots 6 Shots or 9 Shots to the setting Image Se...

Page 54: ...ots Select Deactivate or 4 Shots 6 Shots or 9 Shots for multi capture shots Capture Timer Use the delay timer to add a delay time between pressing the capture button and the picture actually being captured This can allow enough time to take pictures of yourself To set the capture timer 1 While in capture mode select Option Capture Timer 2 Select 5 sec 10 sec or 15 sec or Deactivate to turn the fun...

Page 55: ...w the zoom effect on the phone s screen A slide bar at the bottom of the screen moves as zoom is applied Viewing and Managing Videos Select the My Video option to view and play the videos in your album To open My Video 1 While in video capture mode select Option My Video or From the main menu select Camera My Video A list of stored videos is displayed 2 Use the joystick to highlight a video and pr...

Page 56: ...ss video settings Select the video recorder mode as described in the Recording Videos section of this manual then select Option Camcorder Settings The Camcorder Settings includes options related to lighting conditions There are settings for white balance LED Highlight EV Night mode and AC frequency To open the Camcorder Settings menu 1 While in video recording mode select Option Camcorder Settings...

Page 57: ...eo and audio files Select Option Photo Artist and press the left soft key or the enter key The File Manager appears showing the amount of space occupied by the handset memory and the DRM You can start choosing image files from the stored data to be edited select an image file from one of the handset s folders and then choose to automatically resize it or to prepare it so you can later use it as yo...

Page 58: ... to the picture After that press the left soft key Done to apply the setting or the right soft key Cancel to discard Adjustment You can choose either to adjust the image or the color Highlight one of the two choices from the list and press OK Adjust your image s brightness contrast saturation hue and color values Press Done or Cancel and then press the left soft key to apply the setting or the rig...

Page 59: ... Down Joystick Stop Left Joystick Reverse Right Joystick Fast Forward NOTE You need to connect earphones to the earphone socket on the bottom of the phone to listen to music files Adding music files To add music files to your phone you must first connect the phone to a computer with digital music files Connect the phone to the computer USB port using the USB cable provided The when the phone is co...

Page 60: ...M radio function provides high quality stereo radio reception through earphones To start the radio From the main menu select Media Center FM Radio The FM radio opens NOTE You must plug in the earphones and press the button on the microphone module for the FM radio to work To tune the radio use the the left and right joystick keys To control the volume use the volume key on the side of the phone To...

Page 61: ...adio settings Start the radio then select Option Settings In the Settings submenu you can change the skin and turn background play on or off Java A selection of games created with Java technology comes preloaded on your phone To start a Java game 1 From the main menu select Media Center Java A list of Java games appears 2 Highlight a Java game from the list and press the enter key to launch the ga...

Page 62: ...ing it with the joystick and pressing the key Add a rest using the 0 key Add a vibration effect by pressing 8 This effect is marked with wavy lines on the staff Add an effect to turn the LED light on and off by pressing This effect is marked by a rainbow flag on the staff if you press the after the LED icon appears If you would like to edit your tune by turning off the vibration or screen on off e...

Page 63: ... and the red key can stop the alarm the right soft key icon sets it to snooze i e causes the alarm to sound every 5 minutes until the user stops it Calendar The calendar function helps you keep track of day to day tasks To open the calendar 1 From the main menu select Organizer Calendar 2 The calendar is displayed 3 Use the joystick to highlight a specific date on the calendar and press the center...

Page 64: ...se the calculator 1 From the main menu select Organizer Calculator The Calculator is displayed 2 Use the keypad to enter numbers and the joystick to select the functions Pressing twice selects the m function pressing twice selects the m function pressing twice selects the mc function pressing twice selects the mR function 3 Press the enter key to enter and compute Press to enter a decimal point Wo...

Page 65: ... explains once more how the Image Editor works Stopwatch The phone includes a stopwatch function There are two styles of stopwatch to choose from The typical stopwatch is a simple timer that can be started and stopped using the enter key In this setting you can choose between split timing and lap timing split timing continues running the elapsed time after the first mark has been set lap timing re...

Page 66: ... Input a number using the keypad 6 Press the enter key to confirm The measure is converted and displayed Currency Exchange The currency exchange is a useful tool to help you convert one currency to another To use the currency exchange 1 From the main menu select Organizer Currency Exchange The Currency Exchange is displayed 2 Use the keypad to enter a conversion factor and press the center button ...

Page 67: ...he days of an average period Press the center joystick button to confirm Your menstrual cycle chart is then displayed The dates highlighted in Red signify the days when the Health Manager has calculated you will have your period Orange signifies your ovulation time and on days marked with Yellow the possibility for you to get pregnant is very high If you press the middle key you can see the possib...

Page 68: ...ge 3 Press the enter key to change the highlighted setting Browsing WAP pages Browsing WAP pages is much like browsing web pages with your computer However rather than using a mouse you navigate with the joystick keys and with the Middle enter and call key Scrolling Some WAP pages are longer than the phone s screen To scroll up or down a page press and hold the up or down joystick key Viewing Link...

Page 69: ...TP connection types WAP Push WAP Push is a method for sending multimedia content to your phone If your service provider offers WAP push services you can use WAP push to receive such content as wallpaper ringtones or java games The message is sent as a WAP accessible URL or web address Set WAP Push settings in WAP Settings Receive WAP Push content in WAP Push Inbox Data Account The Data Account men...

Page 70: ...he conformity of the product with the mark RF Exposure Information SAR This model phone meets the government s requirements for exposure to radio waves This phone is designed and manufactured not to exceed the emission limits for exposure to radio frequency RF energy set by the Federal Communications Commission of the U S Government The exposure standard for wireless mobile phones employs a unit o...

Page 71: ...hazardous materials which are dangerous to the environment if not disposed of properly Dispose of the phone by taking it to a cell phone collection or recycling point Contact your dealer for information or assistance This mobile phone complies with part 15 of the FCC Rules Operation is subject to the following two conditions 1 This device may not cause harmful interference and 2 this device must a...

Reviews: