


7
GigaX Series L2 Smart Plus Switch User Manual
Note
3.2.1 Connect the console port
For console management, use an RS232 (DB9) to connect the switch. If you
want to use WEB interface, connect your PC to the switch using the Ethernet
cable.
3.2.2 Connect to the computers or a LAN
You can use Ethernet cable to connect computers directly to the switch ports.
You can also connect hubs/switches to the switch ports by Ethernet cables.
You can use either the crossover or straight-through Ethernet cable to connect
computers, hubs, or switches.
Use a twisted-pair Category 5 Ethernet cable to connect the
1000BASE-T port. Otherwise, the link speed cannot reach
1Gbps.
3.2.3 Attach the power adapter
1. Connect the AC power cord to the POWER receptacle on the back of the
switch and plug the other end of the power cord into a wall outlet or a power
strip.
2. Check the front LED indicators with the description in Table 4. If the LEDs
light up as described, the switch hardware is working properly.
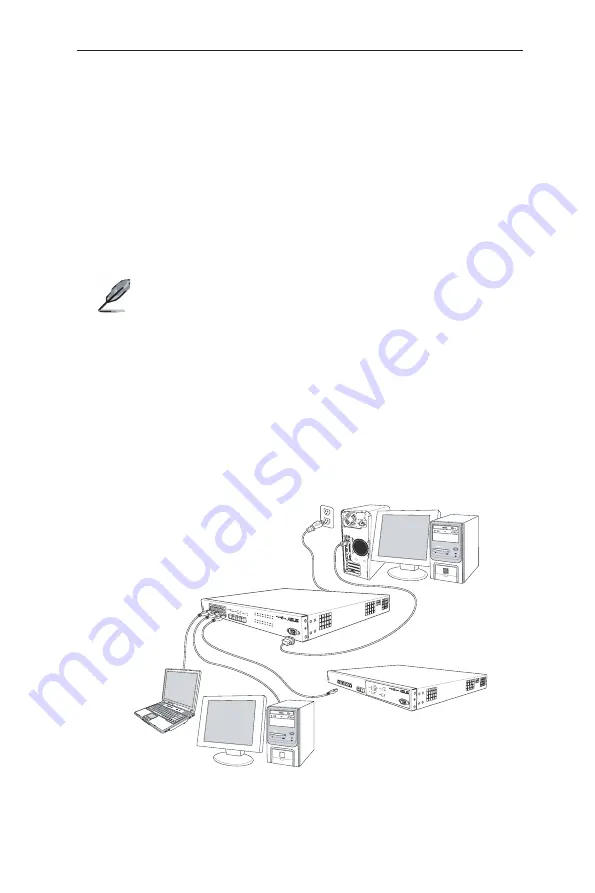
Figure 3. Overview of Hardware Connections
SYSTEM
RPS
FAN
CONSOLE
RS-232
8
4
2
1
7
5
3
6
8
4
2
1
7
5
3
6
S
Expansion Switch/Hub
Client
Client
Cat 5 (or better)
Network Cables
AC Power
RS232
Console
(RS232)
Gig
SYSTEM
RPS
FAN
CONSOLE
RS-232
8
4
2
1
7
5
3
6


