background image

3-2

Chapter 3: Starting up

3.1 

Installing an operating system

The barebone system supports Windows

®

 XP/Vista operating systems (OS). 

Always install the latest OS version and corresponding updates so you can 

maximize the features of your hardware.

3.3 

Support �V� information

The support DVD that came with the system contains useful software and several 

utility drivers that enhance the system features.

3.2 

Powering up

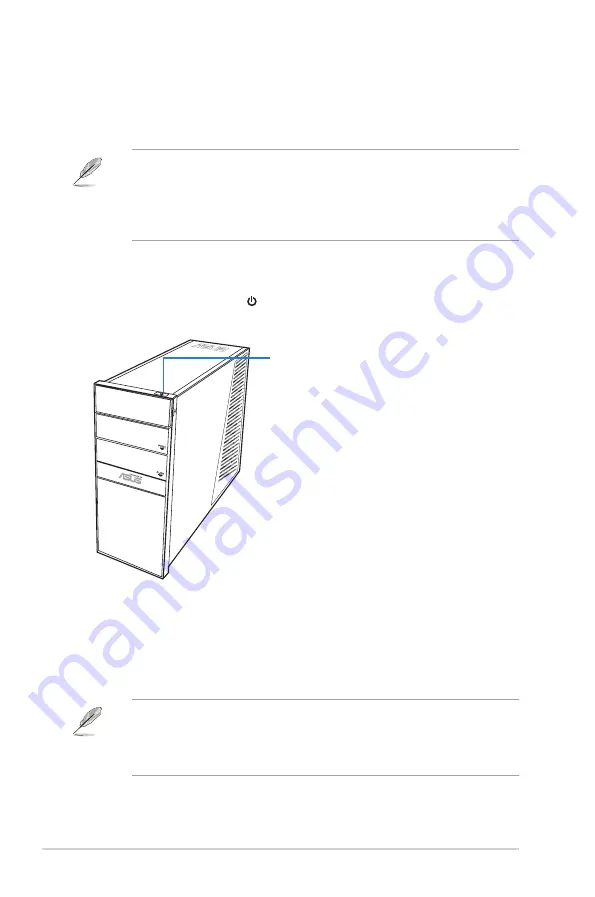
Press the system power button (   ) to enter the OS. 

•  Because motherboard settings and hardware options vary. Refer to your 

OS documentation for more information.

•  Ensure that you install Windows

®

 XP Service Pack 3 /Windows

®

 Vista 

Service Pack 1 before installing the drivers for better compatibility and 

system stability.

•  Screen display and driver options may not be the same for different 

operating system versions.

•  The contents of the support DVD are subject to change at any time without 

notice. Visit the ASUS website at www.asus.com for updates.

Press.to.turn.ON.the.system

Summary of Contents for G1-P5G43

Page 1: ...G1 P5G43 ASUS PC Desktop Barebone User s Manual ...

Page 2: ...TICULAR PURPOSE IN NO EVENT SHALL ASUS ITS DIRECTORS OFFICERS EMPLOYEES OR AGENTS BE LIABLE FOR ANY INDIRECT SPECIAL INCIDENTAL OR CONSEQUENTIAL DAMAGES INCLUDING DAMAGES FOR LOSS OF PROFITS LOSS OF BUSINESS LOSS OF USE OR DATA INTERRUPTION OF BUSINESS AND THE LIKE EVEN IF ASUS HAS BEEN ADVISED OF THE POSSIBILITY OF SUCH DAMAGES ARISING FROM ANY DEFECT OR ERROR IN THIS MANUAL OR PRODUCT SPECIFICAT...

Page 3: ...view 2 4 2 4 2 Installing CPU 2 4 2 4 3 Installing the CPU fan and heatsink assembly 2 6 2 5 Installing a DIMM 2 8 2 5 1 Overview 2 8 2 5 2 Memory configurations 2 9 2 5 3 Installing a DDR2 DIMM 2 15 2 5 4 Removing a DDR2 DIMM 2 15 2 6 Expansion slots 2 16 2 6 1 PCI slots 2 16 2 6 2 PCI Express x1 slot 2 16 2 6 3 PCI Express x16 slot 2 16 2 6 4 Installing an expansion card 2 17 2 6 5 Configuring a...

Page 4: ...umpers 4 3 4 3 Connectors 4 5 Chapter 5 BIOS setup 5 1 Managing and updating your BIOS 5 2 5 1 1 ASUS Update utility 5 2 5 1 2 ASUS EZ Flash 2 utility 5 3 5 1 3 ASUS CrashFree BIOS 5 4 5 2 BIOS setup program 5 5 5 2 1 BIOS menu screen 5 6 5 2 2 Menu bar 5 6 5 2 3 Navigation keys 5 7 5 2 4 Menu items 5 7 5 2 5 Submenu items 5 7 5 2 7 Pop up window 5 7 5 2 8 Scroll bar 5 7 5 2 9 General help 5 7 5 3...

Page 5: ... PCI PnP 5 15 5 5 Power menu 5 16 5 5 1 Suspend Mode 5 16 5 5 2 ACPI 2 0 Support 5 16 5 5 3 ACPI APIC Support 5 16 5 5 4 APM Configuration 5 17 5 5 5 Hardware Monitor 5 17 5 6 Boot menu 5 19 5 6 1 Boot Device Priority 5 19 5 6 2 Boot Settings Configuration 5 19 5 6 3 Security 5 20 5 7 Tools menu 5 22 5 7 1 ASUS EZ Flash 2 5 22 5 7 2 AI NET 2 5 22 5 8 Exit menu 5 23 ...

Page 6: ...rews and staples away from connectors slots sockets and circuitry Avoid dust humidity and temperature extremes Do not place the product in any area where it may become wet Place the product on a stable surface If you encounter technical problems with the product contact a qualified service technician or your retailer Notices Macrovision Corporation Product Notice This product incorporates copyrigh...

Page 7: ...d bin indicates that the product electrical and electronic equipment should not be placed in municipal waste Check local regulations for disposal of electronic products DO NOT throw the mercury containing button cell battery in municipal waste This symbol of the crossed out wheeled bin indicates that the battery should not be placed in municipal waste About this guide Audience This guide provides ...

Page 8: ...ontact information 2 Optional Documentation Your product package may include optional documentation such as warranty flyers that may have been added by your dealer These documents are not part of the standard package 2 Chapter 2 Basic installation This chapter provides step by step instructions on how to install components in the system 3 Chapter 3 Starting up This chapter helps you power up the s...

Page 9: ...e for the following items If any of the items is damaged or missing contact your retailer immediately Item description 1 ASUS G1 P5G43 barebone system with ASUS motherboard Power supply unit ASUS chassis 2 Cable AC power cable 3 Support DVD 4 Installation guide ...

Page 10: ... ...

Page 11: ...ystem introduction This chapter gives a general description of the ASUS G1 P5G43 The chapter lists the system features including introduction on the front and rear panel and internal components Chapter 1 ...

Page 12: ...ory using DDR2 1066 800 667 DIMMs High resolution graphics via integrated graphics controller or PCI Express x16 slot Serial ATA USB 2 0 and 8 channel audio feature the system and take you ahead in the world of power computing 1 2 Front panel The front panel includes the optical drive bays hard disk drive bay power button and I O ports 1 Power button 2 Optical drive bay cover 3 5 25 inch drive bay...

Page 13: ...is for switching on off the power supply unit 3 Power supply unit PSU fan vent This vent is for the PSU fan that provides ventilation inside the power supply unit 4 Chassis fan vent This vent is for the fan that provides ventilation inside the system chassis HDMI DVI SPDIF OUT 14 15 2 1 6 9 11 5 3 10 16 7 12 19 8 13 17 4 18 Do NOT cover the rear vent and the ambience temperature is limited up to 3...

Page 14: ...lu Ray discs and other protected content 10 Video Graphics Adapter VGA port This 15 pin port is for a VGA monitor or other VGA compatible devices 11 USB 2 0 ports 1 4 These 4 pin Universal Serial Bus USB ports are available for connecting USB 2 0 devices 12 LAN RJ 45 port This port allows gigabit connection to a Local Area Network LAN through a network hub Refer to the table below for the LAN port...

Page 15: ...t Front Speaker Out Front Speaker Out Pink Mic In Mic In Mic In Mic In Orange Center Subwoofer Center Subwoofer Black Rear Speaker Out Rear Speaker Out Rear Speaker Out Gray Side Speaker Out Refer to the audio configuration table below for the function of the audio ports in 2 4 6 or 8 channel configuration 19 Expansion slot covers Remove these covers when installing expansion cards ...

Page 16: ...labeled for your reference Proceed to Chapter 2 for instructions on installing additional system components 1 Front panel assembly 2 5 25 inch optical drive bays 3 Hard disk drive bay 4 Power supply unit 5 CPU socket 6 DIMM sockets 7 ASUS motherboard 8 PCI Express x16 slot 9 PCI Express x1 slot 10 PCI slots 11 Chassis fan 12 Expansion slot metal brackets 1 2 3 4 5 6 7 8 9 10 11 12 ...

Page 17: ...This chapter provides step by step instructions on how to install components in the system Chapter 2 Basic installation ...

Page 18: ...de or in soft off mode and not powered OFF Unplug the power cable from the power outlet and make sure that the standby power LED is OFF before installing any system component Use a grounded wrist strap or touch a safely grounded object or a metal object such as the power supply case before handling components to avoid damaging them due to static electricity Hold components by the edges to avoid to...

Page 19: ...toward the rear panel until its hooks disengage from the chassis tab holes Set the side cover aside 3 Locate the front panel assembly hooks then lift them until they disengage from the chassis 4 Swing the front panel assembly to the right until the hinge like tabs on the right side of the assembly are exposed 5 Remove the front panel assembly then set it aside Air duct 1 1 2 2 4 3 4 4 3 3 4 Chassi...

Page 20: ...ot bent Contact your retailer immediately if the PnP cap is missing or if you see any damage to the PnP cap socket contacts motherboard components ASUS will shoulder the cost of repair only if the damage is shipment transit related Keep the cap after installing the motherboard ASUS will process Return Merchandise Authorization RMA requests only if the motherboard comes with the cap on the LGA775 s...

Page 21: ...r in the direction of the arrow to a 135º angle A B Load lever Retention tab 4 Lift the load plate with your thumb and forefinger to a 100º angle 4A then push the PnP cap from the load plate window to remove 4B 5 Position the CPU over the socket making sure that the gold triangle is on the bottom left corner of the socket then fit the socket alignment key into the CPU notch Gold triangle mark Alig...

Page 22: ...ely and seek professional medical help 2 4 3 Installing the CPU fan and heatsink assembly The Intel LGA775 processor requires a specially designed heatsink and fan assembly to ensure optimum thermal condition and performance When you buy a boxed Intel processor the package includes the CPU fan and heatsink assembly If you buy a CPU separately make sure that you use only Intel certified multi direc...

Page 23: ... heatsink on top of the installed CPU making sure that the four fasteners match the holes on the motherboard 3 When the fan and heatsink assembly is in place connect the CPU fan cable to the connector on the motherboard A B B 2 Push down two fasteners at a time in a diagonal sequence to secure the heatsink and fan assembly in place Do not forget to connect the CPU fan connector Hardware monitoring...

Page 24: ...s DIMM sockets A DDR2 module has the same physical dimensions as a DDR DIMM but has a 240 pin footprint compared to the 184 pin DDR DIMM DDR2 DIMMs are notched differently to prevent installation on a DDR DIMM socket The figure illustrates the location of the DDR2 DIMM sockets Channel Sockets Channel A DIMM_A1 and DIMM_A2 Channel B DIMM_B1 and DIMM_B2 ...

Page 25: ... less For effective use of memory we recommend that you do any of the following Use a maximum of 3GB system memory if you are using a 32 bit Windows OS Install a 64 bit Windows OS when you want to install 4GB or more memory on the motherboard For single channel configuration you may install one double sided DIMM in any of the four sockets OR install two single side DIMMs in DIMM_A1 and DIMM_A2 or ...

Page 26: ...kingmax KKB8FNUXF DXX 18A 6 6 6 24 1 9V Kingston KHX8500D2K2 1G 1024MB Kit of 2 SS N A Heat Sink Package 5 5 5 15 2 2V Kingston KHX8500D2K2 1GN EPP 1024MB Kit of 2 SS Kingston Heat Sink Package 5 5 5 18 1 8V Kingston KHX8500D2K2 2GN EPP 1024MB DS Kingston Heat Sink Package 5 5 5 18 1 8V Kingston KVR1066D2N7 1G 1024MB DS Elpida E5108AJBG 1J E 7 1 8V Kingston KHX8500D2K2 2G 2048MB Kit of 2 DS N A He...

Page 27: ...DS G SKILL Heat SinkPackage 4 G SKILL F2 6400CL5D 2GBNQ 1024MB DS G SKILL Heat SinkPackage 5 G SKILL F2 6400CL4D 4GBPK 2048MB DS G SKILL Heat SinkPackage 4 G SKILL F2 6400CL5D 4GBPQ 2048MB DS G SKILL Heat SinkPackage 5 G SKILL F2 6400CL6Q 16GMQ 4096MB DS N A Heat SinkPackage 5 GEIL GB22GB6400C4DC 1024MB DS GEIL GL2L64M088BA30EB 5 GEIL GB22GB6400C5DC 1024MB DS GEIL GL2L64M088BA30EB 5 GEIL GB24GB640...

Page 28: ...nda HY818T1G800C2F 2 5 5 Samsung K4T51083QG HCF7 512MB SS Qimonda M378T6553GZS CF7 6 Samsung K4T1G084QQ HCF7 1024MB SS Qimonda M378T2863QZS CF7 6 Samsung K4T1G084QQ HCF7 2048MB DS Samsung M37875663QZ3 CF7 6 Samsung M378T5263AZ3 CF7 4096MB DS Samsung K4T2G084QA HCF7 Super Talent T800UB1GC4 1024MB DS Super Talent Heat SinkPackage 4 Transcend TS64MLQ64V8J 512MB SS Micron 7HD22D9GMH 5 Transcend JM800Q...

Page 29: ...1G 1024MB DS Kingston SO1280420822SOPD6408TR 4CGL25USL156304PECXA 5 1 8V Kingston KVR667D2N5 2G 2048MB DS Micron 7RE22D9HNL 5 5 5 15 2 0V Kingston KVR667D2N5 2G 2048MB DS ELPIDA E1108ACBG 8E E0813A90CC 5 1 8V Micron MT8HTF12864AY 667E1 1024MB SS Micron D9HNL7ZE17 5 PSC AL6E8E63J 6E1 512MB SS PSC A3R12E3JFF717B9A00 5 PSC AL7E8F73C 6E1 1024MB SS PSC A3R1GE3CFF734MAA0J 5 PSC AL6E8E63J 6E1 1024MB DS P...

Page 30: ...upport asus com for the latest QVL Vendor Part No Size SS DS Brand ChipNO Timing DIMM BIOS Voltage DIMM Support A B C MDT DDRII512PC667 512MB DS MDT 18D51201D 30726E 4 MDT MDT1024MB 1024MB DS MDT 18D51280D 30646E 4 TAKEMS TMS51B264C081 665AP 512MB SS takeMS MS18T51280 3S0627D 5 TAKEMS TMS51B264C081 665QI 512MB SS takeMS MS18T51280 3 5 TAKEMS TMS1GB264C081 665AE 1024MB DS takeMS MS18T51280 3SEA0710...

Page 31: ...ps snap back in place and the DIMM is properly seated 1 Unlock a DDR2 DIMM socket by pressing the retaining clips outward 2 Align a DIMM on the socket such that the notch on the DIMM matches the break on the socket Locked Retaining Clip Make sure to unplug the power supply before adding or removing DIMMs or other system components Failure to do so may cause severe damage to both the motherboard an...

Page 32: ...gure shows a network card installed on the PCI Express x1 slot 2 6 3 PCI Express x16 slot This motherboard supports PCI Express x16 graphic cards that comply with the PCI Express specifications The figure shows a graphics card installed on the PCI Express x16 slot 2 6 Expansion slots In the future you may need to install expansion cards The following sub sections describe the slots and the expansi...

Page 33: ...completely seated on the slot 5 Secure the card to the chassis with the screw you removed earlier 6 Replace the system cover 2 6 5 Configuring an expansion card After installing the expansion card configure it by adjusting the software settings 1 Turn on the system and change the necessary BIOS settings if any See Chapter 5 for information on BIOS setup 2 Assign an IRQ to the card 3 Install the so...

Page 34: ...l and power plugs to the connectors at the back of the drive For IDE ODD Connect the IDE signal and power plugs to the connectors at the back of the drive 2 3 3 SATA IDE 4 1 Locate the 3 5 inch hard disk drive bay 2 Insert the hard disk drive to the 3 5 inch hard disk drive bay then carefully push the drive until its screw holes align with the holes on the bracket 3 Secure the hard disk drive with...

Page 35: ... right side of the chassis 2 Swing the front panel assembly to the left then insert the hooks to the chassis until the front panel assembly fits in place 3 Insert the six side cover hooks into the chassis tab holes 4 Push the side cover to the direction of the front panel until it fits in place 5 Secure the cover with two screws you removed earlier Air duct 5 5 3 4 1 2 1 1 2 2 2 Chassis tab holes ...

Page 36: ...2 20 Chapter 2 Basic installation ...

Page 37: ...This chapter helps you power up the system and install drivers and utilities from the support DVD Chapter 3 Starting up ...

Page 38: ...m features 3 2 Powering up Press the system power button to enter the OS Because motherboard settings and hardware options vary Refer to your OS documentation for more information Ensure that you install Windows XP Service Pack 3 Windows Vista Service Pack 1 before installing the drivers for better compatibility and system stability Screen display and driver options may not be the same for differe...

Page 39: ...lick the ASSETUP EXE to run the DVD Click an item to install Click an icon to display support DVD motherboard information ASUS InstAll Launches the ASUS InstAll driver installation wizard Intel Chipset Inf Update Program Installs the Intel chipset Inf update program Intel Graphics Accelerator Driver Installs the Intel Graphics accerlerator driver Realtek Audio Driver Installs the Realtek audio dri...

Page 40: ...load the latest version of the BIOS from the ASUS website Before using the ASUS Update make sure that you have an Internet connection so you can connect to the ASUS website ASUS AI Manager Installs the ASIS AI Manager Adobe Reader 8 Installs the Adobe Reader that allows you to open view and print documents in Portable Document Format PDF ASUS Express Gate Installer Installs the ASUS Express Gate F...

Page 41: ... user guide 3 3 4 Other information The icons on the top right corner of the screen give additional information on the motherboard and the contents of the support DVD Click an icon to display the specified information Motherboard Info Displays the general specifications of the motherboard 1024 KBytes 08 13 2009 0205 American Megatrends Inc Rev X 0x G1 P5G43 ASUSTeK Computer INC ...

Page 42: ...3 6 Chapter 3 Starting up Browse this DVD Displays the support DVD contents in graphical format Filelist Displays the contents of the support DVD and a brief description of each in text format ...

Page 43: ...This chapter gives information about he motherboard that comes with the system This chapter includes the motherboard layout jumper settings and connector locations Chapter 4 Motherboard info ...

Page 44: ...board info 4 1 Introduction The G1 P5G43 barebone system comes with an ASUS motherboard This chapter provides technical information about the motherboard for future upgrades or system reconfiguration 4 2 Motherboard layout ...

Page 45: ...rance reinstall the battery You do not need to clear the RTC when the system hangs due to overclocking For system failure due to overclocking use the CPU Parameter Recall C P R feature Shut down and reboot the system then the BIOS automatically resets parameter settings to default values Due to the chipset limitation AC power off is required before you use the C P R function You must turn off and ...

Page 46: ...ower supply in reduced power mode USBPW1 6 is for the rear USB ports USBPW7 12 is for the internal USB connectors that you can connect to additional USB ports 3 Keyboard power 3 pin KBPWR This jumper allows you to enable or disable the keyboard wake up feature When you set this jumper to pins 2 3 5VSB you can wake up the computer by pressing a key on the keyboard the default is the Space Bar s Thi...

Page 47: ... on the fan connectors Only the 4 pin CPU fan connector supports the ASUS Q FAN feature 1 CPU chassis and power fan connectors 4 pin CPU_FAN 3 pin CHA_FAN 3 pin PWR_FAN The fan connectors support cooling fans of 350 mA 2000 mA 24 W max or a total of 1 A 7 A 84 W max at 12V Connect the fan cables to the fan connectors on the motherboard ensuring that the black wire of each cable matches the ground ...

Page 48: ...s a minimum power of 400 W Do not forget to connect the 4 pin ATX12V power plug Otherwise the system will not boot We recommend that you use a PSU with a higher power output when configuring a system with more power consuming devices or when you intend to install additional devices The system may become unstable or may not boot up if the power is inadequate 3 Digital audio connector 4 1 pin SPDIF_...

Page 49: ...rial ATA signal cables for Serial ATA hard disk drives 5 Optical drive audio connector 4 pin CD These connectors allow you to receive stereo audio input from sound sources such as a CD ROM TV tuner or MPEG card Install the Windows XP Service Pack 2 or later version before using Serial ATA ...

Page 50: ...ure your device Pin 20 on the IDE connector is removed to match the covered hole on the Ultra DMA cable connector This prevents incorrect insertion when you connect the IDE cable Use the 80 conductor IDE cable for Ultra DMA 133 100 66 IDE devices If any device jumper is set as Cable Select ensure that all other device jumpers have the same setting Drive jumper setting Mode of device s Cable connec...

Page 51: ...ctor The IDE LED lights up or flashes when data is read from or written to the HDD System warning speaker 4 pin SPEAKER This 4 pin connector is for the chassis mounted system warning speaker The speaker allows you to hear system beeps and warnings ATX power button soft off button 2 pin PWRSW This connector is for the system power button Pressing the power button turns the system on or puts the sys...

Page 52: ... chassis These USB connectors comply with USB 2 0 specification that supports up to 480 Mbps connection speed Never connect a 1394 cable to the USB connectors Doing so will damage the motherboard The USB module cable is purchased separately 9 LPT connector 26 1 pin LPT The LPT Line Printing Terminal connector supports devices such as a printer LPT standardizes as IEEE 1284 which is the parallel po...

Page 53: ...ule cable to this connector We recommend that you connect a high definition front panel audio module to this connector to avail of the motherboard s high definition audio capability 11 Serial port connectors 10 1 pin COM1 The connector is for a serial COM port Connect the serial port module cable to the connector then install the module to a slot opening at the back of the system chassis The seria...

Page 54: ...4 12 Chapter 4 Motherboard info ...

Page 55: ...BIOS setup This chapter tells how to change system settings through the BIOS Setup menus and describes the BIOS parameters Chapter 5 ...

Page 56: ...date BIOS from the Internet then click Next b Select the ASUS FTP site nearest you to avoid network traffic or click Auto Select then click Next c From the FTP site select the BIOS version that you wish to download then click Next The ASUS Update utility is capable of updating itself through the Internet Always update the utility to avail all its features 5 1 1 ASUS Update utility The ASUS Update ...

Page 57: ...gram Go to the Tools menu to select EZ Flash 2 and press Enter to enable it Press Tab to switch between drives until the correct BIOS file is found ASUSTek EZ Flash 2 BIOS ROM Utility V3 36 Current ROM Update ROM A Note FLASH TYPE WOINBOND W25X80 PATH A BOARD P5QL VM EPU VER 0206 H 00 B 02 DATE 07 10 2009 BOARD Unknown VER Unknown DATE Unknown Enter Select or Load Tab Switch V Drive Info Up Down H...

Page 58: ...r motherboards without the floppy connector prepare a USB flash disk before using this utility Recovering the BIOS To recover the BIOS 1 Turn on the system 2 Insert the support DVD to the optical drive or the removable device that contains the BIOS file to the USB port or to the floppy disk drive if supported 3 The utility automatically checks the devices for the BIOS file When found the utility r...

Page 59: ...iled to enter BIOS Setup using the first two options Using the power button reset button or the Ctrl Alt Del keys to force reset from a running operating system can cause damage to your data or system We recommend to always shut down the system properly from the operating system The default BIOS settings for this motherboard apply for most conditions to ensure optimum performance If the system bec...

Page 60: ...e right or left arrow key on the keyboard until the desired item is highlighted 5 2 1 BIOS menu screen Select Screen Select Item Change Field Tab Select Field F1 General Help F10 Save and Exit ESC Exit v02 61 C Copyright 1985 2009 American Megatrends Inc System Time 00 31 48 System Date Tue 07 28 2009 SATA 1 Not Detected SATA 2 Not Detected SATA 3 Not Detected SATA 4 Not Detected SATA 5 Not Detect...

Page 61: ...p up window Select a menu item then press Enter to display a pop up window with the configuration options for that item 5 2 8 Scroll bar A scroll bar appears on the right side of a menu screen when there are items that do not fit on the screen Press the Up Down arrow keys or Page Up Page Down keys to display the other items on the screen 5 2 9 General help At the top right corner of the menu scree...

Page 62: ... system time 5 3 1 System Time xx xx xx Allows you to set the system time 5 3 2 System Date Day xx xx xxxx Allows you to set the system date 5 3 3 SATA1 6 While entering Setup the BIOS automatically detects the presence of SATA devices There is a separate sub menu for each SATA device Select a device item then press Enter to display the SATA device information The BIOS automatically detects the va...

Page 63: ...lects the PIO mode Configuration options Auto 0 1 2 3 4 DMA Mode Auto Selects the DMA mode Configuration options Auto SMART Monitoring Auto Sets the Smart Monitoring Analysis and Reporting Technology Configuration options Auto Disabled Enabled 32Bit Data Transfer Enabled Enables or disables 32 bit data transfer Configuration options Disabled Enabled 5 3 4 Storage Configuration The items in this me...

Page 64: ...he auto detected system memory IDE Detect Time Out Sec 35 Selects the time out value for detecting ATA ATAPI devices Configuration options 0 5 10 15 20 25 30 35 Due to Intel chipset driver support regulation the AHCI mode is not supported in Windows XP environment The AHCI mode is only supported by Windows Vista with OS built in driver Hard Disk Write Protect Disabled Disables or enables device wr...

Page 65: ... clock and the FSB frequency If an invalid ratio is set in CMOS then the actual and set values may differ Key in ratio numbers directly C1E Support Enabled Allows you to enable or disable C1E Support Configuration options Disabled Enabled Max CPUID Value Limit Disabled Setting this item to Enabled allows legacy operating systems to boot even without support for CPUs with extended CPUID functions C...

Page 66: ...s you to change the advanced chipset settings Select an item then press Enter to display the submenu North Bridge Configuration Memory Remap Feature Enabled Allows you to enabled or disable the remapping of the overlapped PCI memory above the total physical memory Enable this option only when you install 64 bit operating system Configuration options Disabled Enabled Configure DRAM Timing by SPD En...

Page 67: ...Option ROM Disabled Allows you to enable or disable the boot ROM in the onboard LAN controller This item appears only when the Onboard LAN item is set to Enabled Configuration options Disabled Enabled JMB368 Controller Disabled Allows you to enable or disable the JMB368 controller Configuration options Enabled Disabled Serial Port1 Address 3F8 IRQ4 Allows you to select the Serial Port1 base addres...

Page 68: ...egacy USB storage devices including USB flash drives and USB hard drives Setting to Auto allows the system to detect the presence of USB devices at startup If detected the USB controller legacy mode is enabled If no USB device is detected the legacy USB support is disabled Configuration options Disabled Enabled Auto USB 2 0 Controller Mode HiSpeed Allows you to configure the USB 2 0 controller in ...

Page 69: ...low you to change the advanced settings for PCI PnP devices The menu includes setting IRQ and DMA channel resources for either PCI PnP or legacy ISA devices and setting the memory size block for legacy ISA devices Take caution when changing the settings of the PCI PnP menu items Incorrect field values can cause the system to malfunction Plug and Play O S No When set to No BIOS configures all the d...

Page 70: ...state the system appears suspended and stays in a low power mode The system can be resumed at any time S3 Only Enables the system to enter the ACPI S3 Suspend to RAM sleep state default In S3 sleep state the system appears to be off and consumes less power than in the S1 state When signaled by a wake up device or event the system resumes to its working state exactly where it was left off Auto Dete...

Page 71: ...is parameter allows you to wake the system through a PCI LAN or modem card This feature requires an ATX power supply that provides at least 1A on the 5VSB lead Configuration options Disabled Enabled Resume On PCIE Devices Disabled When set to Enabled this parameter allows you to wake the system through a PCI Express card This feature requires an ATX power supply that provides at least 1A on the 5V...

Page 72: ...monitor automatically detects and displays the Chassis fan speed in rotations per minute RPM If the fan is not connected to the motherboard the field shows N A Select Ignored if you do not wish to display the detected speed Power Fan Speed Ignored or N A The onboard hardware monitor automatically detects and displays the Power fan speed in rotations per minute RPM If the fan is not connected to th...

Page 73: ...ooting to decrease the time needed to boot the system When set to Disabled BIOS performs all the POST items Configuration options Disabled Enabled Full Screen Logo Enabled This allows you to enable or disable the full screen logo display feature Configuration options Disabled Enabled 5 6 Boot menu The Boot menu items allow you to change the system boot options Select an item then press Enter to di...

Page 74: ...ge the supervisor password The Supervisor Password item on top of the screen shows the default Not Installed After you set a password this item shows Installed To set a Supervisor Password 1 Select the Change Supervisor Password item and press Enter 2 On the password box key in a password containing up to six letters or numbers or both then press Enter 3 Confirm the password when prompted The mess...

Page 75: ...user password The User Password item on top of the screen shows the default Not Installed After you set a password this item shows Installed To set a User Password 1 Select the Change User Password item and press Enter 2 On the password box key in a password containing up to six letters or numbers or both then press Enter 3 Confirm the password when prompted The message Password Installed appears ...

Page 76: ...read only 3 CD DISC read only BIOS SETUP UTILITY Main Advanced Power Boot Tools Exit 5 7 1 ASUS EZ Flash 2 Allows you to run ASUS EZ Flash 2 When you press Enter a confirmation message appears Use the left right arrow key to select between Yes or No then press Enter to confirm your choice Please see section 5 1 2 for details 5 7 2 AI NET 2 Check Realtek LAN cable Disabled Enables or disables check...

Page 77: ...at you made to the Setup program If you made changes to fields other than System Date System Time and Password the BIOS asks for a confirmation before exiting Discard Changes This option allows you to discard the selections you made and restore the previously saved values After selecting this option a confirmation appears Select OK to discard any changes and load the previously saved values Load S...

Page 78: ...5 24 Chapter 5 BIOS setup ...

Reviews: