5-6
Chapter 5: AMD
®
CrossFireX™ technology support
Chapter 5
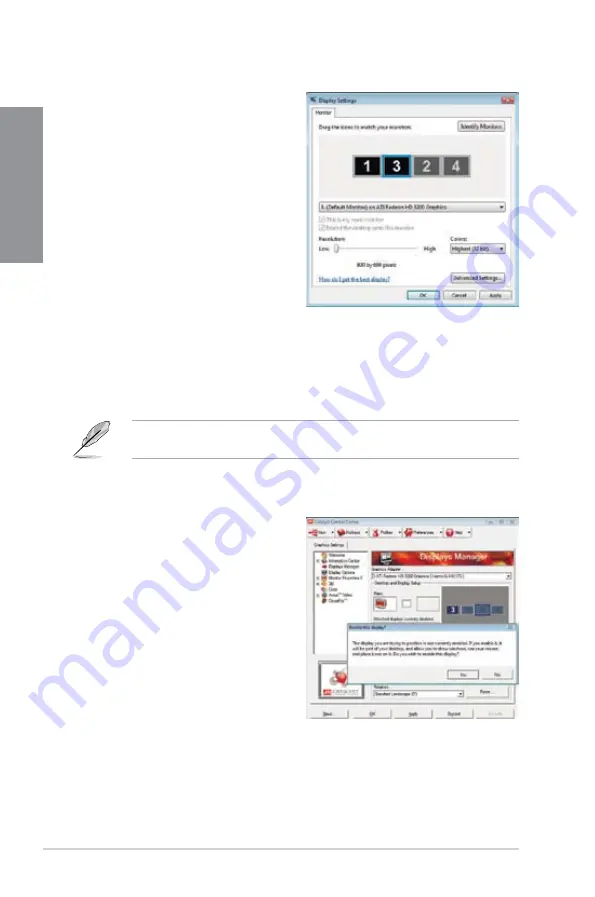
1. Follow steps 1 to 3 on
Using the onboard graphics card
.
2.
From the AMD CATALYST(R) Control
Center screen, click
Display Manager
>
Graphics Adapter
. Select
AMD
Radeon HD 4250 Graphics [Gabbs, G
HW173]
. Click
OK
, and then
Yes
from
the confirmation window.
3.
Follow steps 6 to step 8 on
Using the
onboard graphics card
to complete
the process of setting up the onboard
graphics card as your main monitor.
If you are using both an add-on and the on-board graphics cards at same time and want to
set the onboard graphics card as your main monitor, follow the below instructions.
4.
Right-click on the Windows
®
desktop,
then click
Personalize
from the shortcut
menu.
5. Click
Display Settings
. Select
[Default
Monitor] on ATI Radeon HD 4250
Graphics
, then select the check boxes
of
This is my main monitor
and
Extend the desktop onto this monitor
.
Click
OK
, and then
Yes
from the
confirmation window.
6.
Restart the system. Right-click on the
Windows
®
desktop, then click
AMD
CATALYST(R) Control Center
from the
shortcut menu. The AMD CATALYST
Control Center screen appears.
7.
Click
Graphics Settings
>
CrossFire™
, then select the
Enable CrossFire™
check
box. When a confirmation pops up, click
Yes
. The screen blacks out for about one
minute.
8.
Click
OK
. The onboard graphics card is set to be the main monitor.
Summary of Contents for F1A75-V PRO
Page 1: ...Motherboard F1A75 V PRO ...
Page 14: ...xiv ...
Page 20: ...1 6 Chapter 1 Product Introduction Chapter 1 ...
Page 58: ...2 38 Chapter 2 Hardware information Chapter 2 ...
Page 92: ...3 34 Chapter 3 BIOS setup Chapter 3 ...


