


FINAL RADIO SYSTEM INSTALLATION
1. Whether you 72 MHz systems or the newer 2.4 GHz systems, proper radio installation and care is vital
to the safe and reliable operation of your aircraft. Follow the manufacturer’s instruction for installation
guidance of receivers and batteries paying attention to factors such as vibration isolation, adequate cooling,
and clearances.
2. Mount your reciever(s) securely in a location which provides a clean and maintenance free solution to
your setup. All servo wires should be neatly routed and secured in place so they will not come loose or
flop around during flight.
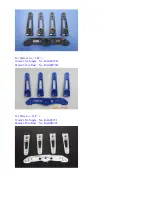
3. The fuselage ply sides provide space to mount your switches just below the canopy. Mount your
switches according to the manufacturer’s instructions and route your wires safely and securely as above.
4. Your receiver battery(s) can be mounted in a variety of locations depending on your balance needs.
Regardless of where you mount your batteries it is vital that they are very secure with no possibility of
coming loose. Use double sided velcro to hold the batteries from sliding around and then use zip ties or
velcro straps to secure them tightly in place.
5. Servo and battery leads are the life blood of your aircraft. Make sure all wires are top quality and
connectors are tight and display no loose pins or frayed wires. Servo clips are provided in the kit for your
convenience. These servo clips can even be glued to the wood structure using CA if desired.
6. Check all radio programming and control surface operations thouroughly before your initial flight.
Check your radio range according to the radio manufacturer’s instructions both with the engine off and
running.
BALANCING and PRE-FLIGHT
1.
Most state of the art aerobatic aircraft allow for a wide margin for balancing depending on what level of
precision or freestyle the pilot prefers. To perform properly without being too pitch sensitive, you must
not go too aft on the CG.
We recommends an initial CG setting of 107-126mm(4.2-5 inches) behind
the leading edge of the wing at the root.
More experienced pilots may want to set the CG further aft
for more 3D capability. Varying weights of engines and radio gear will dictate how you should install
each. The batteries can easily be located pretty much anywhere in the fuselage.
Note:
The best way to check your balance is to trim for level flight at about 1/2 to 3/4 throttle and then
roll inverted. The aircraft should maintain level flight with very little to no down elevator input. If the
aircraft climbs when inverted then you’ve probably got your CG too far aft. If the nose drops more than
slightly, then you are most likely nose heavy.
Summary of Contents for SLICK540 120E
Page 1: ...ARF MODEL 74in SLICK540 30CC 120E Instruction Manual ...
Page 9: ... Larger carbon fiber wing tube diameter than V1 Previous versions Scheme A Yellow white black ...
Page 10: ...Scheme B Red white black ...
Page 40: ......
Page 46: ... 3in Nylon Spinner with Aluminium Backplate No KAG0197 ...