


Arcserve
UDP
8100 and
UDP
8200 Appliance Hardware Installation Guide
16
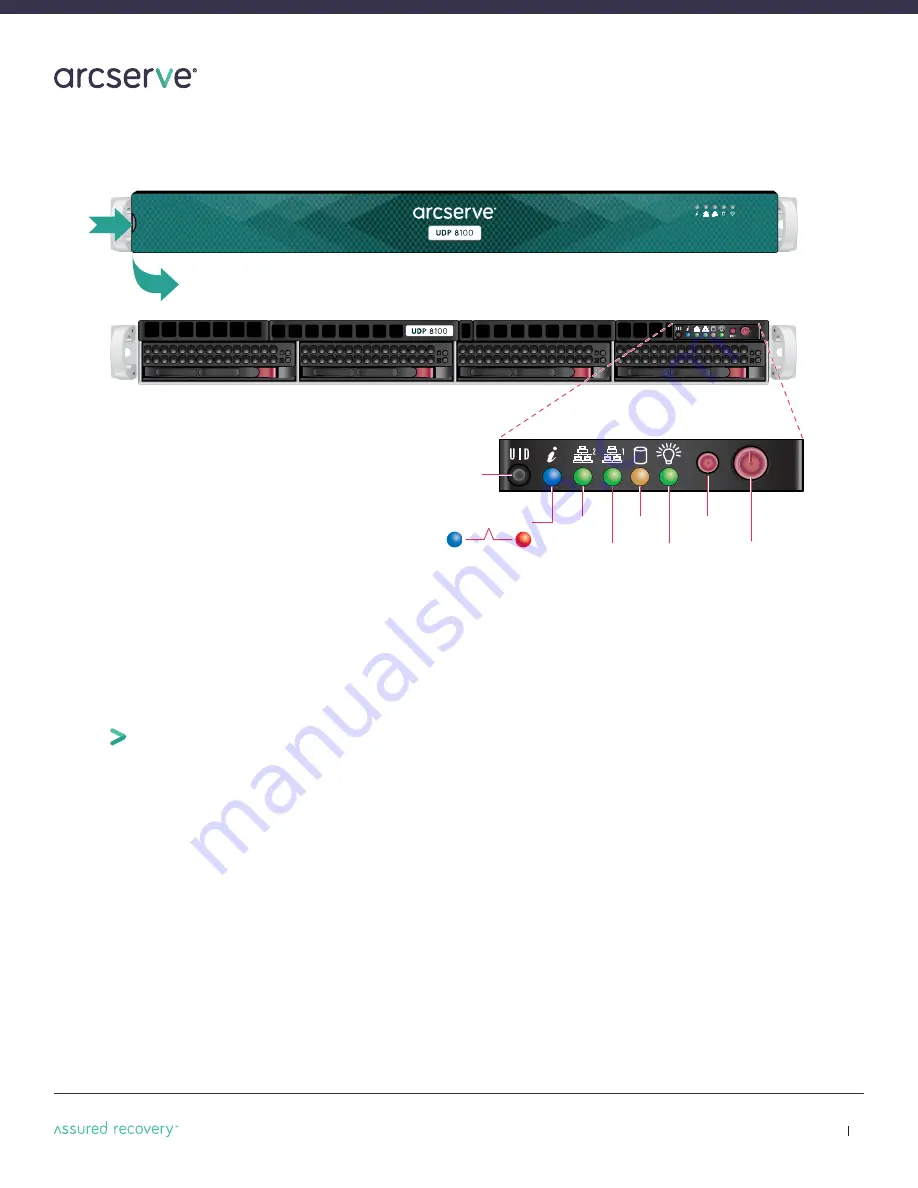
12. Front Panel Operation
HDD LED
NIC2 LED
Power LED
NIC1 LED
I/O Power
Button
Reset Button
Multi-function LED
Blue LED
System identification
indicator
Red LED
System alert
indicator
Unit ID Button
2
1
Power on the appliance
n
Re
m
ove the front bezel (
i
f
i
nstalled
on the appl
i
ance) by press
i
ng
i
n on
the left s
i
de of the bezel to release
i
t
fro
m
the appl
i
ance .
n
Press the po
w
er button located on
the far r
i
ght on the front s
i
de of the
appl
i
ance.
n
Once the syste
m
has been po
w
ered
on, replace the bezel.
13. Run Arcserve UDP Appliance Wizard
1.
When po
w
er
i
s
i
n
i
t
i
ally appl
i
ed to the appl
i
ance, the Arcserve UDP Appl
i
ance W
i
zard
i
s launched.
N
av
i
gate
through each page of the
wi
zard. For
m
ore
i
nfor
m
at
i
on about the
wi
zard, see the Arcserve UDP Appl
i
ance
User Gu
i
de (
arcserve.com/udp-appliance-userguide
) or v
i
e
w
the v
i
deo at:
arcserve.com/udp-appliance-wizard-video
.
Note:
After select
i
ng the Operat
i
ng Syste
m
language, a screen to enter W
i
ndo
w
s l
i
cen
s
e
m
ay co
m
e up.
Sk
i
p to
proceed here
, the OS
i
s already l
i
censed and act
i
vated.
The wizard lets you perform the following tasks:
n
Def
i
ne the Appl
i
ance host na
m
e.
n
Spec
i
fy LA
N
connect
i
ons for the Appl
i
ance.
n
Conf
i
gure e
m
a
i
l and alert sett
i
ngs.
n
Create protect
i
on plans.
A protect
i
on plan lets you def
i
ne source nodes, backup dest
i
nat
i
on,
and conf
i
gure a backup schedule.
Upon co
m
plet
i
on of the
wi
zard, Arcserve UDP launches the UDP console at the
dashboard
page.


