


OPC-5XX7 User Manual
88
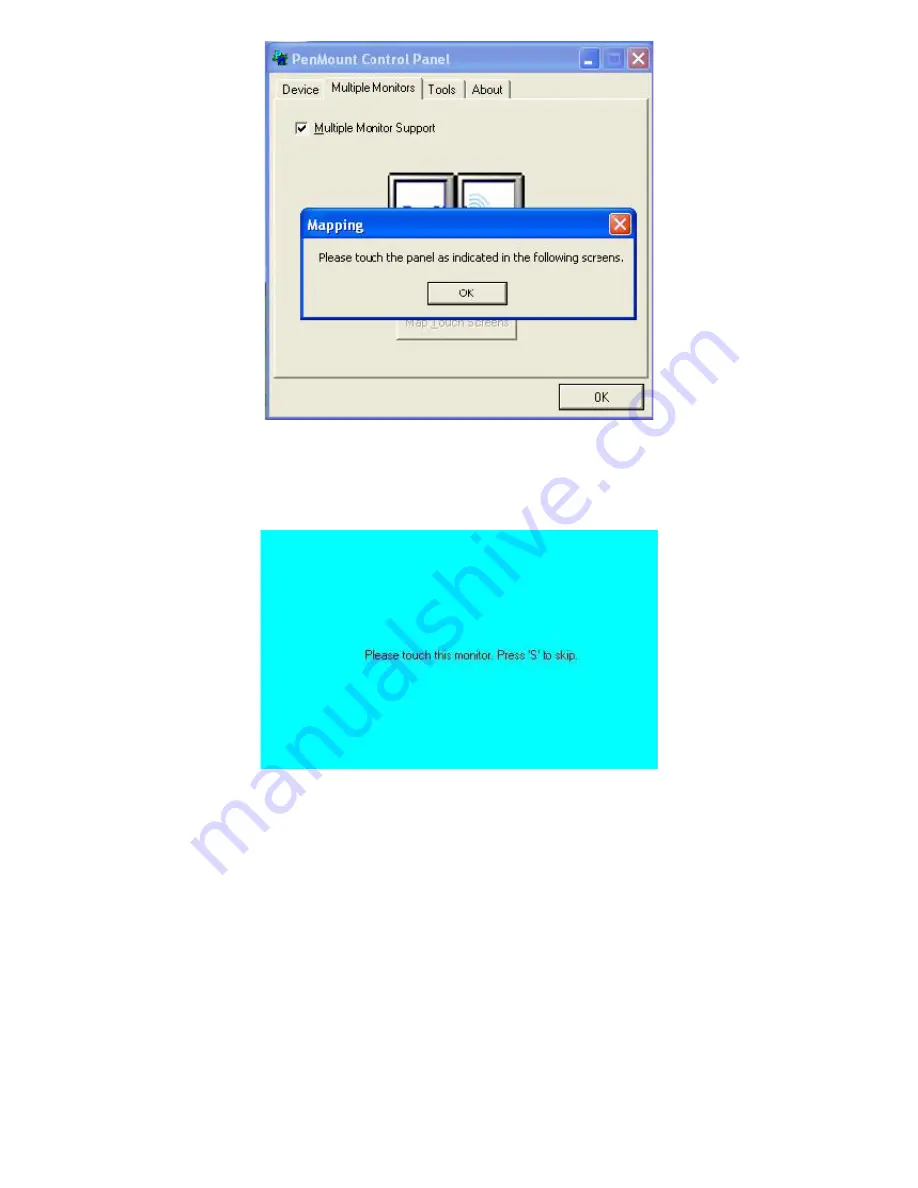
3. Touch each screen as it displays
“Please touch this monitor. Press ‘S’ to skip”
Following this
sequence and touching each screen is called
mapping the touch screens
.
4. After the setting procedure is finished, maybe you need to calibrate for each panel and controller
NOTES:
1. If you used a single VGA output for multiple monitors, please do not use the
Multiple Monitors
function. Just follow the regular procedure for calibration on each of your desktop monitors.
2. The Rotating function is disabled if you use the Multiple Monitors function.
3. If you change the resolution of display or screen address, you have to redo
Map Touch Screens
so
the system understands where the displays are.
4. If you more monitor mapping one touch screen,
Please press ‘S’ to skip mapping step.
Summary of Contents for OPC-5XX7
Page 8: ...OPC 5XX7 User Manual 8 1 3 Dimensions Figure 1 1 Dimensions of the OPC 5087 ...
Page 9: ...OPC 5XX7 User Manual 9 Figure 1 2 Dimensions of the OPC 5127 ...
Page 10: ...OPC 5XX7 User Manual 10 Figure 1 3 Dimensions of the OPC 5157 ...
Page 11: ...OPC 5XX7 User Manual 11 Figure 1 4 Dimensions of the OPC 5197 ...
Page 13: ...OPC 5XX7 User Manual 13 Step 4 That s how it should look after it has been installed ...
Page 16: ...OPC 5XX7 User Manual 16 Figure 2 2 Mainboard Dimensions ...
Page 17: ...OPC 5XX7 User Manual 17 ...
Page 18: ...OPC 5XX7 User Manual 18 Figure 2 3 Connector and Jumper Locations ...
Page 63: ...OPC 5XX7 User Manual 63 ...
Page 64: ...OPC 5XX7 User Manual 64 ...
Page 67: ...OPC 5XX7 User Manual 67 ...
Page 68: ...OPC 5XX7 User Manual 68 ...
Page 69: ...OPC 5XX7 User Manual 69 Click FINISH A Driver Installation Complete ...
Page 71: ...OPC 5XX7 User Manual 71 ...
Page 72: ...OPC 5XX7 User Manual 72 Click FINISH A Driver Installation Complete ...
Page 74: ...OPC 5XX7 User Manual 74 ...
Page 75: ...OPC 5XX7 User Manual 75 Click FINISH Audio Driver Installation Complete ...
Page 79: ...OPC 5XX7 User Manual 79 ...


