


6
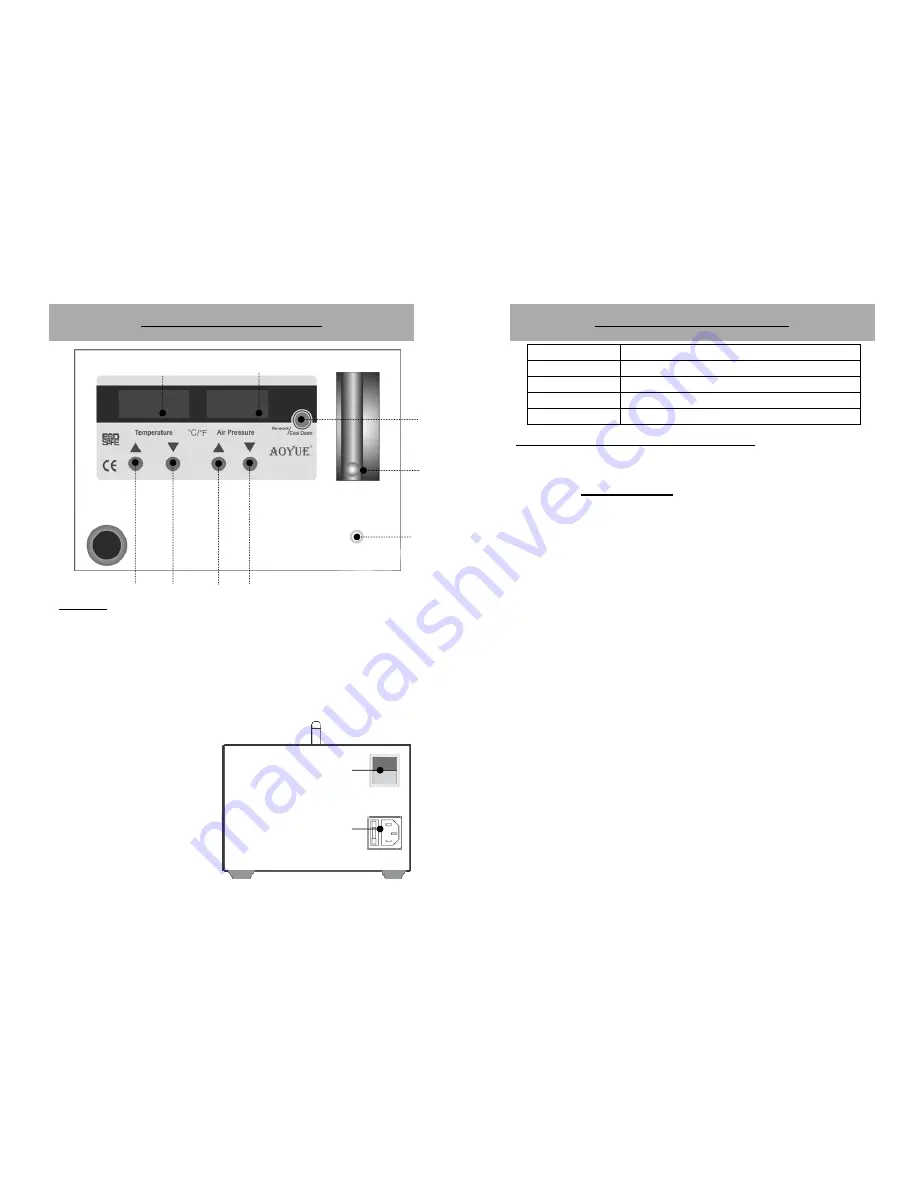
CONTROL PANEL GUIDE
LEGEND:
B1 - Temperature Display
B2 -
Airflow Level Display
C1 -
Temperature Control (Up)
C2 -
Temperature Control (Down)
C3 -
Airflow Control (Up)
C4 -
Airflow Control (Down)
F
-
Hot Air Gun Function Switch
G - Airflow
Gauge
H -
Vacuum pen
Connector
(for
i852A++
only)
B1
B2
C1
H
G
Main Power Switch
Back Panel
AC Power Inlet with
Fuse
v
F
C2
C3 C4
11
OPERATING GUIDELINES
Selection Menu
Function
1
Hot Air Gun Sleep Timer
2 Temperature
Scale
Adjustment
3
AC Line Frequency Selection
4
Hot Air Gun Digital Offset
E. Activating Hot Air Gun Auto-Sleep Mode
The hot air gun’s SLEEP mode can be activated by following the
set of procedures below:
1. Follow System Settings procedures 1 to 6.
2. Adjust system selection menu to SEL 1, then press the air flow
control up button “C3”.
3. If successful the display “B1 and B2” would show “t 60”
indicating soldering iron sleep timer setting is being set.
4. Adjust the sleep timer with the air flow control buttons “C3 and
C4”, Sleep timer is adjustable from 5 to 60 minutes with “t OFF”
signifying sleep timer is turned off.
5. Save the selected timer settings and exit from the sleep timer
adjustment menu by pressing the Hot Air gun function switch
“F” .
6. If the sleep mode is activated the sleep timer will start counting
down once the hot air gun is placed securely on the hot air gun
holder. See: Hot air gun proper placement on page 12. The
display “B1” will show the letter “L” indicating the hot air gun
has been locked into position.
7. When the sleep timer expires, the system will start cooling down
the hot air gun by blowing air at maximum intensity while the
display shows a flashing OFF to signify hot air gun is currently
preparing to go into sleep mode. Once the hot air gun actual
temperature goes below 90 degrees, the display “B1 and B2”
would show “ - - - - - - -“ seven dashes indicating hot air gun is
now in sleep mode.


