-15-
2-4 Installation of option device
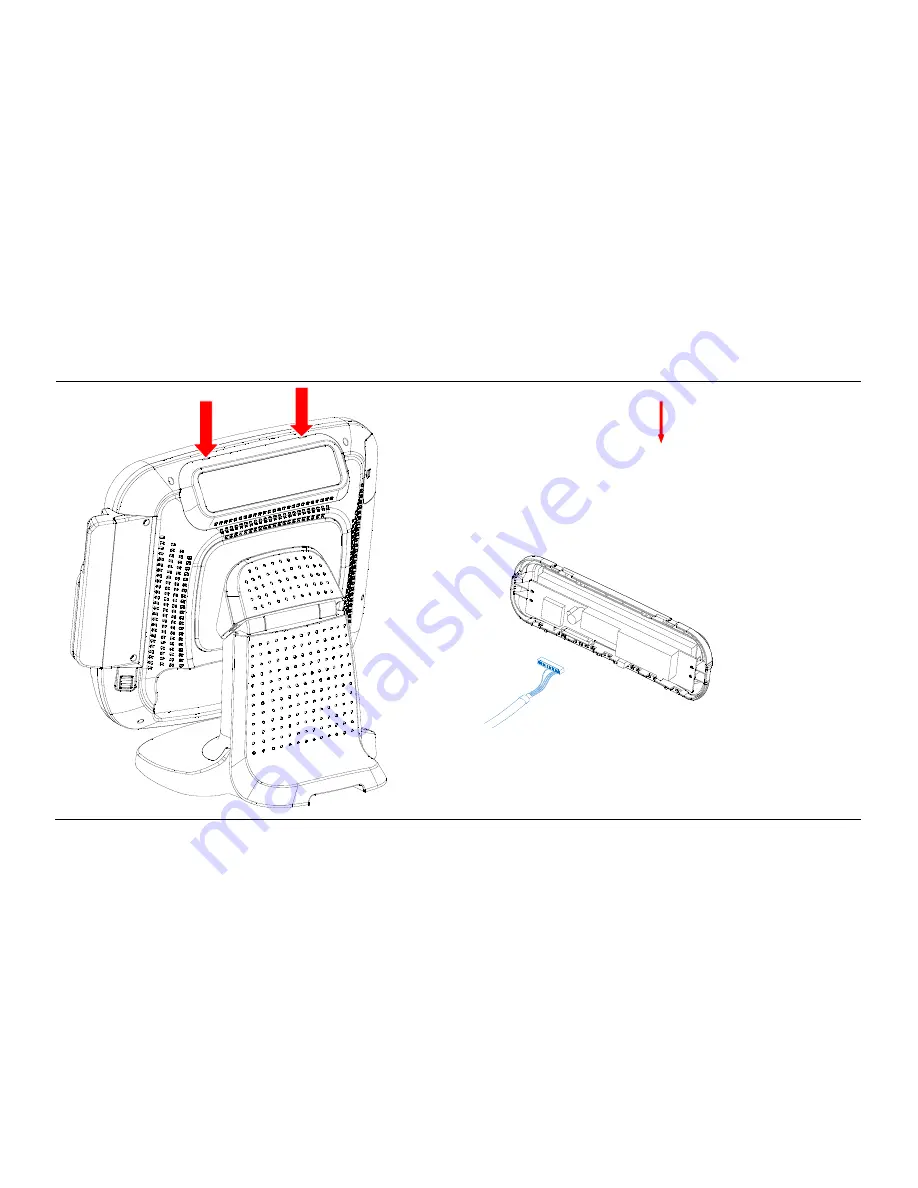
[CDP installation]
1.
Put (-) driver in the marked grooves : and split cover from the rear
of POS main unit.
2.
Connect cable from POS main unit to customer display(CDP) part and
place the display in customer display space.
3.
Testing : It is successfully connected for CDP installation to POS unit
when initial booting is on going after power off and on.
(CDP and 12 inch LCD monitor are used only with COM4 port on board.)
Summary of Contents for POS610
Page 1: ......
Page 9: ...9 Packing details AnyShop main unit Driver CD User manual Power code...
Page 10: ...10 Options 12 inch LCD Monitor Front Rear Customer display Front Rear...
Page 13: ...13 Rear view CUSTOMER DISPLAY HDD I O PORT STAND USB PORT...
Page 22: ...22 Speaker and MIC connection 1 Speaker connection 2 MIC connection...
Page 23: ...23 Printer connection Connect printer cable among Serial Parallel and USB port you required...
Page 36: ...36 3 4 Advanced chipset features...
Page 49: ...49 3 9 Set password You can set password It is able to enter change the options of setup menus...
Page 56: ...56 Chapter 5 Motherboard jumper setting 5 1 Motherboard jumper setting...
Page 57: ...57...
Page 61: ...61 5 4 CMOS Clear 3 2 1 Protect CMOS 3 2 1 Clear CMOS...
Page 64: ...64 3 Pull out main unit from the stand 4 Complete main unit dissection...


