


12
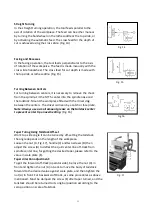
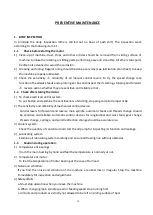
Taper Turning by Setting top Slide
By angle the top slide, tapers may be turned manually with the
Top slide ( Fig. 18 ).
Rotate the top slide to the required angle. A graduated scale
permits accurate adjustment of the top slide. The cross feed is
performed with the cross slide. This method can only be used for
short tapers.
Fig. 18
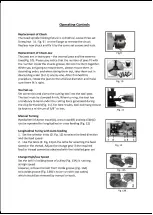
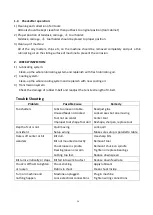
Threads Cutting
Set the machine up to the desired thread pitch (according to the
Thread chart Fig. 7). Start the machine and engage the half nut.
When the tool reaches the part, it will cut the initial threading
pass. When the tool reaches the end of cut, stop the machine by
turning the motor off and at the same time back the tool out of
the part so that it clears the thread. Do not disengage the half
nut lever. Reverse the motor direction to allow the cutting tool
to traverse back to the starting point. Repeat these steps until
you have obtained the desired results.
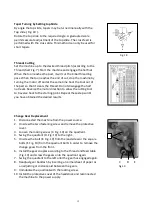
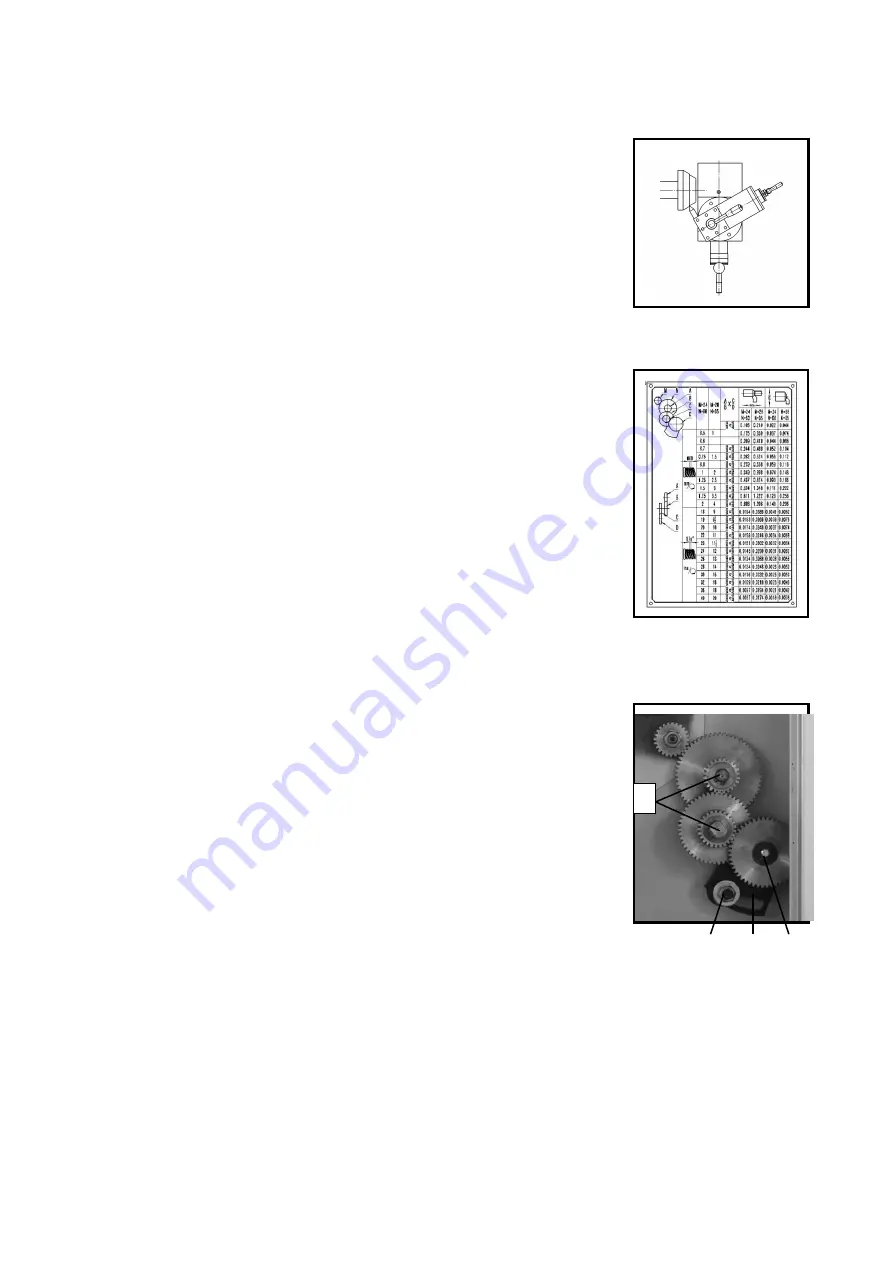
Change Gear Replacement
1.
Disconnected the machine from the power source.
2.
Unscrew the two fastening screw and remove the protective
cover.
3.
Loosen the locking screw (C. Fig. 19) on the quadrant.
4.
Swing the quadrant (D. Fig. 19) to the right.
5.
Unscrew the bolt (E. Fig. 19) from the leadscrew or the square
bolts (F. Fig. 19) from the quadrant bolts in order to remove the
change gears from the front.
6.
Install the gear couples according to the thread and feed table
(Fig. 19) and screw the gears onto the quadrant again.
7.
Swing the quadrant to the left until the gear has engaged again.
8.
Readjust gear backlash by inserting a normal sheet of paper as C D E
an adjusting or distance aid between the gears.
Fig.19
9.
Immobilize the quadrant with the locking screw.
10.
Install the protective cover of the headstock and reconnected
the machine to the power supply.
F
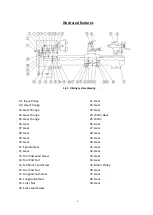
Summary of Contents for BL330E
Page 1: ......
Page 10: ...10 ...
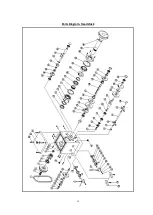
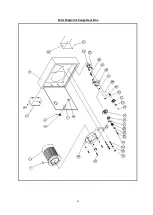
Page 14: ...14 Parts Diagram Headstock ...
Page 16: ...16 Parts Diagram Trestle ...
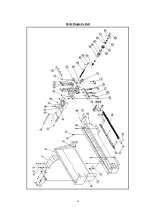
Page 18: ...18 Parts Diagram Bed ...
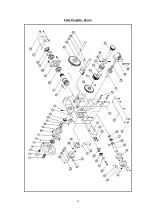
Page 20: ...20 Parts Diagram Apron ...
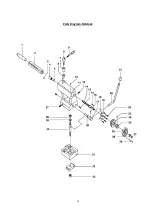
Page 22: ...22 Parts Diagram Tailstock ...


