UG-1757
Rev. 0 | Page 8 of 17
INITIAL CONFIGURATION
An initial configuration wizard is available when the
plugin opens that allows quick configuration of the
, the
DAC configuration register, and the DAC input register. Click
Apply
to initiate the configured settings in the order of the
recommended power-up sequence on the
data sheet.
SETTING THE DAC OUTPUT
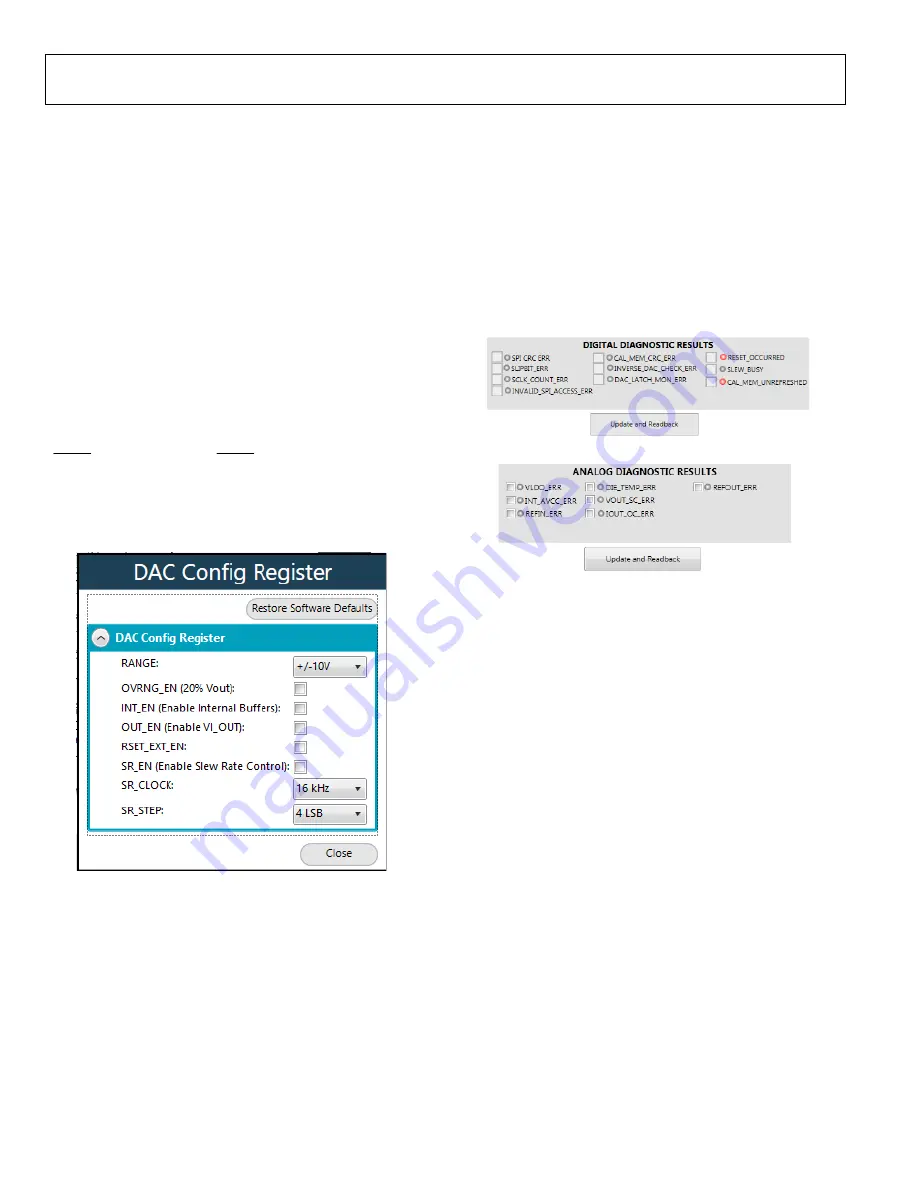
To configure the DAC output, use the
DAC Config Register
pop-up menu (see Figure 10). Click the
14 Bit DAC
button in
the block diagram (see Figure 8) to display the DAC
configuration register. Select the appropriate settings and click
Apply Changes
(see Figure 8). It is recommended to disable the
output until the proper value in the DAC input register is written
to the device.
To change the DAC voltage or current output level, write the
appropriate hexadecimal code to the DAC input register and
click
Apply Changes
. Click
SW LDAC
to issue a software
LDAC command or pull the LDAC pin low to update the DAC
output register with the values in the DAC input register. To
enable the DAC output, select the
OUT_EN (Enable VI_OUT)
check box and click
Apply Changes
. The programmed voltage
or current then reflects on the VI
OUT
pin.
2
314
6 -
010
DAC Config Register
Pop-Up Menu
UPDATING DIAGNOSTIC RESULTS
has a digital diagnostic results register and an analog
diagnostic results register that contain error flags for the on-
chip digital and analog diagnostic features. Write 1 to the
respective error flags to update the error flag status.
To update the digital and analog diagnostic result registers, click
Update and Readback
(see Figure 11 and Figure 12). The
Update and Readback
button initiates a write of 1 to the
selected check boxes and then reads back the updated diagnostic
result. Figure 11 shows the digital diagnostic results register.
Figure 12 shows the analog diagnostic results register.
23
14
6 -
1
11
Digital Diagnostic Results Register
2
314
6 -
0
1
1
Analog Diagnostic Results Register
EXAMPLE SEQUENCES
There are four example sequences available. Click the
Example
Sequences
button on the bottom left of the block diagram (see
Figure 8) and the window shown in Figure 13 opens. To enable
either of the sequences, click the relevant sequence button. The
sequence runs immediately and the output changes accordingly.
To return to the main window, click
Back to AD5413
.


