33
98-0155 Rev. C
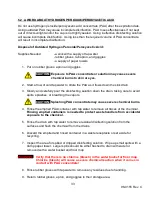
5.2 A WORD ABOUT HYDROGEN PEROXIDE/PEROXYACETIC ACID
Do not use hydrogen peroxide/peroxyacetic acid concentrate (PAA) after the expiration date.
Using outdated PAA may cause incomplete disinfection. PAA loses effectiveness if not kept
out of direct sunlight and/or the cap is not tightly sealed. Using ineffective disinfecting solution
will cause incomplete disinfection. Using less than the required volume of PAA concentrate
will result in incomplete disinfection.
Disposal of Outdated Hydrogen Peroxide/Peroxyacetic Acid:
Supplies Needed
- a sink with a supply of tap water
- rubber gloves, lab apron, and goggles
- a supply of paper towels
1. Put on rubber gloves, apron and goggles.
CAUTION:
Exposure to PAA concentrate or solution may cause severe
chemical burns to skin or eyes.
2. Start a flow of cold tap water to dilute the PAA as it flows down the sink drain.
3. Slowly and carefully pour the disinfecting solution down the drain, taking care to avoid
spills, splashes, or breathing the vapors.
CAUTION:
Splashing PAA concentrate may cause severe chemical burns.
4. Rinse the emptied PAA container with tap water to remove all traces of the chemical.
Rinsing emptied containers is needed to protect waste handlers from accidental
exposure to the chemical.
5. Rinse the drain with tap water to remove residual disinfecting solution from the
surfaces and flush the chemical from the drains.
6. Discard the emptied and rinsed container in a waste receptacle or set aside for
recycling.
7. Inspect the area for spilled or dripped disinfecting solution. Wipe up small spills with a
damp paper towel. Larger spills should be either flushed to drain with water or
removed with a water bucket and floor mop.
WARNING: Verify that there is no chlorine (bleach) in the water bucket or floor mop.
Chlorine (bleach) will cause a severe chemical reaction when it comes in
contact with PAA concentrate!
8. Rinse rubber gloves with tap water to remove any residues due to handling.
9. Return rubber gloves, apron, and goggles to their storage area.
Summary of Contents for MRO3Z
Page 2: ...98 0155 Rev C ...
Page 5: ...98 0155 Rev C ...
Page 13: ...8 98 0155 Rev C MRO7Z and MRO8Z CONFIGURATION SHOWN BELOW Figure 3 2 ...
Page 15: ...10 98 0155 Rev C 3 2 INTERNAL CABINET TOP AND SIDE VIEW Figure 3 3 ...
Page 16: ...11 98 0155 Rev C 3 3 INTERNAL CABINET TOP AND SIDE VIEW CONT Figure 3 4 ...
Page 18: ...13 98 0155 Rev C 3 4 ELECTRICAL DIAGRAM AND FIELD WIRING Figure 3 5 ...
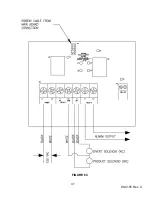
Page 19: ...14 98 0155 Rev C Fig Figure 3 6 ...
Page 20: ...15 98 0155 Rev C Figure 3 7 ...
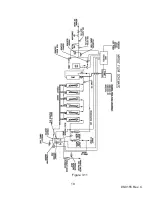
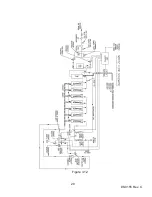
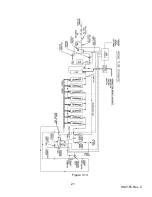
Page 21: ...16 98 0155 Rev C 3 5 FLOW DIAGRAMS Figure 3 8 ...
Page 22: ...17 98 0155 Rev C Figure 3 9 ...
Page 23: ...18 98 0155 Rev C Figure 3 10 ...
Page 24: ...19 98 0155 Rev C Figure 3 11 ...
Page 25: ...20 98 0155 Rev C Figure 3 12 ...
Page 26: ...21 98 0155 Rev C Figure 3 13 ...
Page 46: ...41 98 0155 Rev C FIGURE 6 3 ...

