36
18-CE15D1-1C-EN
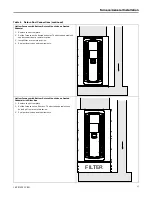
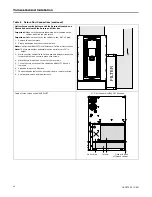
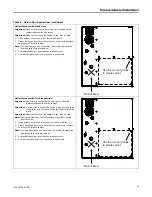
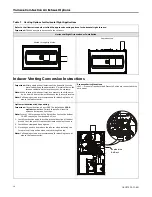
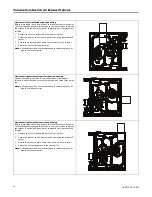
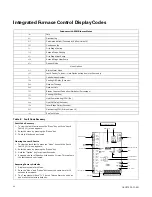
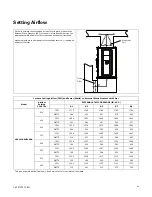
Table 7. Venting Options for Horizontal Right Applications
Refer to the illustrations below to find the approved venting options for horizontal right furnace.
Important:
The exhaust must be vented to the outdoors.
Horizontal Right Orientation or Installation
Vented through right side.
Vented out top.
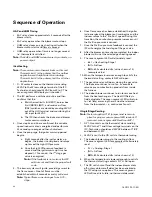
Inducer Venting Conversion Instructions
Important:
After deciding the orientation of the flue outlet, cut the
metal tabs around the appropriate 5” metal cutout on the
furnace cabinet and remove the cutout, if necessary.
Note:
When rotating the inducer it may be necessary to cut the wire
tie. A new wire tie must be installed once the inducer is rotated.
Note:
Self-tapping screws are recommended for attaching the vent
pipe to the inducer outlet.
Pressure Switch locations
L8V1 — Pressure Transducer and Pressure Switch are connected to the
hot header.
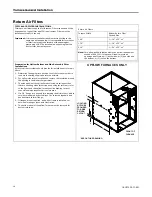
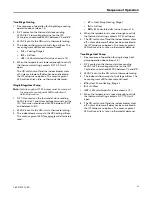
Upflow orientation with top venting
Important:
The combustion air duct MUST be installed on
C100
upflow
applications. Failure to install will result in
nuisance burner box limit trips.
Note:
Future C100 furnaces with the Burner Box limit on the bottom
DO NOT require the Combustion Air Duct.
1.
Install combustion air duct by sliding the split section of the duct
around the J-tube until it reaches the clearance hole of the duct.
2.
Install hose clamp and hand tighten.
3.
No changes need to be made to the inducer when installing the
furnace in upflow position when vented through the top.
Note:
Self-tapping screws are recommended for attaching the vent
pipe to the inducer outlet.
Combustion
Air Duct

