background image

33

16599 rev. B   pub. 11/07/2017

section 4


maintenance

BATTERY & ELECTRICAL

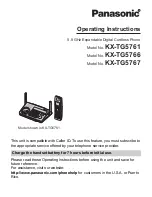
Battery Charging - 48V Models 

(Refer to Figure 4 .23)

• A charging port is located on the seat surround below the driver side of the bench 
  seat . Use an AWG 12 gauge cord to charge .
• The charger will come on and begin to charge on its own .
• A fully discharged battery set will take 9-12 hours to fully recharge .

Battery Charging - Gas Models

Use a trickle charger to maintain battery voltage as needed . 

Step by step watering procedure:

Battery Disposal

Lead-acid batteries are completely recyclable . Return whole scrap battery 
to distributor, manufacturer or lead smelter for recycling . For information on 
returning batteries to Trojan Battery Company for recycling call 800-423-6569 . For 
neutralized spills, place residue in acid-resistant containers with sorbent material, 
sand or earth and dispose of in accordance with local, state and federal regulations 
for acid and lead compounds . Contact local and/or state environmental officials 
regarding disposal information .

Fuse Locations 

(Refer to figures 4 .24, 4 .25 & 4 .26)

Your 48V Vehicle has fused protection for the main motor circuit, along with the 
low amperage 48 volt circuit, and the 12 volt circuit .  Shown in figure 4 .23 (next 
page) is the 500 amp main fuse .  This fuse will blow in the event of a short across 
the battery posts, or a catasatrophic failure in the motor or controller .  Should this 
fuse blow, it must be replaced with a like 500 amp fuse .  These fuses are available 
through your dealer .

The electrolyte is a solution of acid and water so skin 

contact should be avoided.

NEVER jump the battery with an automotive battery

REMEMBER: Always wear a safety shield

or approved safety goggles when adding

water or charging batteries.

WARNING

WARNING

WARNING

Fuse Replacement

Your unit is equipped with fuses to protect the electrical system from excessive 
load conditions . Units are equipped with 20 amp fuses located just forward of the 
engine .

Replace fuses by opening the sealed fuse holder . Remove fuses and replace . Close 
the fuse holder . Fuse replacement is part number 2-70029 .

FUSES


a . Open the vent caps and look inside the fill wells .

  b . Check electrolyte level; the minimum level is at the top of the plates .
  c . If necessary add just enough water to cover the plates at this time .
  d . Put batteries on a complete charge before adding any additional water
    (refer to the Charging section) .
  e . Once charging is completed, open the vent caps and look inside the fill wells . 
  f .  Add water until the electrolyte level is 1/8” below the bottom of the fill well .
  g . A piece of rubber can be used safely as a dipstick to help determine this level .
  h . Clean, replace, and tighten all vent caps .

figure 4 .23 (battery charging port)

Battery Watering

Flooded batteries need water . More importantly, watering must be done at the 
right time and in the right amount or else the battery’s performance and longevity 
suffers . Water should always be added after fully charging the battery . Prior to 
charging, there should be enough water to cover the plates . If the battery has been 
discharged (partially or fully), the water level should also be above the plates . 
Keeping the water at the correct level after a full charge will prevent having to 
worry about the water level at a different state of charge . Depending on the local 
climate, charging methods, application, etc . Trojan (the battery manufacturer) 
recommends that batteries be checked once a month until you get a feel for how 
thirsty your batteries are .

Important things to remember:

1 . Do not let the plates get exposed to air . This will damage (corrode) the plates .

2 . Do not fill the water level in the filling well to the cap . This most likely will cause 
  the battery to overflow acid, consequently losing capacity and causing a 
  corrosive mess .

3 . Do not use water with a high mineral content . Use distilled or deionized water 
  only .

DRIVER SIDE OF

BENCH SEAT

SEAT SURROUND

Summary of Contents for LandStar LS350

Page 1: ...NUAL SAFETY MANUAL This manual applies to the following Full Size Crew Cab Utility Vehicle brands 16599 rev B pub 11 07 2017 FULL SIZE CREW CAB UTILITY VEHICLES THE LATEST VERSIONS OF THE ILLUSTRATED...

Page 2: ...Maintenance battery electrical 33 34 Section 5 Troubleshooting pages 35 36 Section 6 Wiring diagrams pages 37 42 Kohler 277cc Honda 390cc 37 Kohler 429cc 38 Vanguard 479cc 39 Kohler 674cc 40 48 volt 4...

Page 3: ...operly restrained occupant from being crushed as a result of a vehicle rollover The Overhead Brush Bar System also provides mounting for a variety of accessories including windshields canopy tops and...

Page 4: ...ts 3 point seat belts differential lock if equipped NOTE Fully equipped Dash shown Actual features may vary based on model ultra guard bumper LED headlights 2499 S 600 E suite 102 Columbia City IN 467...

Page 5: ...mation or instructions WARNING CAUTION NOTE Please take a few moments to get well acquainted with your vehicle by reading this Owners Manual Before operating this vehicle the owner and each operator m...

Page 6: ...RY IMPORTANT TO READ UNDERSTAND AND FOLLOW ALL INSTRUCTIONS AND WARNINGS LOCATED ON THE DECALS ON YOUR UTILITY VEHICLE SEE FOLLOWING PAGES FOR SAFETY LABEL DETAIL SAFETY LABEL LOCATIONS section 2 safe...

Page 7: ...de operaci n Este veh culo no es legal en la calle y destinados a uso solamente afuera de carretera El hecho de no comprender y seguir las Advertencias y Instrucciones para el uso seguro y el manteni...

Page 8: ...e E 15 or E 85 fuel diesel or blends with an Ethanol content in excess of 10 Doing so will cause damage to the engine and void the warranty Este motor fue dise ado para funcionar con gasolina de autom...

Page 9: ...acity of this vehicle Do not pull a trailer or implement exceeding the specified towing capacity or loss of control may result Do not attach an implement trailer or other device to the hitch that will...

Page 10: ...tion when starting the engine a Hot engine muffler or drive components can burn on contact NEVER operate the machine while under the influence of alcohol drugs or medication of any kind a Such operati...

Page 11: ...over Periodic checks for loose fasteners per the vehicle maintenance schedule should be performed DO NOT disconnect the negative battery cable with engine running This may damage the Electronic Contro...

Page 12: ...ng in the throttle cable conduit and or on the throttle mechanism a This may result in the throttle sticking which can cause the engine to continue to run and result in loss of control Keep the engine...

Page 13: ...s power short and possibly a fire Hydrogen gas is generated as a natural part of the lead acid battery charging process A 4 concentration of hydrogen gas is explosive and could cause severe injury or...

Page 14: ...n when released b That the throttle cable and linkages operate properly and the throttle cable or other linkages are adjusted properly c That the steering mechanism s is adjusted and operates smoothly...

Page 15: ...ed Driving at excessive speeds increases the likelihood of an accident In choosing an appropriate speed you must consider the capability of your vehicle the terrain visibility and other operating cond...

Page 16: ...and the vehicle in neutral 5 Be sure the passenger restraint system i e Seat Belt is properly adjusted and fastened at all times during operation a If the passenger restraint system is not properly us...

Page 17: ...rottle cable conduit and or on the throttle mechanism may cause binding of the cable and or the throttle mechanism a This may result in the throttle sticking which can cause the engine to continue to...

Page 18: ...ake pedal that is located on the floorboard left of the accelerator A lever action parking brake control is mounted on the center console located between the operator and passenger seats Pull up on th...

Page 19: ...PLATE LOCATED HERE ELECTRIC MOTOR ON OFF SWITCH DUAL 12V OUTLETS MODE SWITCH This switch is used for FAST mode M1 with speeds up to 22 mph or SLOW mode M2 with speeds up to 10 mph SLOW mode has a more...

Page 20: ...celerate on hills Loss of control and rollover could result If the vehicle loses power or traction and stops while climbing a hill immediately engage the service brake and back slowly down the hill ma...

Page 21: ...ng the water brake function may be diminished Apply light pressure to the brake system while driving slowly until the system returns to normal brake operation Frequent water crossings will require mor...

Page 22: ...RC12LC4 25 132 27 S 2262 SPARK PLUG REPLACEMENT PARTS Description Part No Briggs Stratton 479cc 16172 Kohler 674cc Spin on 16525 OIL FILTER REPLACEMENT PARTS REPLACEMENT PARTS ACCESSORIES AND SERVICE...

Page 23: ...l fill drain locations To access oil check fill and drain locations flip the seat bottom forward and remove figure 4 1 If equipped also remove the underseat storage tray to expose the engine figure 4...

Page 24: ...dels will require removal of the seat bottom and underseat storage tray to access filter 3 Replace filter per instructions included in your engine owner manual DRIVE BELT DRIVETRAIN MAINTENANCE Drive...

Page 25: ...OIL If you are unsure of your ability to remove the transaxle please use an authorized service provider NOTE NOTE ALL MODELS Transaxle Oil Change Warm oil drains quickly and completely Therefore drain...

Page 26: ...differ from illustration Identifies operations where a risk of serious injury exists when instructions are not properly followed Identifies a step where there exists a risk of part deterioration or co...

Page 27: ...til the pulley is freed from the engine shaft 3 Straight Shaft Remove the fixed flange by pulling Pulley removal from the vehicle Cleaning the pulley Cleaning the cap Removing the cap and block centri...

Page 28: ...ner and a cloth 5 Clean again the flanges with compressed air 1 Clean the sliding flange ramps with compressed air 2 Clean to remove any dust or dirt that can remain on the sliding flange ramps 3 Pass...

Page 29: ...up Put the blocks in their respective location previously noted during disassembly in the sliding flange Make sure that the tabs are positioned upside up as shown in the figure below DRIVETRAIN MAINT...

Page 30: ...igure 4 13 pedal lubrication points NOTE center console removed figure 4 12 center console removal figure 4 11 4WD drive shaft location CABLES HOOD REMOVAL PEDAL LUBRICATION POINTS SPRING LOCATION Ped...

Page 31: ...clevis with fastener NOTE This may require use of a pry bar to apply initial pressure to the cable assembly Tires Check tire pressure before each use Prior to operating the vehicle check and adjust ti...

Page 32: ...e is suspected Cleaning the Windshield if applicable Rinse windshield with lukewarm water wash gently with mild soap or detergent and lukewarm water using a soft cloth or sponge DO NOT SCRUB or use br...

Page 33: ...buretor by allowing the engine to run completely out of fuel b Lubricate the engine cylinder by removing the air cleaner and spraying an engine fogging oil through the carburetor c Do NOT save or stor...

Page 34: ...tem from excessive load conditions Units are equipped with 20 amp fuses located just forward of the engine Replace fuses by opening the sealed fuse holder Remove fuses and replace Close the fuse holde...

Page 35: ...esult in the throttle sticking which can cause the engine to continue to run and result in loss of control BATTERY ELECTRICAL CONT figure 4 24 battery charger figure 4 25 25 amp fuse figure 4 26 10 am...

Page 36: ...air intake restrictor Throttle cable is defective or out of adjustment Replace or clean sparkplug Replace or correctly install air intake restrictor Clean and lubricate or replace cable ENGINE SHUTS D...

Page 37: ...ehicle 1 Put the vehicle in neutral 2 Loosen the cable adjusters behind the dash board figure 5 3 3 Make sure the selector lever on the dashboard is in neutral 4 Make sure the transmission is in neutr...

Page 38: ...green white white white green green GROUND RECTIFIER B B white blue red green brown VIEW B B red red red white red blue blue F G VIEW IN DIRECTION OF ARROW F VIEW IN DIRECTION OF ARROW G POWER OUTLETS...

Page 39: ...rown white green brown white green green brown white green 1 POSITION COLOR A B C D E F G H BROWN RED GREEN BLUE WHITE E PED F G H 1 2 3 3 3 4 5 6 5 4 3 2 1 A A 1A 2A SECTION A A SECTION B B red black...

Page 40: ...white green green GROUND B B white blue red green brown VIEW B B red red white blue D D VIEW D D yellow brown brown white E E VIEW E E F G VIEW IN DIRECTION OF ARROW F VIEW IN DIRECTION OF ARROW G 2W...

Page 41: ...white white green green B B white blue red green brown VIEW B B C C VIEW C C white red red white blue brown D D VIEW D D yellow brown brown white E E VIEW E E F G VIEW IN DIRECTION OF ARROW F VIEW IN...

Page 42: ...ail from A H post terminal block blue 1 4 loom x 11 5 1 4 loom x 44 L 1 4 loom x 34 L 1 4 loom x 34 L 1 4 loom x 48 L 3 8 loom x 16 L 1 4 loom x 17 L Pos Neg 20A fuse 1 4 loom x 11 5 1 4 loom x 12 L b...

Page 43: ...front of vehicle 1 2 A Signal Horn Headlight Switch Green 10A White White White Black Red Red Red Red Black Black Black White Red Black Stripe Yellow Red Black Black Black Black Red Green Green White...

Page 44: ...HONDA UNITS NGK BPR6ES KOHLER UNITS NGK 2382 5 0 gal HONDA UNITS 10 amp KOHLER UNITS 18 amp CVT automatic Gear drive Schafer DANA oil filled transaxle Locking 2 wheel drive Double A arms adjustable sh...

Page 45: ...d 674cc LandMAXX Commercial Power Engine by Kohler Command Pro CH640 rated at 20 5hp 4 stroke OHV V twin with oil pressure warning light C2 C4 specifications Up to 24 mph Up to 18 mpg Up to 90 miles 1...

Page 46: ...cific Exclusions This limited warranty does not apply to components which are subject to normal wear and tear These items include but are not limited to the tires battery brakes throttle shift and bra...

Page 47: ...Master directly American LandMaster Dealers To locate the authorized dealer nearest you please call American LandMaster customer service at 1 800 643 7332 visit our website at www americanlandmaster c...

Page 48: ...missing bolts nuts guards SHIFT LEVER insure working properly THROTTLE insure throttle is working properly BATTERY insure that it is fully charged BRAKE insure brake is adjusted and working OIL insure...

Page 49: ...t Replace damaged cable Clean out any mud and debris If ice is present move vehicle to a warm place and allow the ice to melt and water to dry Adjust as necessary Fasteners Check wheels to see that al...

Reviews: