background image

Main Features

• 2 phono, 4 line,  2 auxiliaries & 2 mic inputs 

• Fader "Q" On/Off switch • RCA and Balanced XLR Outputs 

• High quality Alps Feather Fader™ for smooth, clean cross fading

• Bass, mid & treble control for mics • Volume control for each mic

• Fader "Q" Start* (fader allows auto return to preset digital cue points)

  • On/Off Channel assign switch  • Cue mixing slider • Split Cue monitoring

• Zone/Booth volume • Treble, Mid, and Bass control per a channel 

• High level headphone output• On/Off/Talkover switch for DJ mic • Soft-touch 

rubber knobs and fader handles for better control• Pan and Gain for 

each channel • 12V BNC light connector for gooseneck light • Left & right 

turntable ground connectors conveniently located on rear panel • Master 

volume control • Master Level Indicators with peak hold • Left/Right master 

balance• Cue Level Control • Cue button with LED for each channel 

• Neutrik combo microphone connection 1/4”(6.3mm)/XLR  • Independent 

light control output for touch panels and chase controllers - 1/4" 

connection • Convenient "L"-Shape design allows you to mount other units 

directly against the mixer

The Q-2422/SX comes with a 2 year limited warranty!

* Compatible with American DJ CD Players also featuring Fader "Q" Start

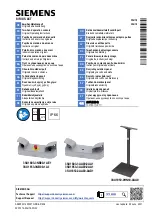
Q-2422/SX

© American DJ® AUDIO  Los Angeles,  CA 90058 USA

Specifications subject to change without notice.

  Featuring

    Fader “Q” Start

©

American DJ Audio

®

 - www.americandj.com - Q-2422/SX™ User Instructions page 2

Summary of Contents for Q-2422 - AUTRE

Page 1: ...USER INSTRUCTIONS Q 2422 SX Professional Preamp Mixer...

Page 2: ...ight connector for gooseneck light Left right turntable ground connectors conveniently located on rear panel Master volume control Master Level Indicators with peak hold Left Right master balance Cue...

Page 3: ...to set the output volume These controls are used to aid in distortion control Use these control to preset your signal level before the crossfader With your channel faders in the maximum position use t...

Page 4: ...ower immediately Have the device checked by a qualified service technician before operating again Any damage caused by liquid entering the device is not subject to warranty Never let the AC cord come...

Page 5: ...the channels are set properly For recording connect your tape recorder or cassette deck to the REC OUT JACKS 33 The REC OUT level will not be influenced by the MASTER FADER 13 Connect your microphone...

Page 6: ...on either side of the crossfader When the crossfader is set in the center position both assigned channels can be heard at once 9 ON OFF Q START Start and stop the CD Player with the slide of the fader...

Page 7: ...You can connect microphones with a 1 4 inch 6 3mm jack or XLR connector 16 BNC JACK FOR GOOSENECK LAMP This jack is used to connect an American DJ 12V DC gooseneck lamp 17 ASSIGN SWITCH Used to select...

Page 8: ...ther non magnetic equipment to the line level inputs Line level musical instruments with stereo outputs such as Rhythm Machines or Samplers should also be connected to LINE inputs The RCA input jacks...

Page 9: ...use damage to your mixer and or audio system When the AUX PHONO 38 switch is set to the AUX position the jacks will only accept a line level input 38 MIC 2 INPUT JACK Connect your microphone with 1 4...

Page 10: ...e 14dBV 200mV 12K Ohm 2dB Microphone 49 dBV 3 6mV0 3K Ohms 3 dB Phono 48dBV 4mV 47K Ohms 3dB Aux 14 dBV 200mV 47K Ohms 2dB Output Sensitivity Level Impedence Rec Out RCA 10dBV 316mV 2 2K Ohms 2dB Mast...

Reviews: