


39
Click the checkbox next to Enable to the Bonjour functionality. The Server Name field allows the user specify what
name to use in order to connect devices via the Bonjour protocol.
To reset to default settings, click the Reset Defaults button. To refresh the page, click the Refresh button. To save the
settings, click the Save button.
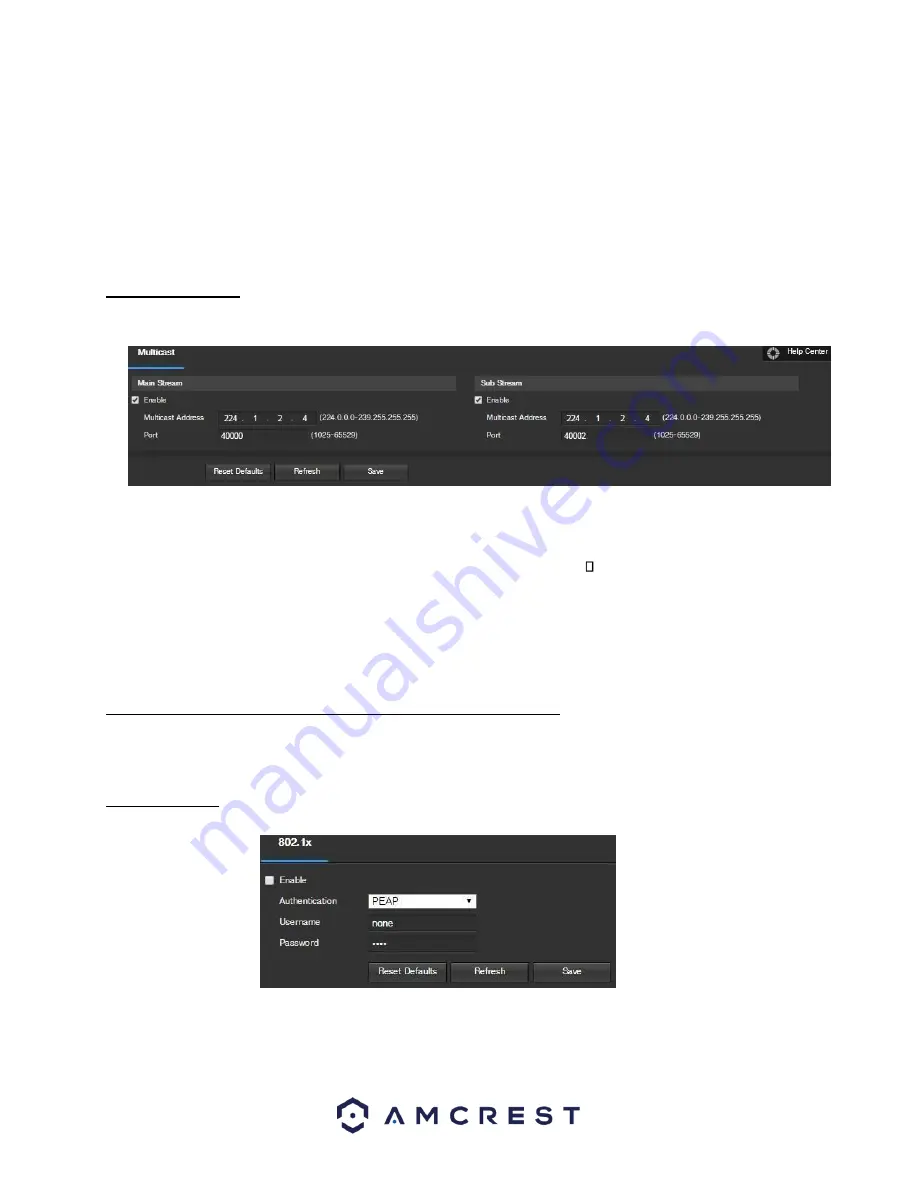
5.2.2.10 Multicast
Multicast is a feature that enables the camera to broadcast its live view to multiple computers on the same network.
Below is a screenshot of the multicast screen:
Below is an explanation of the fields in the Multicast settings screen:
•
Enable
: This checkbox allows the user to enable Multicast functionality.
•
Multicast Address
: This field allows the user to enter a multicast address.
Port
: This field allows the
user to enter a multicast port.
To reset to default settings, click the Reset Defaults button. To refresh the page, click the Refresh button. To save the
settings, click the Save button.
5.2.2.11 WiFi (Not Available on Amcrest POE Bullet Cameras)
Amcrest POE Bullet Cameras do not contain WiFi modules.
5.2.2.12 802.1x
802.1x is an authentication method for connecting to a network. Below is a screenshot of the 802.1x screen:
To enable 802.1x, click the checkbox next to Enable. An authentication method can be chosen from the dropdown
box, and a username and password can be entered in their respective fields.
Summary of Contents for IP8M-2496E
Page 1: ...1 IP8M 2496E User Manual...
Page 51: ...51...


