Alpha UPS Monitor Installation Procedure
1. Install the Alpha UPS Monitor onto your computer. Restart the computer.
If you install the Alpha UPS Monitor on a version of Windows without the .NET framework installed, an error
message saying the framework is not installed will appear. Install the framework onto your computer, restart
your computer, and then try again to install the Alpha UPS Monitor.
2. Connect the computer cable from any available communications port on the computer to the RS–232 port
on the Alpha FXM front panel. Select a COM port from the drop down menu on the Communications tab
and then click on the update button. (The baud rate cannot be changed since the FXM can only operate at
2400.)
3. To start communications between the computer and the Alpha FXM, do one of the following:
Click on the screen’s Online Indicator, OR
In the
File
drop-down menu, click on
Connect to FXM
.
If the computer cannot connect to the Alpha FXM, a pop-up screen appears asking you to check the wiring and
your connection to the proper COM port.
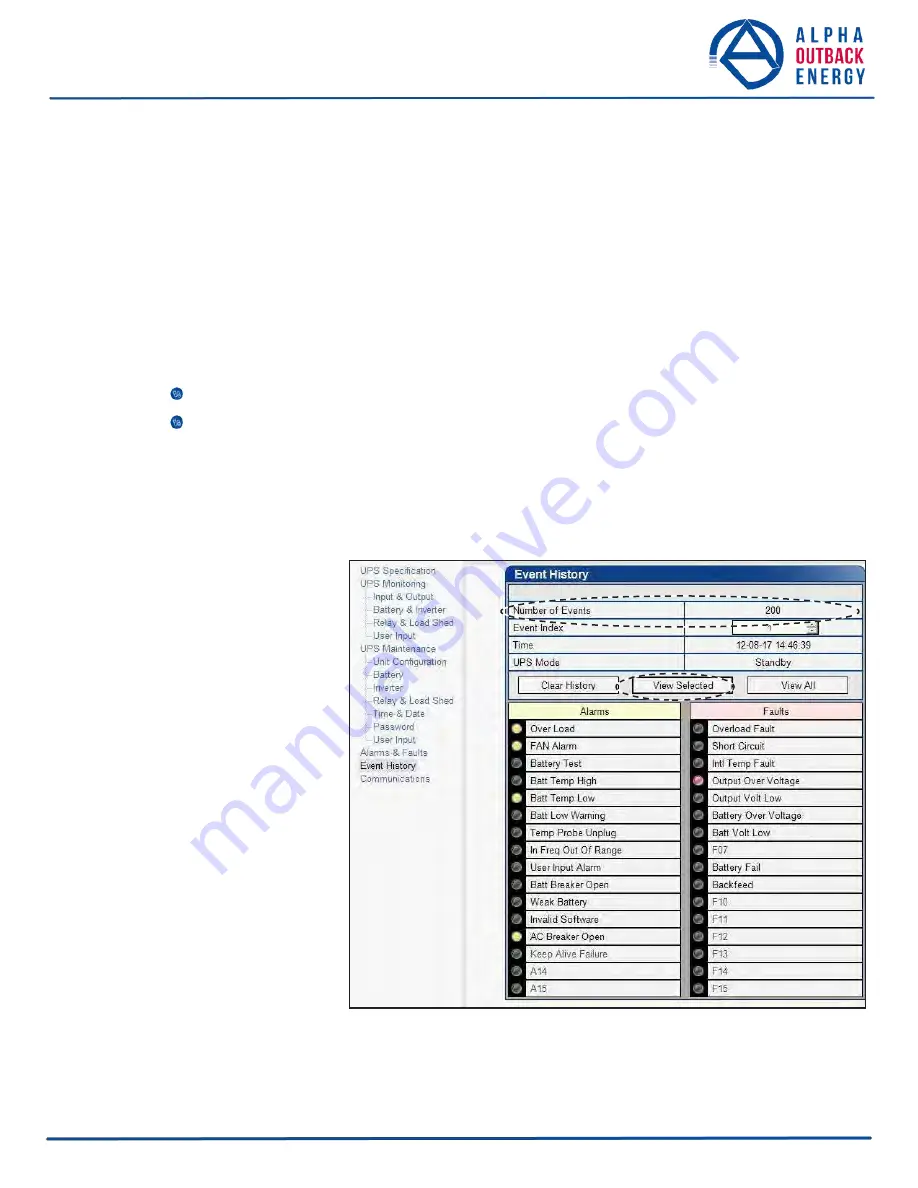
6.4.2 Event History (Alpha UPS Monitor)
This screen shows the most
recent events recorded by the
Alpha FXM. (Once the
number of events reaches
200, the oldest entries are
overwritten.)
Choose
a
number in the
Event Index
drop- down box and then click
on the
View Selected
button
to display the updated
information about the selected
event.
Clicking on the
Clear History
button clears the log. This
action cannot be undone.
To view all events, click the
View All
button to open the
Event Log Monitor
window
shown in Figure 52).
Figure 51 — Alpha UPS Monitor: UPS Event History screen
Page
6
0
to
95


