background image

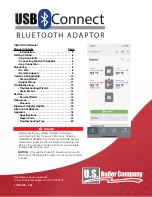
1.3.3.  Connect  the  Standard  Telephone  Cable  (RJ11)  into  the  phone  port  labeled 

PHONE1  (FXS1  below)

  as  seen  below  (If  you  have  a  secondary  account,  or 

T.38 Fax line, you can plug another phone or fax machine into 

PHONE2

): 


1.3.4.  Connect the other end of the cable to your telephone 


1.3.5.  Connect  another  Standard Telephone  Cable into the  phone  port labeled 

LINE 

(FXO  above)

  (this  is  to  connect  your  PSTN  line,  if  you  wish  to  use  your 

Landline) 


1.3.6.  Connect  the  other  end  of  the  cable  to  the  regular  phone  jack  in  the  wall 

(optional) 


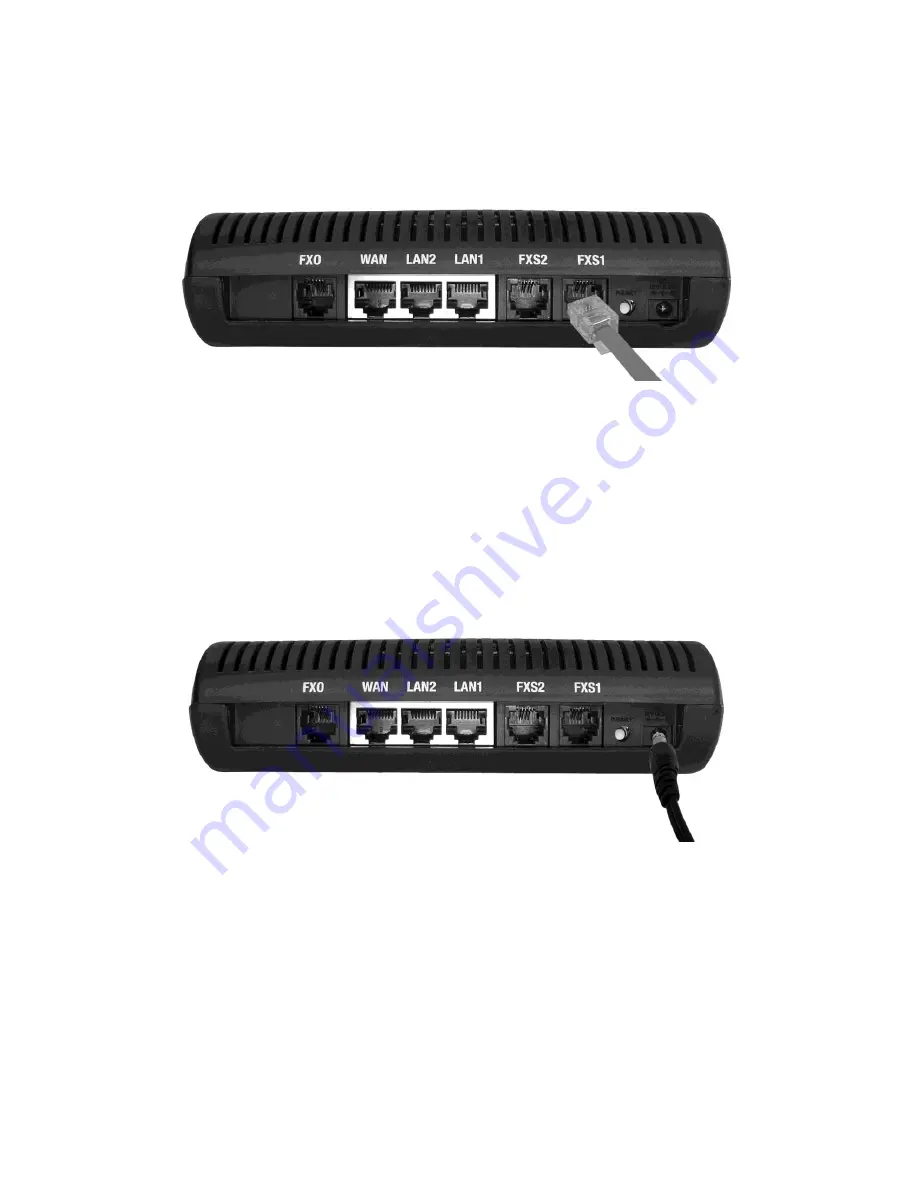
1.3.7.  You may now plug the Power Adapter into an AC outlet which will power up the 

ATA unit, as seen below:  


WARNING:


Use only the Power Adapter included in this package.


Wait until the POWER, VOIP and WAN LED's turn green and remain stable on the Front Panel of your 
ATA (LAN LED might also be green). 
 
The ATA will get provisioned with your account information and you will be able to place and receive calls 
as soon as the PHONE1 LED is red and stable (if you have two accounts, then both PHONE1 and 
PHONE2 should be red). If you have not setup your VOIP account, then you must do that next, in order to 
have it provisioned and working. 


Summary of Contents for CRA 210

Page 1: ......

Page 2: ...et Cable RJ45 Power Adapter 1 2 You will also need the following 1 2 1 A standard corded or wireless telephone 1 2 2 Access to a Broadband Internet connection DSL or Cable 1 2 3 A Router if you have m...

Page 3: ...all the Analog Telephone Adapter ATA follow these instructions 1 3 1 Connect the Ethernet Cable RJ45 into the WAN port of the ATA unit as seen below 1 3 2 Connect the other end of the cable into a fre...

Page 4: ...o the regular phone jack in the wall optional 1 3 7 You may now plug the Power Adapter into an AC outlet which will power up the ATA unit as seen below WARNING Use only the Power Adapter included in t...

Page 5: ...us section open a web browser application such as Internet Explorer or FireFox 2 1 3 In the Address Bar of your browser type the following http IP Address where the IP address is the IP we noted earli...

Page 6: ...ve the file to your local PC for example on your Desktop so it s easy to remember where you saved it 3 1 7 Go back to your ATA Web Panel and click the Browse button 3 1 8 Locate the Firmware file you...

Page 7: ...touch un insulated Telephone Ethernet wires or terminals unless the line has been disconnected at the network interface 5 1 4 Use caution when installing or modifying Telephone Ethernet lines To preve...

Page 8: ...ompany may make changes to its facilities equipment operations or procedures that could affect the proper operation of your equipment If they do you will be given advance notice so as to give you an o...

Reviews: