background image

24 


When confirming the exit arrow icon (>) after Level 9, the system will save all the programmed settings. 

If the Operator wants to make available only a limited number of combinations options (ex. only 2 options), 

he will leave 0 in all the boxes of the row no. 3. 

If the Operator wants to set only a limited number of levels (ex. 7 levels out of the 9 programmable), he will  

leave 0 in all the boxes of levels 8 and 9.  


PLEASE PAY ATTENTION: if all the boxes in each level are set to 0 (zero), the machine will react as if the 

Pay-out Table is disabled; so it will prompt the User to choose from which hopper (i.e. which Token or coin or 

banknote denomination) he intends to collect his change. 


7.3.6.3 C 

PAY-OUT TABLE IN POS MODE  [10 levels available, each level allows 3 combinations] 


The POS Pay-out table will be available in the display Menu for set-up ONLY if:  


the POS has been enabled (see section 

7.3.6.1.C  


Enable POS Terminal

 ); 


the Dispense Mode has been set to AUTOMATIC. 


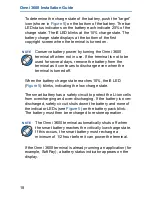
Select and confirm ‘Enable’: the display


will show the following pattern of 3 available  

combinations relevant to the first pay-in level: 


Ten (10) levels can be set for the amounts introduced by Users. Such amounts must be entered in the box right 

of the LEVEL 1, …, LEVEL 

10 legends. For each of the 10 levels,3 different combinations can be programmed. 


HOW  IT WILL WORK AFTER SETTING THIS TABLE: when the User will introduce the relevant amount of money, 

he will be prompted to choose among the 3 programmed combinations associated to that amount (see section 6.1). 


SETTING THE PATTERNS IN THE POS MODE:  

highlight  LEVEL 1 and confirm it by OK; the cursor will shift to the value box: set the first level value in the box by 

the “

+

” button (make corrections by the “

-

“ button), then confirm by “OK”


(ex. 1,00 €)

.  

The cursor will return at the left of the LEVEL 1 

box; step down by the “

+

” button 

to the table underneath so as to 

start setting the number of pieces to be dispensed by the hoppers.  

Confirm by “OK” to modify the first box 

of the HP1 column, then set it b

y the “

+

” button (make corrections by the 


-

“ button), 

and 

confirm by “OK”. 


The cursor will shift to the HP2 box in the first line. Continue in the same way until first line is fully set.  

Press “OK” to move 

the cursor back left of the first line, and sh

ift to the second line by pressing the “

+

” button. 


Go on as explained until the 3

rd

 line (or the previous one, if enough for your purpose) has been filled.  

When the cursor returns left of the 3

rd


line, press the “

+

” button to make the exit icon ( >) available at the bottom 

right corner of the display.  


As an example, supposing that 

HP1=2€, HP2= 1€, HP3=0,50€, HP4=0,

1

0€, the following pattern could be 

programmed for LEVEL 1 = 

1 €:


  HP1 

HP2 

HP3 

HP4 

 0 

 0 

 2 

 0 

 0 

 0 

 1 

 5 

 0 

 0 

 0 

     10 


HP1 

HP2 

HP3 

HP4 

 0 

 0 

 0 

 0 

 0 

 0 

 0 

 0 

 0 

 0 

 0 

 0 

                0,00 


LEVEL 1


SETUP 


Summary of Contents for LAND

Page 1: ...4 EN LAND Money Changer Token Dispenser Progettazione e produzione di sistemi di pagamento e accessori per macchine Gaming Vending e Car Wash Design and manufacture of payment systems and accessories...

Page 2: ...p A declines any and all responsibility towards the User with reference to damages losses or claims of third parties resulting from the use of the product or caused by incorrect interpretations of thi...

Page 3: ...REVISIONI Revisione n Data Modifica Note Creazione 1 00 23 07 2018 Creazione FW v 1 01 Rev 1 01 14 07 2020 Integrazione VPOS Touch Nayax e Valina FW CMG v 1 09 Nayax v 1 07 Valina Rev 1 02 11 12 2020...

Page 4: ...eceipt All packaging material must be recycled or disposed of in compliance with your local applicable laws 2 Components description COD DESCRIPTION A AE 0806 Power Box RD 125 and Switch B SH 1D41 001...

Page 5: ...ctions Change of notes and coins into various denomination coins in various combinations Change of notes and coins into one or more denomination tokens in various combinations without or with return c...

Page 6: ...6 5 Installation 5 1 Dimensions...

Page 7: ...w slab s hooks and then comfortably fastened to it by screws z holes or just left hanging so as to remove it at ease WALL MOUNT SLAB 5 3 PREPARATION FOR USE 534 167 97 80 70 130 300 800 240 110 12 X W...

Page 8: ...e change machine will activate different procedures depending on whether it has been set up to operate by AUTOMATIC MODE factory setting or in MANUAL 2P MODE In any of the two modes the Operator can p...

Page 9: ...t or the purchased tokens At the end of the payout cycle the display will show both the inserted amount and the total amount paid out 6 2 Automatic mode When a note or coin is inserted the display sho...

Page 10: ...ation 7 1 Default configuration The device parameters of the LAND Money change machine Token dispenser are preset by default as follows Control Board Parametres Pay out mode AUTOMATIC Hopper S11 Param...

Page 11: ...he message DEFAULT CONFIG RESTORED will be displayed and the unit shall return to its original setting NOTICE the RESTORE DEFAULT CONFIGURATION command resets the default PIN code 0000 7 2 System conn...

Page 12: ...black 6p MDB end and the Ethernet connector LAN of the POS Interface cable as indicated Connect the white 6p MDB end and the Ethernet connector LAN of the POS Interface cable as indicated Start the S...

Page 13: ...se the button key to highlight the icon of the menu function you want to check the description of the highlighted icon will appear at the bottom of the screen e g SHOW STATUS OF PERIPHERAL UNITS for t...

Page 14: ...hen press the or the keys until the desired figure appears and confirm it by OK The cursor will move to the next position Repeat per each of the next 3 characters of the PIN Once entered the fourth ch...

Page 15: ...e option TURN OFF ON ii automatic reset after 30 seconds have passed If during these 30 seconds more money is inserted it will be added to the remaining credit amount choose the option FIXED TIME OUT...

Page 16: ...he machine this sub menu allows to configure the GSM GPS fuction The DISPENSE MODE function allows to set the way the machine reacts to the introduction of money i e change money immediately and autom...

Page 17: ...ing line ENABLE COINS 7 3 6 1 B ENABLE COINS By this function the Operator can decide which coin denominations the machine must accept and which ones it must reject and immediately return to the User...

Page 18: ...or wait for the User to confirm after dropping the money in it also allows to set the coin denominations that can be individually delivered by the 4 hoppers Press OK to start the modification of the...

Page 19: ...and will start the payment of the chosen option by pressing the CONFIRM button Following to that It is possible to set the hoppers for the wished coin denominations If the unit includes the Note Recy...

Page 20: ...tup the Pay out Table When the Pay out Table is enabled the Operator can set different change combinations for the amounts introduced by the User different operating options can be set according to wh...

Page 21: ...display prompts for Reset Total Accounts see sect 7 3 5 in order to prevent any possible future data inconsistency 7 3 6 3 A PAY OUT TABLE IN THE AUTOMATIC MODE 6 levels available each level one combi...

Page 22: ...2 0 00 0 0 0 0 0 00 0 0 0 0 0 00 0 0 0 0 If HP1 gets empty then the other hoppers will return change equivalent to the cashed amount PLEASE PAY ATTENTION if all the boxes in the pattern are set to 0...

Page 23: ...hoppers Confirm by OK to modify the first box of the HP1 column then set it by the button make corrections by the button and confirm by OK The cursor will shift to the HP2 box in the first line Conti...

Page 24: ...different combinations can be programmed HOW IT WILL WORK AFTER SETTING THIS TABLE when the User will introduce the relevant amount of money he will be prompted to choose among the 3 programmed combin...

Page 25: ...ill react as if the Pay out Table is disabled it will prompt the User to choose from which hopper i e denomination he wants to collect his tokens 7 3 6 3 Exit To return to the upper menu level highlig...

Page 26: ...the default PIN code is 0000 The settings in the following menus can be modified by using the PIN code MODIFY PIN RESET ACCOUNTS RESTORE DEFAULT CONFIGURATION To modify the existing PIN press OK and d...

Page 27: ...ed and the unit is ready to resume operation 8 Messages 8 1 Messages from the Machine display 8 1 1 FAULTY OPERATION When all dispensers are empty or when any critical combination of working condition...

Page 28: ...note 3 Fraud attempt detected 5 Adjust optic sensors 7 Stacker full OryOne Only 9 Low power supply 11 Check operation of the encoder efficiency of the validator motor 12 Check operation of the encoder...

Page 29: ...yset None CPU out of service Check connections and cables inside the validator Thedisplaywillalsoreportan error Out of service yellow variable ROM or RAM out of service SeeVegamanual chart13 according...

Page 30: ...ckwards then lift the latter up and rotate it 180 rightwards Gently wipe the sensors with a clean lint free tissue or with a cotton swab or with a small sponge possibly moistened with isopropyl alcoho...

Page 31: ...he Recycler Transport path clean Use a dry soft lint free cloth or a Cotton swab to wipe dirt and stains from the Magnetic and Optical Sensors Rollers and Belts If necessary blow the inside of the Uni...

Page 32: ...is operation 2 Press buttons A and lift the Upper Validation Section open 3 Remove the Course Reversing Guide Cover by pressing in on the two buttons B 4 Turn the Thumb Lock Knob C to gain access to t...

Page 33: ...e together with the following documents copy of the sale invoice delivery note stating returned for guarantee repair detailed report of the problem found and the circumstances in which it occurs Befor...

Page 34: ...34 Spare parts List LAND...

Page 35: ...35...

Page 36: ...36...

Page 37: ...37...

Page 38: ...38...

Page 39: ...lberici S p A reserves the right to make changes to the equipment described and to its technical specifications at any time and without notice in pursuit of the continual improvement of its product NO...

Page 40: ...per videogames e per macchine vending Design and manufacture of payment systems accessories for videogames and vending machines Via Ca Bianca 421 40024 Castel San Pietro Terme BO ITALY Tel 39 051 944...

Page 41: ...41...

Reviews: