background image

- 36 -

Waste electrical and electronic products must 

not be disposed of with household waste. 

Please refer to the retailer from whom you 

purchased this item for disposal instructions.

MK9 2NW

TeCHNICAL HeLP ON THe OPeRATION 

OF THIS PRODUCT IS AVAILABLe 

PLeASe CALL 0845 307 3850

mONDAY TO FRIDAY 9 Am TO 5 Pm

Please check and identify the supplied accessories.


Remote Control (with batteries)  .................................................................. x 1


YUV SCART Adaptor ................................................................................... x 1


iPod Dock Adaptor ...................................................................................... x 6

IF yOU ReQUIRe A SPARe OR RePLACeMeNT 
BATTeRy OR ANy OTHeR ACCeSSORIeS FOR 

THIS PRODUCT

PLEASE CALL 01302 872207

mONDAY TO FRIDAY 9 Am TO 4:30 Pm

811-711791W020

Summary of Contents for ALTVDi31217

Page 1: ...1 INSTRUCTION MANUAL 17 HD Ready Digital LCD TV with built in DVD player docking for iPod ALTVDi711701...

Page 2: ...the influence of electrostatic phenomenon the product may malfunction and require user to power reset Condensation INFORMATION When left in a heated room where it is warm and damp water droplets or c...

Page 3: ...ent is not to be used for a day or more disconnect it at the wall outlet This symbol means that the unit is double insulated No connection to earth is necessary SAFE USE OF YOUR EQUIPMENT This equipme...

Page 4: ...ce YUV 19 Using Headphones 19 Connecting HDMI 20 SOUND SYSTEM 20 USING WITH YOUR iPod 21 25 CD DVD OPERATION 26 27 Playing a disc 26 Playing a picture file disc 26 Pausing playback still mode 26 Stopp...

Page 5: ...on this unit if they were purchased from outside your geographic area or made for business purposes Disc Function or Operation that is Not Available When the symbol appears on the screen it indicates...

Page 6: ...be used for a long time remove the batteries to avoid damage caused by battery leakage corrosion Do not mix old and new batteries Do not mixALKALINE standard CARBON ZINC or rechargeable NICKEL CADMIUM...

Page 7: ...ress to select previous chapters tracks or titles on a disc 11 ANGLE button Press to switch the camera angle of the video presentation when scenes with multiple camera angles are recorded on a DVD SIZ...

Page 8: ...PLAY button Press to start and resume playback of a disc GUIDE button Press to display the PROGRAMME Guide in DTV mode PAUSE button Press to pause playback and single frame advance on DVD STEP INFO b...

Page 9: ...k 12 HDMI jack 13 SCART jack AV IN 2 14 AUDIO IN jacks Left Right VIDEO IN jack AV IN 1 15 TV Antenna Cable terminal Coaxial TV antenna input 16 COMMON INTERFACE slot 17 I button Turns the unit on and...

Page 10: ...cable to TV ANTENNA CABLE Terminal cable not included CONNECTING THE POWER CORD Connect the AC power cord into a wall outlet Press the I button on the unit or remote control to turn on the unit Notes...

Page 11: ...rom wall outlet TURNING THE UNIT ON FOR THE FIRST TIME The first time you turn the unit on it will go straight into Auto scan mode Simply follow the screen prompts as below to tune in the channels 1 P...

Page 12: ...NGUAGE FOR DTV While watching a DTV programme you can press the buttontodisplaytheAudioLanguagemenu andselectaudio language audio format and sound track Use the or button to select an audio language o...

Page 13: ...button to set or cancel the selected channel as one of the favourite programmes CI Information Display CAM and Smart card information select the language if available Before you begin to you to use y...

Page 14: ...r Temp Select the colour temperature of the picture Select Normal balanced Warm red white Cold blue white mode Note You can also select Picture Mode simply by pressing the PICTURE button on the remote...

Page 15: ...ime zone TV DTV SETUP SETUP MENU 1 Press the TV MENU button 2 Use the or button to select the SETUP 3 Use the or button to select the options Language Audio Language Subtitle Language Restore Setting...

Page 16: ...enu and return to the normal screen press the EXIT button Lock System Select to lock or unlock the programmes Change Password If you change the password remember your password Block Programme Enter th...

Page 17: ...ponding to the row of coloured subjects on the screen Pressing one of the colour buttons will take you directly to the page corresponding to the subject heading analogue text only mix To view a page o...

Page 18: ...nnectingTO SOURCESWITH SCART Devices with RGB output must be connected to the SCART input Connects the SCART from the source to the corresponding SCART on this unit SCART cable not included as shown M...

Page 19: ...ENT VIDEO OUT and AUDIO OUT to this unit SCART and AUDIO IN To operate the connected device and play the source first press the FUNCTION button to select the YUV SCART mode May require a subscription...

Page 20: ...ecification HDCP is used to protect digital content transmitted and received by DVI compliant or HDMI compliant displays HDMI has the capability to support standard enhanced or high definition video p...

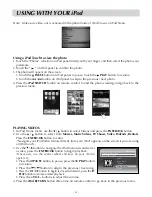
Page 21: ...t is not in iPod mode Notes Your iPod will charge automatically until fully charged once it is connected no matter whether the unit is in iPod mode or not Make sure the software of iPod is the latest...

Page 22: ...ate the iPod menu lists and select a photo press the ENTER OK button twice to begin playback If necessary use the control wheel and keys on your iPod to operate it Press the PAUSE button to pause pres...

Page 23: ...t reverse forward press the PLAY button to resume normal playback Press the VOL buttons to adjust the volume 4 Press the iPod RETURN button three time on remote control to go back to the previous menu...

Page 24: ...os on iPod panel and then press the ENTER OK button on remote control to confirm 2 Use the button on remote control to select from Movies Rentals TV Shows MusicVideos VideoPlaylistsorSettings andthenp...

Page 25: ...tton 2 Use the button to select from Shuffle Repeat or Language Press the ENTER OK button to enter the settings 3 Use the button to a setting press the ENTER OK button to confirm 4 Press the iPod RETU...

Page 26: ...nd press the PLAY button to resume playback You also can use the GOTO function or use the numbered buttons to enter the image number to quickly select any image Press the ANGLE button on the remote co...

Page 27: ...btitle language Notes If only one language is recorded the language does not change About two seconds later playback continues with the new subtitle you selected The number of languages recorded diffe...

Page 28: ...t 3 second later DISPLAY FUNCTION While the disc is playing press the DISPLAY button repeatedly to display information on operation status LOCATING A SPECIFIC TIME You can move to a specific location...

Page 29: ...track is played repeatedly Repeating an entire disc 2 While the disc is playing press the REPEAT DISC button until the REP REP ALL indicator displays on the screen The entire disc is played repeatedly...

Page 30: ...r preferred language then press the ENTER OK button to confirm 4 Repeat steps 2 and 3 to adjust other options 5 To exit the SETUP MENU and return to the normal screen press the SETUP button Notes Some...

Page 31: ...e SETUP button TV Type Pan Scan When wide screen video is played this mode clips the right and left sides of the image so that it can be viewed on a conventional screen Some wide screen DVDs that do n...

Page 32: ...THE FUNCTION SETTINGS Default It takes 3 5 seconds to reset the unit to the factory default CLEANING THE DISC A defective or dirty disc inserted into the unit can cause sound to drop out during playba...

Page 33: ...playback side facing frontwards Clean the disc A non valid disc has been inserted The unit and disc region number are incompatible Condensation may have formed inside the unit due to a sudden change i...

Page 34: ...n try it again Coloured patches of picture F u n c t i o n k e y does not respond correctly Under the influence of electrostatic phenomenon the product may malfunction and require user to power reset...

Page 35: ...ect of unauthorised modifications or alterations or has been the subject of commercial use In the event of a problem with the product within the guarantee period please return it to your nearest store...

Page 36: ...HELP ON THE OPERATION OF THIS PRODUCT IS AVAILABLE PLEASE CALL 0845 307 3850 MONDAY TO FRIDAY 9 AM TO 5 PM Please check and identify the supplied accessories Remote Control with batteries x 1 YUV SCAR...

Reviews: