


- 15 -
tion menu and use the
or
button to
cycle through
“Off”
and language options.
Favourite Mode
This function enables or disables the
favourite channel list mode. See Channel
List menu Favourites on
page13.
Use
or
button to turn on/off favourite
mode. If the
“Favourite Mode”
is on, in nor-
mal operating mode pressing “P/CH+
” and “
-
P/CH” buttons will only navigate through the
channels that were previously defined as
favourites in Channel List.
EPG Preference
Digital terrestrial television channels can
broadcast simultaneous Next&Now and 7-
Day electronic programme.
Highlight the EPG Preference line in the
Configuration menu and use the
or
but-
ton to selectNext&Now
or
7-Day.
Receiver Upgrade
The IDTV can be upgraded via the configura-
tion menu, entered from the main menu.
In the Configuration menu, highlight the
“Receiver Upgrade”
item by pressing
or
button and press the “SELECT” button to
start upgrade process.
There are two possibilities for Receiver soft-
ware to be upgraded:
automatic
and
manual
.
i
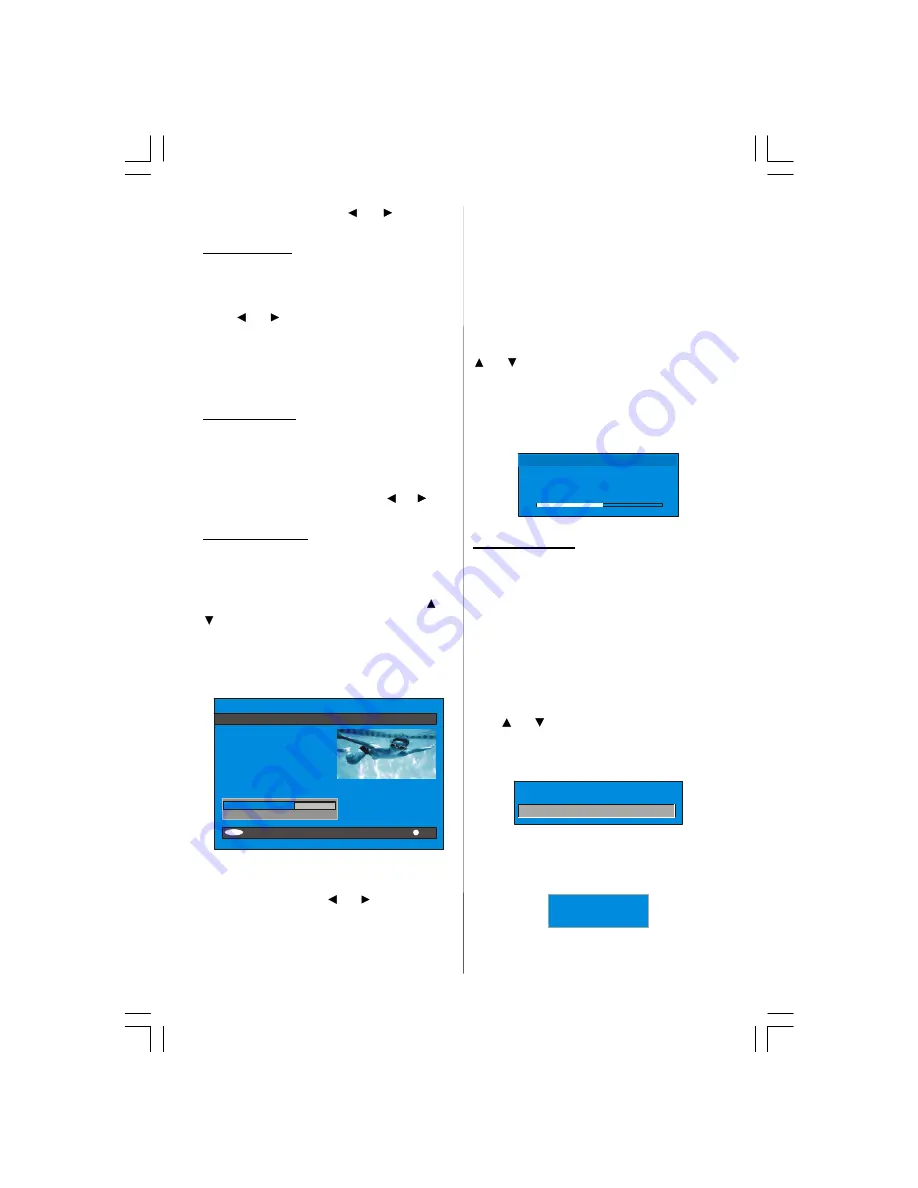
CONFIGURATION
Audio Language
Subtitle
Favourite Mode
EPG Preference
Receiver Upgrade
Parental Settings
English
Off
Off
Now&Next
V.1.5
Exit
More
Automatic Download
Search for New Version
Enabled
MENU
Automatic Download (Automatic upgrade)
Automatic Download can be enabled or
disabled by pressing
or
button. If it is
enabled, then there are two ways for auto-
matic upgrade. The first one is checking the
existence of a new software every time the
IDTV goes to standby. The second one is
waking up at 03:00 a.m. every night, pro-
vided that the IDTV is left in standby mode.
Both automatic upgrade methods result in
standby mode either upgraded or not.
If the automatic upgrade is set to “Disabled”
then this function will not work.
Search For New Version (Manual upgrade)
Manual upgrade starts if the
“Search for
New Version” item is highlighted by using
or
button and activated via pressing
the
“SELECT”
button.
After
“Search for New Version”
is acti-
vated, the IDTV tunes to each frequency that
have been stored in its database and looks
for the new software.
Software Upgrade
Searching for upgrade. Please wait, or
press MENU to cancel.
Search Progress:
Parental Settings
Some channels broadcast material which
you do not want younger members of the
family to watch. Any channel can be ‘locked’
so that it cannot be selected for viewing with-
out first a four-digit PIN code being entered.
In this way any channel not suitable for
younger viewers can be protected.
This function enables or disables the menu
protection system and allows the PIN code
to be changed.
Use
or
button to go to Parental Set-
tings option. Press the “SELECT” button to
enter Parental Settings Menu. A box asking
for the lock key is displayed.
Enter Lock Key
There is only one key which is set to “0000”
initially. Enter lock key. If wrong Lock key is
entered, the following message is displayed
on the screen and it is returned back.
Wrong Lock Key
If it is correct, the Parental Settings Menu in-
cluding following items is displayed:
ENG-20700-20 INCH TFT-BACK AV-1549UK-MB18 IDTV-(WO PIP-WO PC)-50093041.p65
06.09.2006, 17:37
15
Summary of Contents for MB18 IDTV
Page 34: ......


