


To Record TV programmes, you must first search for the Tv stations
in your area.
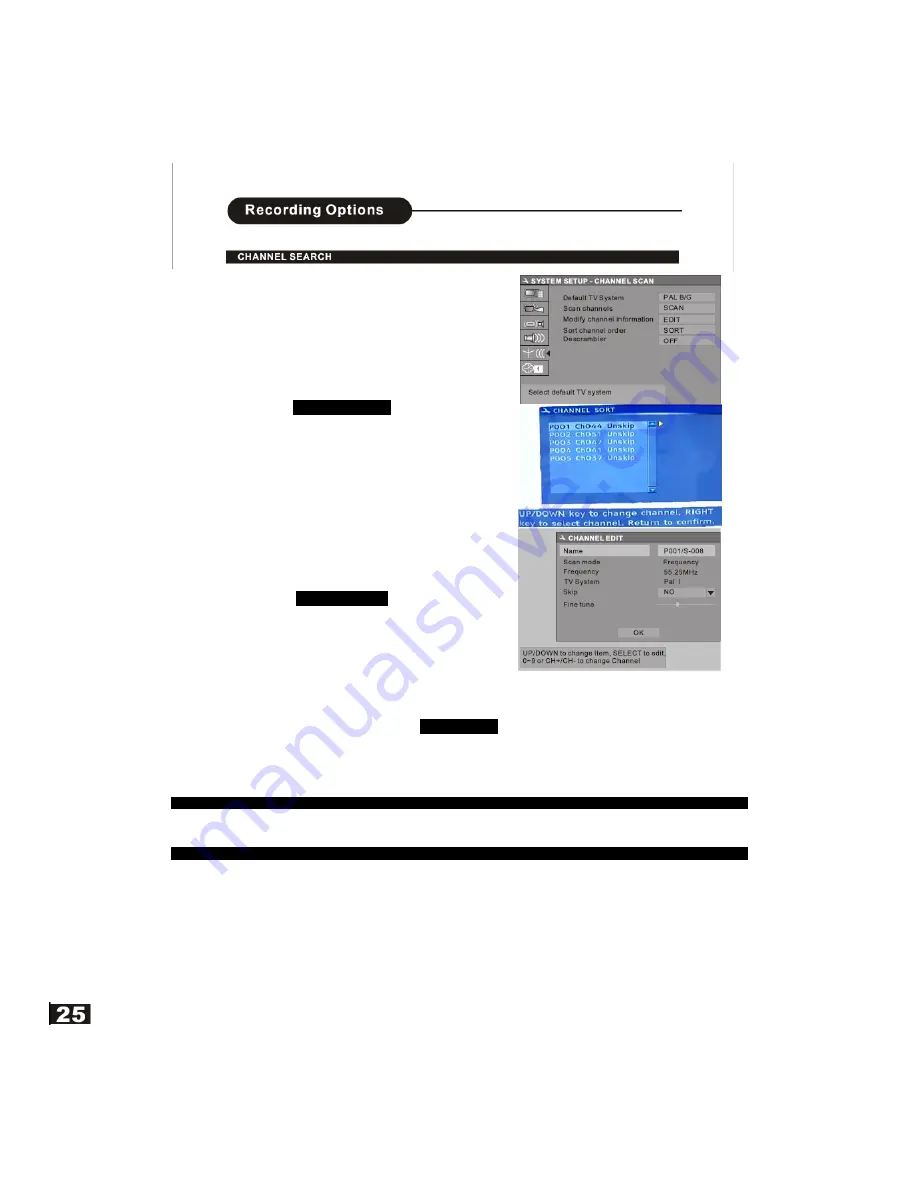
1.Enter the setup menu and select “CHANNEL SCAN” and press the
ENTER button.
2. It will now scan the channels automatically. To stop searching,
press the STOP button.
3. When search is completed the first received station will be
displayed. This will not necessarily be BBC1. To move the received
stations you must enter the SORT menu.
CHANNEL SORT
It is useful to have a current Tv guide to hand when channel
sorting.
1. Select “Sort Channel Order” and press ENTER
2. Use the
c
/
d
buttons to select BBC1, (the programme is shown in
the background).
3. Press the ENTER button and the station data will be shown in the
Right column
4 Move this up using the
c
button to location 1 and press ENTER
again. This will place BBC1 in the correct place and move all other
channels down one place.
5. Use the
c
/
d
buttons to select BBC2 and continue as “3 to 4”.
Continue until all 5 stations are in the correct order.
6. If you have other stations that are worth keeping, these can be
added in order.
CHANNEL EDIT
You may wish to rename the channels.
1. Select “Modify Channel Information” and press ENTER.
2. Select “Name” and press ENTER.
3. To change the name use the
c
/
d
to change the letters and the
e
/
f
to select each letter in the word.
4. Select OK and press ENTER to return to the sub menu.
To change the names of all the channels you must go back to the normal Tv screen, select the channel you wish to re
name and re enter the setup menu’s and proceed from 1 to 4.
Channel Skip
There may be channels in the memory that you wish not to be selected with the CH+ / CH- buttons.
1. Select “Modify Channel Information” and press ENTER.
2. Select “Skip” and press ENTER.
3. Select either YES or NO and press ENTER.
4. Press ENTER to return to the sub menu.
Default TV System (Sound)
In the UK the Sound system is “PAL I”. Always select this for UK use. In other countries the sound system is not “I”. If
you wish to move to another country this must be changed to receive the sound in that country. Use “B/G” for Western
Europe, “D/K” for Eastern Europe, SECAM “L” for some areas of France.
Record Quality
1. Press the SETUP button during stop status.
2. Select RECORD and press ENTER
3. Select “Default Quality” and press ENTER
4. Use the
c
/
d
buttons to select the required quality. Note the higher the quality the less time is available on the disc
HQ: Perfect quality, nearly 60 minutes on a blank disc
SP: Standard play quality, nearly 120 minutes on a blank disc
LP : Long Play, approx 180 minutes on a blank disc
EP: Extend play, nearly 240 minutes on a blank disc
SLP: Standard long play, nearly 360 minutes on a blank disc
Summary of Contents for AMTDR3101X
Page 1: ...Customer Help Line 01422 263313 DVD ReWritable...
Page 2: ...1...
Page 7: ......
Page 9: ......
Page 10: ......
Page 11: ......
Page 15: ...Note The above features vary depending upon the disc type such as Digital Audio Audio CD etc...
Page 16: ...2 Press the c d e f buttons to select the title you want...
Page 19: ......
Page 20: ...On Digital Audio discs the AUDIO button is used for selection of Left Right and stereo...
Page 21: ...Note On Digital Audio CD discs there are some differences on the OSD...
Page 22: ......
Page 23: ......
Page 24: ......
Page 25: ......
Page 29: ......
Page 30: ......
Page 31: ......
Page 36: ...DVD Re Writeable...


