background image

12

13

OPERATING INSTRUCTIONS 

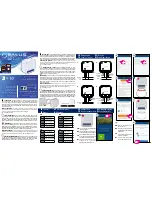
COMPONENTS (SEE PAGE 2)

CONTROL PANEL (SEE PAGE 3)

USE PRECAUTIONS

• This unit is only suitable for well insulated rooms or occasional use.

• Make sure that the product is placed on a dry and plane surface.

• Leave at least 50 cm of space at the back, sides and front of the unit.

• Parts of this product may become very hot and cause burns. Pay particular attention when 

using near children and/or vulnerable persons.

1

 Protective grille

2

 Hot air outlet

3

 Control Panel

4

 Metal base

5

 Cold air inlet grille

6

 Main switch of the appliance

7

 Power supply cord

A

  Power increase button

B

 [ HOT HEAT ] (1,500 W) operation indicator

C

 [ WARM HEAT ] (1,000 W) operation indicator

D

 [  FAN ] operation indicator (0 W)

E

  Power decrease button

MAIN FUNCTIONS

ADDITIONNAL FUNCTIONS

[ + ] AND  [ - ]  BUTTONS

Easily  adjust  the  power  of  your  additional  heater  using  these  two  buttons.  You  can  switch 

between [ FAN ] Mode, [ WARM HEAT ] Mode and [ HOT HEAT ] Mode.

INCLINAISON

Rotate the body of the appliance up to 50°, to point it in the direction you want it to be. 

However, be careful to do this when the additional heater is cold.

1. Plug the unit.

2. Press the main switch on the back of the unit () to turn it on. The unit is now in standby mode.
3. Press the [ + ] () button to turn on the unit. The heater will turn on in [ FAN ] mode. The Fan 

operation indicator () will light up.

4. Press the [ + ] button again to increase the power and enter [ WARM HEAT ] mode. The Warm 

Heat operation indicator () will light up.

5. If you press the [ + ] button a third time, the power will increase again and enter [ HOT HEAT ] 

mode. The Hot Heat operation indicator () will light up.

6. When the room temperature is pleasant enough, press the [ - ] () button to reduce power 

consumption and prevent the room from overheating.

7. To turn off the unit, press the [ - ] button until all indicator lights are off. The heater will continue 

to operate and blow air for a few seconds after being turned off.

8. If you are not going to use your auxiliary heater for a long period of time, turn the main switch 

() on the back of the unit to the OFF position.

Summary of Contents for YRON

Page 1: ...YRON CHAUFFAGE D APPOINT C RAMIQUE PTC HEARTER KERAMIK RAUMHEIZER GUIDE D UTILISATION USER MANUAL BEDIENUNGSANLEITUNG...

Page 2: ...2 3 YRON 1 2 3 4 5 6 7 PANNEAU DE CONTR LE CONTROL PANEL BEDIENFELD A B C D E...

Page 3: ...lisez le l int rieur des b timents Ne pas utiliser YRON l ext rieur 19 YRON n est pas destin tre utilis dans les salles de bain les buanderies et tout autre lieu dans lequel il y a des risques de proj...

Page 4: ...les c t s et devant l appareil Certaines parties de ce produit peuvent devenir tr s chaudes et provoquer des br lures Portez une attention particuli re lors d une utilisation proximit d enfants et ou...

Page 5: ...pour une prise en charge SAV Lors de la premi re utilisation l appareil met de la fum e ou une odeur d sagr able Ne vous inqui tez pas cela signifie qu une goutte d huile est tomb e sur le serpentin c...

Page 6: ...as YRON 6 Before using YRON make sure that the voltage indicated on the product is in ac cordance with your electrical installation 7 Make sure that the power plug of the unit is correctly plugged in...

Page 7: ...OT HEAT Mode INCLINAISON Rotate the body of the appliance up to 50 to point it in the direction you want it to be However be careful to do this when the additional heater is cold 1 Plug the unit 2 Pre...

Page 8: ...contact your dealer for after sales service The first time the appliance is used it emits smoke or an unpleasant odour Don t worry this means that a drop of oil has fallen on the heating coil during...

Page 9: ...tellt wird 18 Dieses Ger t ist f r den h uslichen nicht kommerziellen Gebrauch bestim mt Verwenden Sie es innerhalb von Ge b uden Verwenden Sie YRON nicht im Freien 19 YRON ist nicht zur Verwendung in...

Page 10: ...stens 50 cm Platz Teile dieses Produkts k nnen sehr hei werden und Verbrennungen verursachen Seien Sie besonders vorsichtig wenn Sie in der N he von Kindern und oder gef hrdeten Personen arbeiten 1 Sc...

Page 11: ...eiterhin besteht wenden Sie sich an Ihren H ndler Bei der ersten Benutzung gibt das Ger t Rauch oder einen unangenehmen Geruch ab Keine Sorge das bedeutet dass w hrend des Herstellungsprozesses ein Tr...

Page 12: ...quipment Applicable in the countries of the European Union and other Euro pean countries with separate collection systems appropriate This symbol on the product indicates that this pro duct shall not...

Page 13: ...183 av Georges Cl menceau 92000 NANTERRE FRANCE info airandme fr 33 9 72 232 232...

Reviews: