Page 7
Air Techniques, Inc.
3.d.
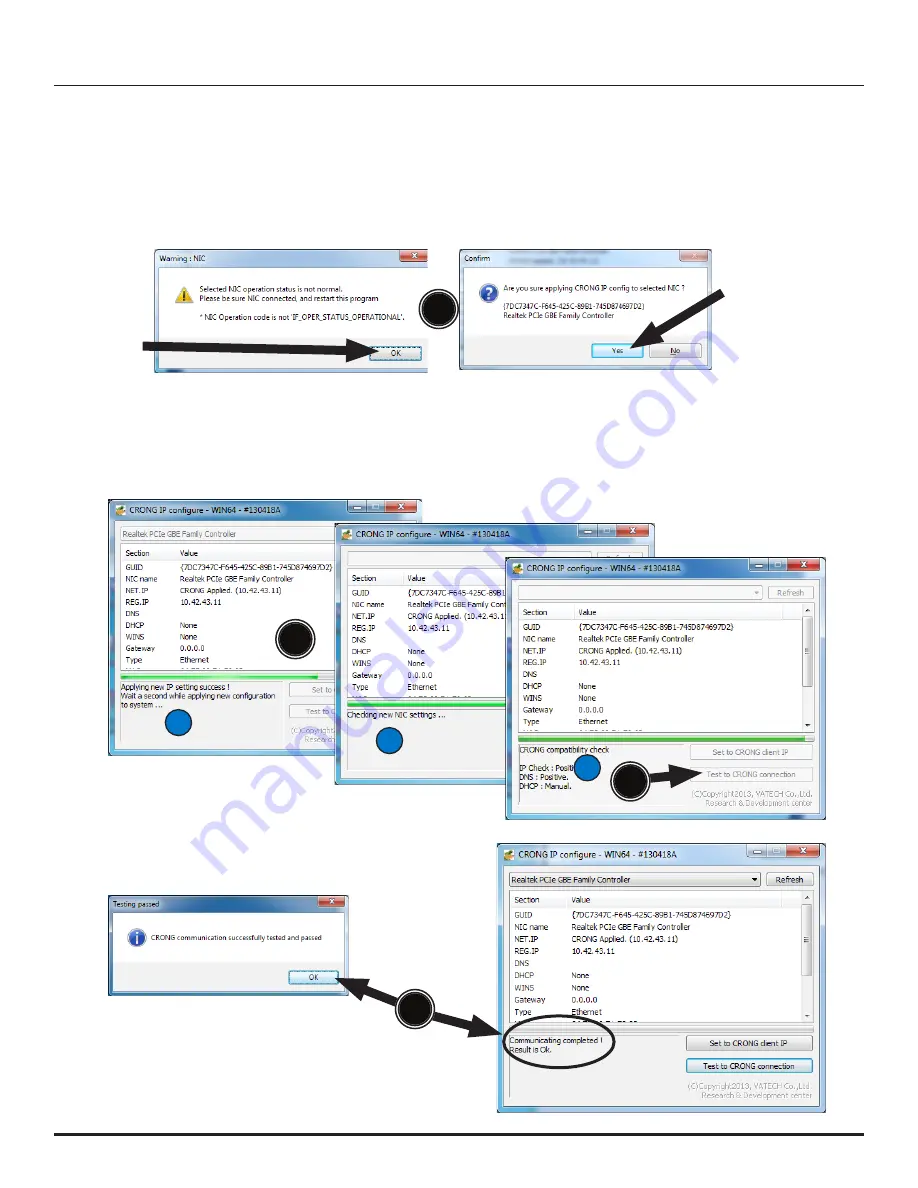
Observe that a new IP and NIC setting process starts in the open the
CRONG IP configure
window.
Note the sequence of information in the lower left window area.
3.e.
When the program finishes the setting check, click the
Test to CRONG connection
button.
3.c.
One of two windows will pop up: the
Warning
window or the
Confirm
message window.
If the Warning message displays, click
OK
, close the
CRONGIPC
application, make sure the
network adapter is properly seated and drivers loaded. Also make sure that S-Pan is turned on
and physically connected to the network adapter. Restart
CRONGIPC
.
Otherwise, click
Yes
when the Confirm message appears.
Device
not
found
Continue to
CRONG IP
Configure
2
1
3.f.
Click
OK
in the Test passed window and
note the successful status.
3.g.
Repeat steps 3.b, 3.c and 3.d above to ensure
that the CRONG client IP is correctly reset after
the test.
3c
3d
3f
3
3e
CONFIGURING THE NIC
Summary of Contents for ProVecta S-Pan
Page 2: ......


