background image

10

Menu operation

The menu items provide several options for you to fine-tune your camera functions. 

The following table gives details on menu operations.
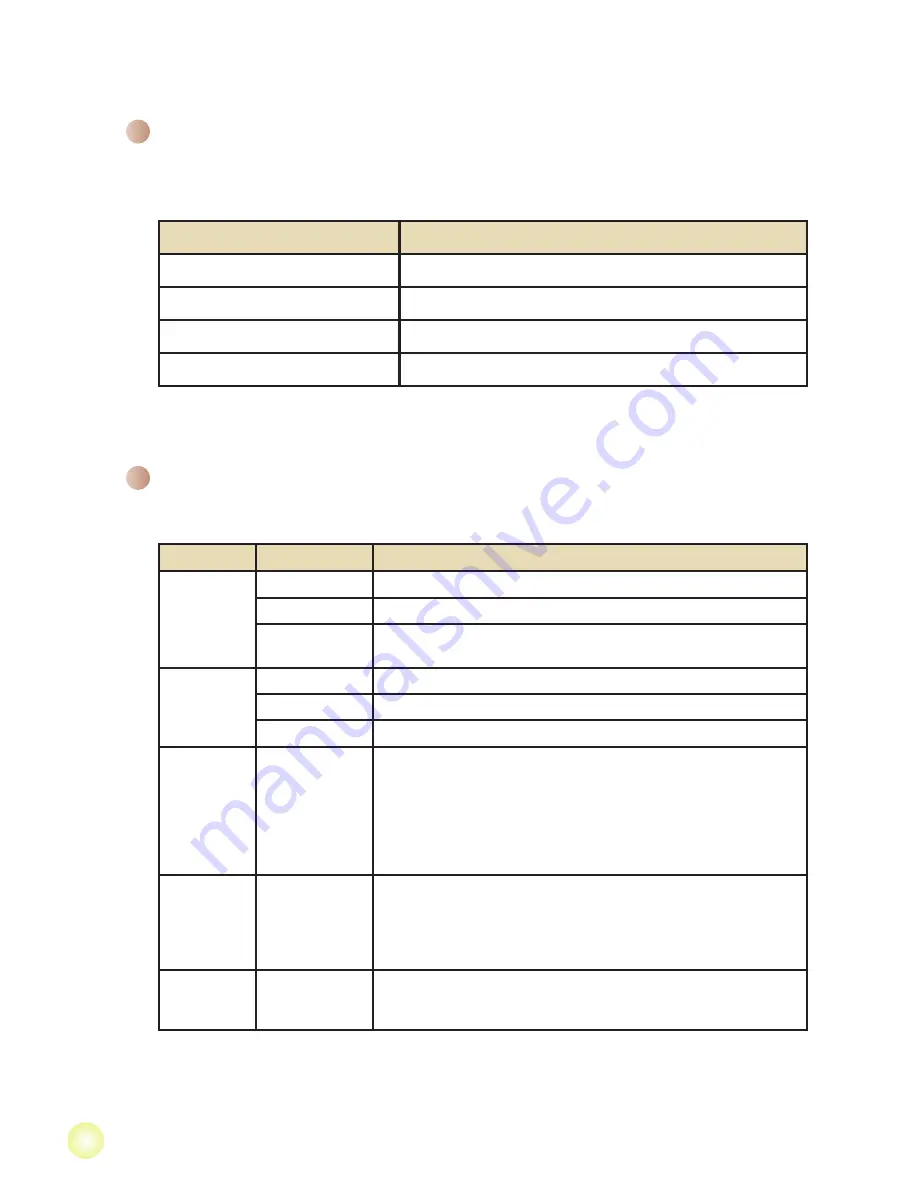
How to...

Action

Bring up the menu

Press the 

MENU

 button. 

Move the highlight bar

Use the 

Joystick

 to move up or down.

Enter sub-menu/Confirm an item

Press the 

OK

 key.

Exit menu/Go back to upper menu

Press the 

MENU

 button (when in sub-menu).

Advanced Operations

Menu items in Camera mode

Power-on → Press the 

Menu

 button.

Item

Option

Description

Video 

Resolution

HD 1080P(30f)

Set the video resolution to HD 1080P (1440x1080 pixels).

HD 60f(720P)

Set the video resolution to HD 60f (1280x720 pixels).

WVGA 

60f(DVD)

Set the video resolution to WVGA 60f (848x480 pixels).

Flash Strobe 

On

The flash is forced to fire in every shot.

Auto

The flash automatically fires when the lighting is insufficient.

Off

The flash is disabled.

NightShot

On/Off

Enabling this setting allows you to take a photograph with a dark 

background. Since the shutter speed will slow down when taking 

photographs at a dark place, we recommend using a tripod to 

eliminate blurring from hand shake. 

Warning: Noise increases when NightShot is enabled.

Warning: The stabilizer function is disabled when NightShot 

is enabled.

EV

-2~+2

Enabling this setting allows you to take a photograph with a dark 

background. Since the shutter speed will slow down when taking 

photographs at a dark place, we recommend using a tripod to 

eliminate blurring from hand shake. 

Warning: Noise increases when NightShot is enabled.

Selftimer

On/Off

Enable/Disable the selftimer. After the selftimer is turned on, the 

camera will have ten seconds delay before recording when the 

Shutter button is pressed.

Summary of Contents for Action A-V5Z5S

Page 1: ......

Page 2: ...that any change or modifications to the equipment not expressly approved by the party responsible for compliance could void Your authority to operate such equipment If the time arises to throw away yo...

Page 3: ...asic Operations 4 Recording a video clip 4 Recording a voice clip 4 Taking a still picture 5 Playing back your recordings 6 Playing back your recordings on PC 7 Connecting the camcorder to TV 8 Advanc...

Page 4: ...sh strobe Lens Internal Microphone SD MMC card slot Speaker MODE button MENU button Shutter button Record button Zoom in out button Macro mode switch AF lock switch Flash switch Resolution switch Powe...

Page 5: ...ts 3 When the charging is interrupted or the battery pack is fully charged the charging LED will turn green When using a PC to charge the battery do not power on the camcorder or the charge will stop...

Page 6: ...item and then Press OK to confirm 5 Move the Joystick up down to select a language 6 When done press OK to confirm the setting Reading LCD indicators 1 Mode icon Zoom ratio indicator Video resolution...

Page 7: ...ated in HD 720P 60f WVGA 60f In HD 1080P 30f mode this function is disabled It s normal that the camcorder will feel slightly warm with continuous use recording due to its high performance Basic Opera...

Page 8: ...ure the LCD preview and ratio of still picture capture will vary depending upon different video resolution settings The image capture of the camera is set where as video resolutions are different Vide...

Page 9: ...ve the highlight box 2 In Full screen mode Use the Joystick to move left or right Video Audio Start playing When selected in full screen mode the file automatically starts playing Pause Resume playing...

Page 10: ...s After the software is properly installed on your PC please follow the procedures listed below 1 Turn on the camcorder 2 Connect the camcorder with SD card inserted to your computer with the USB cabl...

Page 11: ...her end into the AV port on the Camcorder Please do not plug in the yellow connector to the HDTV s AV IN 5 Press the input switch mode on the HDTV and select Component Input If you record an HD resolu...

Page 12: ...mode 2 Connect the audio and video ends of the AV cable yellow white red color to the TV AV IN jacks 3 Power on the camcorder 4 Connect the other end of the AV cable to the AV port on your camcorder...

Page 13: ...rced to fire in every shot Auto The flash automatically fires when the lighting is insufficient Off The flash is disabled NightShot On Off Enabling this setting allows you to take a photograph with a...

Page 14: ...nued Item Option Description Continuous Shot at video resolution On Off Enable Disable continuous shot function White Balance Auto The camera automatically adjusts white balance Sunny This setting is...

Page 15: ...lity to NTSC This option is suitable for America Taiwan Japan and Korea areas PAL Set TV system compatibility to PAL This option is suitable for Germany England Italy Netherlands China Japan and Hong...

Page 16: ...life The flash strobe and the LED lights will be disabled Empty battery life Note To avoid sudden outage of power supply you are recommended to replace the battery when the icon indicates low battery...

Page 17: ...lexity of your subject and surroundings System requirements are different in different video resolution settings Video Resolution PC system requirements HD 1080P 1440x1080 30fps OS Windows XP SP2 Vist...

Page 18: ...ry SD MMC card up to 32GB SDHC LCD display 3 LCD TV out HDTV Component out NTSC PAL system supported Interface USB 2 0 Voice recorder Yes Microphone internal stereo external mic jack Speaker Yes Night...

Page 19: ...82 486 90010 000v1 0 HD DV Camcorder...

Reviews: