S150/S151/S152/Z152
6-5
Attachments
6
2
1
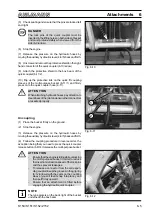
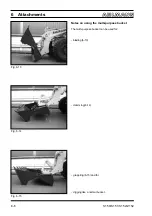
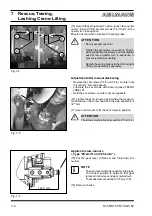
Fig. 6-10
Fig. 6-11
(5) Check seating and ensure that the pins are locked left
and right.
DANGER
The lock pins of the quick coupler must be
inserted in the lifting holes on both sides of bucket
and must protude visibly when viewed from the
side (6-9/arrow).
(6) Stop the engine.
(7) Release the pressure on the hydraulic hoses by
moving the auxiliary hydraulics lever (4-6/5) back and forth.
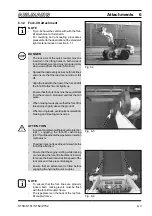
(8) Unscrew and remove the protective shield on the right-
hand connector of the quick coupler (6-10/arrow).
(9) Attach the protective shield to the box beam of the
quick coupler (6-11/2).
(10) Flip up the protective lids on the quick fit coupling
sleeves of the multi-purpose bucket (6-11/1) and firmly
press onto the quick coupler hose (6-11).
ATTENTION
When attaching hydraulic hoses pay attention to
cleanliness of the joint and ensure that connectors
are seated properly.
Uncoupling
(1) Place the bucket firmly on the ground.
(2) Stop the engine.
(3) Release the pressure on the hydraulic hoses by
moving the auxiliary hydraulics lever (4-6/5) back and forth.
(4) Follow the coupling procedure in reverse order, the
exception being that you need to press the quick coupler
release button (4-8/14) to release the multi-purpose bucket.
ATTENTION
-
Ensure that the engine is idling while unlocking
the multi-purpose bucket in order to reduce
the insertion/retraction speed of the lock pins
and thus prevent leakages.
-
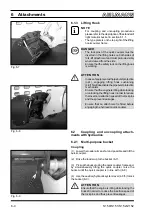
To release a connector from the correspon-
ding coupler line up the grooves in the grip ring
(6-12/arrows) with the cams on the coupling
sleeve (you will feel it snap into place), and
then pull firmly upward.
-
Ensure that an attachment is fitted before
engaging the hydraulic quick coupler.
NOTE
The type plate is on the back right of the bucket
underneath the box beam.
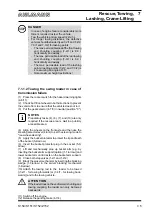
Fig. 6-12
i
Summary of Contents for AS 150
Page 7: ...Safety regulations ...
Page 19: ...Signs ...
Page 22: ...Anti TheftProtection ...
Page 25: ...Description ...
Page 34: ...Operations ...
Page 46: ...Attachments ...
Page 54: ...Rescue Towing Lashing Crane Lifting ...
Page 61: ...Maintenance ...
Page 80: ...Troubleshooting ...
Page 83: ...Wiring and Hydraulics ...
Page 98: ...Technical Data Equipment ...
Page 103: ...Technical Data Attachments ...
Page 112: ...Optional Extras Changes ...

