

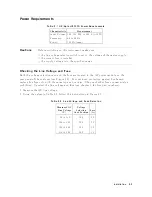


Checking
the
Address
T
o
display
the
curren
t
HP-IB
address
on
the
CR
T:
1.
Press
4
LOCAL
5.
2.
Select
NNNNNNNNNNNNNN
8757
.
Changing
the
Address
T
o
c
hange
the
HP-IB
address:
1.
Press
4
LOCAL
5.
2.
Select
NNNNNNNNNNNNNN
8757
.
The
CR
T
displays
the
curren
t
address.
3.
Using
the
fron
t
panel
k
eypad,
en
ter
the
new
address.
4.
Press
4
ENT
5
to
terminate
the
en
try
.
The
CR
T
displays
the
new
address.
T
urning
the
line
switch
o
or
presetting
the
instrumen
t
do es
not
aect
this
address.
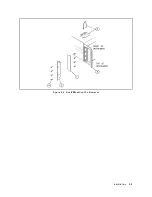
Recording
the
Address
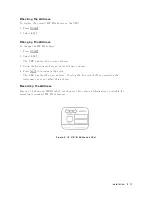
Figure
2-10
sho
ws
an
HP-IB
lab
el
(see
c
hapter
1
for
ordering
information),
a
v
ailable
for
recording
instrumen
t
HP-IB
addresses.
Figure
2-10.
HP-IB
Address
Label
Installation
2-17
Summary of Contents for 8757D
Page 8: ......
Page 13: ...Figure 1 2 HP 8757D Scalar Network Analyzer and Accessories Supplied General Information 1 5 ...
Page 27: ...General Information 1 19 ...
Page 39: ...Figure 2 4 Rack Mounting the Analyzer Installation 2 9 ...
Page 41: ...Figure 2 5 Analyzer to HP Agilent 8350 Sweep Oscillator Interconnections Installation 2 11 ...
Page 43: ...Figure 2 7 Analyzer to HP Agilent 8360 Series Synthesizer Interconnections Installation 2 13 ...
Page 44: ...Figure 2 8 Analyzer to HP Agilent 83750 Series Synthesizer Interconnections 2 14 Installation ...
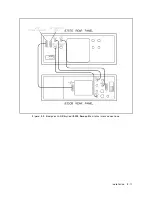
Page 45: ...Figure 2 9 Rear Panel Display Connectors Installation 2 15 ...
Page 49: ...Figure 2 11 HP IB Connectors Signals and Pin Configuration Installation 2 19 ...
Page 52: ......
Page 55: ......
Page 56: ......
Page 57: ......
Page 58: ......
Page 59: ......
Page 60: ......
Page 61: ......
Page 62: ......
Page 63: ......
Page 64: ......
Page 65: ......
Page 66: ......
Page 67: ......
Page 68: ......
Page 69: ......
Page 70: ......
Page 71: ......
Page 72: ......
Page 73: ......
Page 74: ......
Page 75: ......
Page 76: ......
Page 77: ......
Page 78: ......


