background image

29/10/2019

Aeotec Wallmote user guide : Aeotec Group

https://aeotec.freshdesk.com/support/solutions/articles/6000176572-wallmote-user-guide-

4/9

Adding your WallMote to your Z-Wave network.

With your mounting plates prepared to hold each component of your  WallMote, it’s time to add it to your Z-Wave
network.

1. 

Let your Z-Wave primary controller/gateway enter into pairing/

2.

 inclusion mode. 

3. 

Take your WallMote near to your primary controller.  Press the Action Button once on your WallMote, the LED will

blink with green color. 

4.

 If your WallMote has been successfully added to your Z-Wave  network, its green LED will be solid for 2 seconds and

then off. If the adding was unsuccessful and the red LED will be solid for 2 seconds and then off, repeat the above
steps.

With your WallMote now working as a part of your smart home,  you’ll be able to configure it from your home control
software or phone application. Please refer to your software’s user guide for precise instructions on configuring the
WallMote to your needs.

Attach your WallMote to its Back Mounting plate.

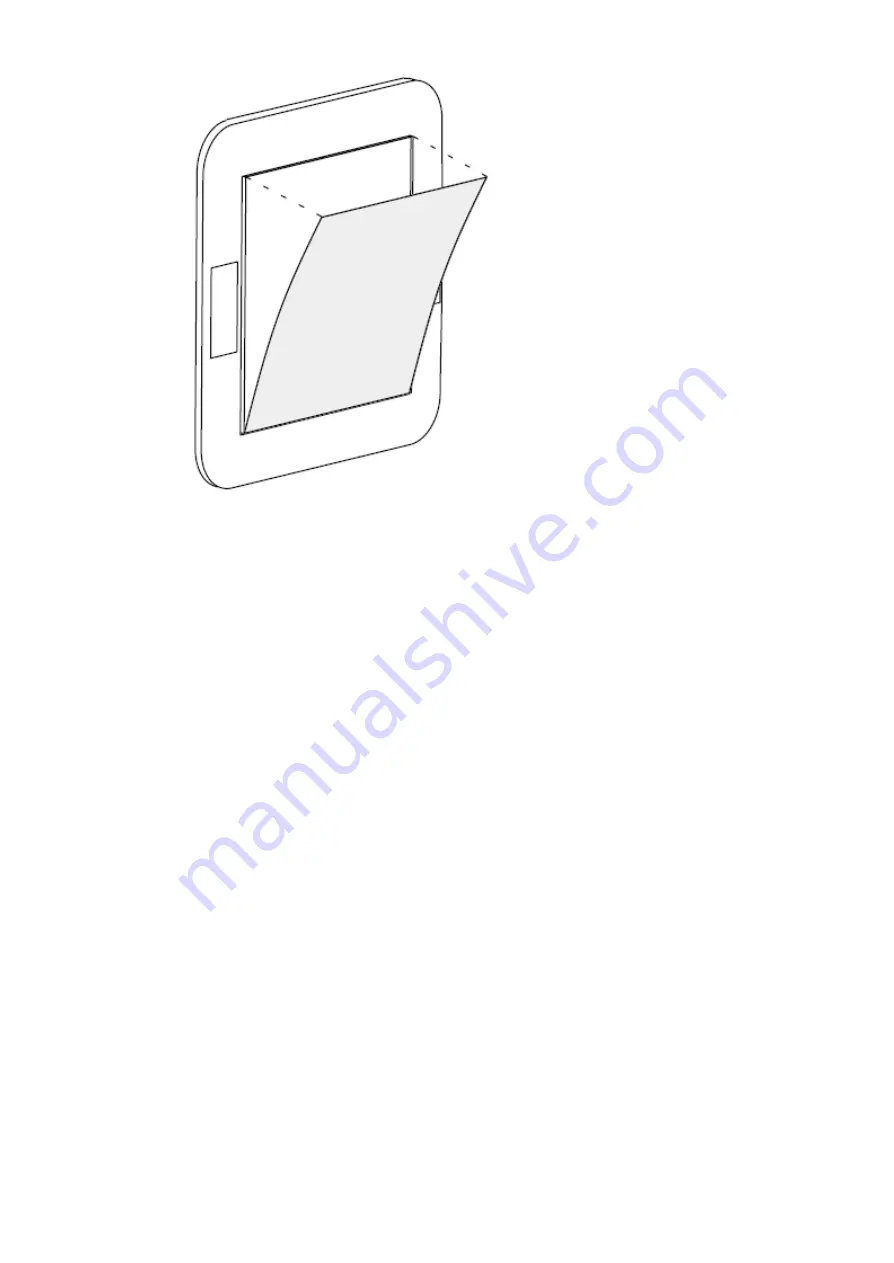
With your WallMote added to the Z-Wave network. It’s now time to insert the main unit into the corresponding Back
Mount plate. Put the main unit in the top-left direction on the Back Mounting, and then push the WallMote into the Back
Mounting Plate, the WallMote will be attracted by the magnets on the Back Mount plate, as the figure below shows.

Summary of Contents for WallMote

Page 1: ...tec com z wave gen5 technology You can find out more about Wallmote http aeotec com z wave wireless switch by following that link To see whether Wallmote is known to be compatible with your Z Wave sys...

Page 2: ...re keep the glass button surface upward direction and no other physical surface or desktop contact with the glass button surface to avoid false triggering and battery consumption Effective Touch area...

Page 3: ...ct and batteries away from open flames and extreme heat Avoid direct sun light or heat exposure Improper battery use may damage the product WallMote and WallMote Quad are intended for indoor use in dr...

Page 4: ...ED will be solid for 2 seconds and then off If the adding was unsuccessful and the red LED will be solid for 2 seconds and then off repeat the above steps With your WallMote now working as a part of y...

Page 5: ...devices from your network 1 Put your primary controller into device removal mode 2 Unlock your WallMote from the Back Mount plate and take the WallMote unit near to your primary controller 3 Press the...

Page 6: ...e Action Button for 12 seconds the buzzer chirp once and the red LED will fast blink and then release Touch vibration This will enable or disable the vibration effects when you press or touch the sens...

Page 7: ...r gateway Every control button also can send the control commands to control the devices in the other association groups see the table below Dimmer control via sliding the button area The WallMote als...

Page 8: ...te to put WallMote back to sleep or wait 10 minutes recommended to manually put it back to sleep to conserve battery life Testing Health Connectivity You can determine the health of your WallMotes con...

Page 9: ...ugh the gateway directly for more advanced controls Below are the known steps required for the listed gateways 1 SmartThings Hub Custom Device Handler by Erocm123 https aeotec freshdesk com solution a...

Reviews: