User Guide
LED 3 indicates internal alarms of the relay. W hen the relay detects a « non-critical » internal alarm
(typically a communication failure), the LED starts blinking continuously. When the relay detects a fault
that is considered as « critical », the LED lights up continuously. Only the disappearance of the cause of
the fault can clear this LED (repair of the module, clearance of the Fault).
LED 4:
Color: GREEN
Label: Power
LED 4 indicates that the relay is powered by an auxiliary source at the nominal range.
LED 5 to 8:
Color: RED
These LEDs are user programmable and can be set to display information about instantaneous and
time-delayed thresholds as well as the status of the logic inputs. Under the CONFIGURATION/LED
menu of the relay, the user can select the information he wishes to associate with each LED. He can
affect more than one function to one LED. The LED will then light up when at least one of the associated
information is valid (OR gate). The LED is cleared when all the associated alarms are acknowledged.
2.3
Description of the two areas under the top and bottom flaps
2.3.1
3.
Relay Identification
Under the upper flap, a label identifies the relay according to its model number (order number) and its
serial number. This information defines the product in a way that is unique. In all your requests, please
make reference to these two numbers.
Under the model and serial number, you will find information about the level of voltage of the auxiliary
supply and the nominal earth current value.
There is RS232 port available under the lower flap in the relay. This RS232 port can be used to plug a
laptop loaded with setting software.
To withdraw more easily the active part of the relay (i-e the chassis) from its case, open the two flaps,
then with a 3mm screwdriver, turn the extractor located under the upper flap, and pulls it out of its case
pulling the flaps towards you.
PASSWORD
3.1
Password Protection
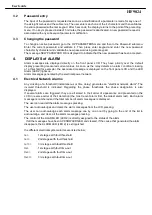
An unlock key (up down) is required, when you want to press any key. After 5 minutes that you don
’t
press any key, you must unlock the keys for navigation through menus.
A password is required for relay settings, especially when changing the various thresholds, time delays,
and communication parameters, allocation of inputs and outputs relays.
The password consists of four capital characters. W hen leaving factory, the password is set to AAAA.
The user can define his own combination of four characters. Should the password be lost or forgotten,
the modification of the stored parameters is blocked. It is then necessary to contact the manufacturer or
his representative and a standby password specific to the relay may be
obtained.
F
LED 3
Color: YELLOW
Label: Warning
HF9024
Summary of Contents for DUA2.1
Page 1: ...Numerical Voltage Protection Relay Technical Guide and user manual HF9024 DUA2 1 ...
Page 4: ...Introduction 1 INTRODUCTION The Voltage relay type HF9024 is a numerical relay HF9024 ...
Page 8: ...Handling Installation and Case Dimensions HANDLING INSTALLATION AND CASE DIMENSIONS HF9024 ...
Page 17: ...User Guide User Guide HF9024 ...


