background image

5

Deutsch

Einführung

Vorwort

Sehr geehrte Kundin, sehr geehrter Kunde,

vielen Dank, dass Sie sich für unser Produkt entschieden 

haben.

Lesen Sie die hier enthaltenen Informationen, damit Sie 

mit Ihrem Gerät schnell vertraut werden und seine Funkti-

onen in vollem Umfang nutzen können.

Wir wünschen Ihnen viel Freude beim Gebrauch.

Informationen zu dieser Bedienungsanleitung

Diese Bedienungsanleitung ist Bestandteil des Stereo 

Autoradios AR 4021 BT (nachfolgend als Gerät bezeichnet) 

und gibt Ihnen wichtige Hinweise für den bestimmungs-

gemäßen Gebrauch, die Sicherheit, den Anschluss sowie 

die Bedienung des Gerätes.

Die Bedienungsanleitung muss ständig in der Nähe des 

Gerätes verfügbar sein. Sie ist von jeder Person zu lesen 

und anzuwenden, die mit der Bedienung und Störungsbe-

hebung des Gerätes beauftragt ist.

Bewahren Sie diese Bedienungsanleitung auf und geben 

Sie diese mit dem Gerät an Nachbesitzer weiter.

Urheberrecht

Diese Dokumentation ist urheberrechtlich geschützt.

Jede Vervielfältigung, bzw. jeder Nachdruck, auch aus-

zugsweise, sowie die Wiedergabe der Abbildungen, auch 

im veränderten Zustand ist nur mit schriftlicher Zustim-

mung des Herstellers gestattet.

Haftungsbeschränkung

Alle in dieser Bedienungsanleitung enthaltenen tech-

nischen Informationen, Daten und Hinweise für den 

Anschluss, den Einbau und die Bedienung entsprechen 

dem letzten Stand bei Drucklegung und erfolgen unter 

Berücksichtigung unserer bisherigen Erfahrungen und 

Erkenntnisse nach bestem Wissen.

Aus den Angaben, Abbildungen und Beschreibungen in 

dieser Anleitung können keine Ansprüche hergeleitet 

werden.

Der Hersteller übernimmt keine Haftung für Schäden 

aufgrund von Nichtbeachtung der Anleitung, nicht 

bestimmungsgemäßer Verwendung, unsachgemäßen 

Reparaturen, unerlaubt vorgenommener Veränderungen 

oder Verwendung nicht zugelassener Ersatzteile.

Warnhinweise


WARNUNG

Ein Warnhinweis dieser Gefahrenstufe kennzeichnet 

eine mögliche gefährliche Situation.

Falls die gefährliche Situation nicht vermieden wird, 

kann dies zu Verletzungen führen.

Die Anweisungen in diesem Warnhinweis befolgen, 


um Verletzungen von Personen zu vermeiden.


ACHTUNG

Ein Warnhinweis dieser Gefahrenstufe kennzeichnet 

einen möglichen Sachschaden.

Falls die Situation nicht vermieden wird, kann dies zu 

Sachschäden führen.

Die Anweisungen in diesem Warnhinweis befolgen, 


um Sachschäden zu vermeiden.


HINWEIS 

Ein Hinweis kennzeichnet zusätzliche Informationen, 


die den Umgang mit dem Gerät erleichtern.

Bestimmungsgemäße Verwendung

Dieses Gerät ist nur bestimmt 

zum Empfang von UKW- und MW-Radiosendern


zur Wiedergabe von Audio-CDs


zur Wiedergabe von MP3- und WMA-Dateien von CD, 


USB-Datenträgern oder SD/MMC-Speicherkarten

zur Wiedergabe von Audio-Signalen externer Audioge-


räte

zur Wiedergabe von Musik via Bluetooth-Profil A2DP


zum Telefonieren via Bluetooth


Eine andere oder darüber hinausgehende Benutzung gilt 

als nicht bestimmungsgemäß.


WARNUNG

Gefahr durch nicht bestimmungsgemäße Verwendung!

Von dem Gerät können bei nicht bestimmungsgemäßer 

Verwendung und/oder andersartiger Nutzung Gefahren 

ausgehen.

Das Gerät ausschließlich bestimmungsgemäß ver-


wenden.

Die in dieser Bedienungsanleitung beschriebenen 


Vorgehensweisen einhalten.

Ansprüche jeglicher Art wegen Schäden aus nicht bestim-

mungsgemäßer Verwendung sind ausgeschlossen.

Das Risiko trägt allein der Betreiber.

Sicherheit

In diesem Kapitel erhalten Sie wichtige Sicherheitshinwei-

se im Umgang mit dem Gerät.

Dieses Gerät entspricht den vorgeschriebenen Sicherheits-

bestimmungen. Ein unsachgemäßer Gebrauch kann zu 

Personen- und Sachschäden führen.

Grundlegende Sicherheitshinweise

Beachten Sie für einen sicheren Umgang mit dem Gerät 

die folgenden Sicherheitshinweise:

Kontrollieren Sie das Gerät vor der Verwendung auf 


äußere sichtbare Schäden. Nehmen Sie ein beschädig-

tes oder heruntergefallenes Gerät nicht in Betrieb.

Summary of Contents for AR 4021 BT

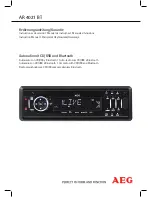
Page 1: ...le d istruzione Instruction Manual Podręcznik Użytkownika Gwarancja Autoradio mit CD USB und Bluetooth Autorradio con CD USB y Bluetooth Auto rádio com CD USB e Bluetooth Autoradio con CD USB e Bluetooth Car radio with CD USB and Bluetooth Radio samochodowe z CD USB oraz urządzeniem Bluetooth ...

Page 2: ...RTUGUÊS Índice Descrição dos elementos Página 3 Visão geral Página 42 Características técnicas Página 57 Índice Página 59 ITALIANO Contenuto Posizione dei comandi Pagina 3 Contenuto Pagina 60 Dati tecnici Pagina 75 Indice Pagina 77 ENGLISH Contents Overview of the Components Page 3 Overview Page 78 Technical Data Page 93 Index Page 94 JĘZYK POLSKI Spis treści Przegląd elementów obłsugi Strona 3 Pr...

Page 3: ...3 Übersicht der Bedienelemente Indicación de los elementos de manejo Descrição dos elementos Posizione dei comandi Overview of the Components Przegląd elementów obsługi ...

Page 4: ...abnehmen 12 Batterie der Fernbedienung austauschen 12 Bedienung und Betrieb 12 Ein Ausschalten 12 Einstellungen 12 Radiofunktionen 14 Allgemeine CD Funktionen 15 Zusatzfunktionen für MP3 WMA CDs 16 USB Anschluss 16 Kartenleser SD MMC 17 Telefonieren via Bluetooth 17 Geräte anmelden PAIRING 17 Geräte trennen Taste SCAN CON 18 17 Geräte wieder verbinden Taste SCAN CON 18 18 Telefonmenü Einstellungen...

Page 5: ...er Ersatzteile Warnhinweise WARNUNG Ein Warnhinweis dieser Gefahrenstufe kennzeichnet eine mögliche gefährliche Situation Falls die gefährliche Situation nicht vermieden wird kann dies zu Verletzungen führen Die Anweisungen in diesem Warnhinweis befolgen um Verletzungen von Personen zu vermeiden ACHTUNG Ein Warnhinweis dieser Gefahrenstufe kennzeichnet einen möglichen Sachschaden Falls die Situati...

Page 6: ...edienen Sie das Gerät nur wenn es die Verkehrs lage zulässt Halten Sie an geeigneter Stelle an um umfangreiche Bedienungen durchzuführen Entfernen oder bringen Sie das Bedienteil nur bei stehendem Fahrzeug an Stellen Sie eine angemessene Lautstärke ein damit Sie akustische Signale der Polizei Feuerwehr und anderen Rettungsdiensten rechtzeitig wahrnehmen Bedienelemente siehe Ausklappseite Autoradio...

Page 7: ...e Rautetaste zur Eingabe von Telefonnummern Fre quenz erhöhen Sendersuchlauf Nächsten Titel wieder geben 9 Taste 0 DISP Zifferntaste zur Telefonnummerneingabe Zusatzinfor mationen auf dem Display anzeigen 10 Taste Sternchentaste zur Eingabe von Telefonnummern Frequenz veringern Sendersuchlauf Vorherigen Titel wiedergeben 11 Taste 7 AF MON Zifferntaste zur Telefonnummerneingabe AF ein und ausschalt...

Page 8: ...ühren Benutzen Sie beim Einbau die ISO Anschlüsse am Gerät Die fahrzeugspezifischen ISO Adapter die Sie gegebenenfalls benötigen erhalten Sie in Fachwerk stätten im Fachhandel oder in den Fachabteilungen der Warenhäuser Anschlüsse an der Geräterückseite A C B D E A ISO Anschluss B Laufsprecher B Kfz Flachsteckersicherung 5 A C ISO Anschluss A Spannungsversorgung D LINE OUT Vorverstärkerausgang Aud...

Page 9: ...leisten ist der Einbau entsprechend dieser Anleitung zwingend erforderlich Im Zweifel wenden Sie sich an eine autorisierte KFZ Werkstatt Bedingt durch die verschiedenen Fahrzeugtypen bzw Fahrzeughersteller ist eine korrekte Belegung des ISO Steckers nicht gewährleistet selbst wenn die ISO Steckeranschlüsse mechanisch aufeinander passen Daher ist es eventuell erforderlich den Stromanschluss zu ände...

Page 10: ...e den Rahmen auf festen Halt Verbinden Sie die ISO Buchsen des Gerätes mit den beiden ISO Steckern Ihres Fahrzeugs Verbinden Sie das Antennenkabel der Fahrzeuganten ne mit der Antennenbuchse des Gerätes Sichern Sie Ihr Gerät ggf zusätzlich gegen Diebstahl Befestigen Sie die Befestigungsschraube mit dem Verankerungsblech und dem Befestigungsmaterial an der Motor Feuerwand des KFZ Schieben Sie das G...

Page 11: ...ie Schrauben 4 um die Lenkradhalterung in die abgebil deten Einzelteile 1 4 zu zerlegen Legen Sie das Gummiband um das Lenkrad Wählen Sie dabei die entsprechenden vorgestanzten Löcher um die Halterung fest am Lenkrad zu montieren Stecken Sie die Abdeckung 3 über die Fixierklammer 2 Drehen Sie anschließend die Schrauben 4 wieder fest Batterie in die Fernbedienung einlegen HINWEIS Vor dem ersten Geb...

Page 12: ... besteht Explosionsgefahr ACHTUNG Batterien gehören nicht in den Hausmüll Geben Sie verbrauchte Batterien bei zuständigen Sammelstellen oder beim Händler ab Bedienung und Betrieb In diesem Kapitel erhalten Sie wichtige Hinweise zur Bedienung und Betrieb des Gerätes HINWEIS Einige Tasten finden Sie sowohl am Gerät als auch auf der Fernbedienung Gleichlautende Tasten bewir ken die gleiche Funktion N...

Page 13: ...ne automatische Sendereinstellung Wenn keine Verkehrs funkinformationen empfangen werden wird ein Alarmton ausgegeben und NO TP TA auf dem Display angezeigt Wenn der eingestellte Sender kein RDS Signal sendet wird SEEK PI auf dem Display angezeigt PI Überfahren Sie einen Bereich in dem zwei Sender mit gleichem AF jedoch unterschied lichem PI Code PI Programminformation empfangen werden können dann...

Page 14: ...hme nach dem Anschluss der Kabel wenn nicht alle Funktionstasten funktionieren wenn auf dem Display eine Fehlermeldung angezeigt wird Radiofunktionen Betriebsart RADIO einstellen Drücken Sie so oft die Taste PAIR MOD 4 bis die Radiofrequenz und das Frequenzband bzw der Radio sender auf dem Display angezeigt wird Frequenzbereich wählen Drücken Sie die Taste BND 26 um zwischen UKW FM1 FM2 FM3 und Mi...

Page 15: ...ade Verkehrsfunk überträgt Im Display wird TRAFFIC angezeigt Der Lautstärkepegel wird auf den im Menü eingestellten Wert für die Übertragung von Verkehrsnachrichten eingestellt Halten Sie während der Wiedergabe von Verkehrsfunk die Taste EQ TA 19 kurz gedrückt um die TA Funktion zu unterbrechen ohne das die Funktion abgeschaltet wird Allgemeine CD Funktionen Anti Schock Funktion ESP Electric Shock...

Page 16: ...d Drücken Sie die Taste SEL 5 um die Auswahl zu bestätigen Die ausgewählte Titelnummer wird gesucht und wiedergegeben Suche nach Titel bzw Verzeichnisname Drücken Sie zweimal die Taste AS PS 21 Drücken Sie die Tasten 23 bis das gewünschte Zeichen auf dem Display angezeigt wird und bestäti gen Sie die Einstellung durch Drücken der Taste SEL 5 Wiederholen Sie diesen Schritt so oft bis Sie die gewüns...

Page 17: ...eabhängig auf ca 3 Meter Für eine optimale Tonqualität während eines Telefonge sprächs Stellen Sie die Lautstärke nicht zu hoch ein Eine Rück kopplung Pfeifton aus den Lautsprechern könnte die Folge sein HINWEIS Die Einstellung der Lautstärke ist abhängig von den Einbaupositionen der Lautsprecher zum Mikrofon und kann daher nicht benannt werden Geräte anmelden PAIRING Bevor Sie über das Autoradio ...

Page 18: ...ngezeigt Geben Sie mit Hilfe der Zifferntasten die gewünschte Telefonnummer ein Speichern Sie die Telefonnummer durch Drücken der Taste SEL Im Display wird SAVE OK angezeigt HINWEIS Sollten Sie eine oder mehrere Ziffern falsch eingegeben haben können Sie die Ziffern mit der Taste BND 26 löschen Kurz drücken Die Ziffern werden einzeln gelöscht Lang drücken Es werden alle eingegeben Ziffern gelöscht...

Page 19: ...Per Streaming werden Stereo Audio Signale zwischen Abspielgerät Quelle und Empfänger gerät kabellos übertragen Um die Quelle fernsteuern zu können muss das Abspielgerät das AVRCP Profil Audio Video Remote Control Profile unterstützen Aufgrund der unterschiedlichen Gerätehersteller Modelle und Softwareversionen kann eine volle Funktionalität nicht gewährleistet werden Nachdem Sie die Geräte unterei...

Page 20: ...herung funktionie ren nicht Das Antennenkabel ist nicht korrekt ange schlossen Überprüfen Sie das Antennenkabel auf korrekten Sitz Die Sendersignale sind zu schwach Stellen Sie die Sen der manuell ein Fehler Mögliche Ursache Lösung Senderspei cher funktio niert nicht Der Anschluss 4 im ISO Anschluss A Dau erplus ist nicht richtig angeschlossen Überprüfen Sie die Kabelverbindun gen Beachten Sie hie...

Page 21: ...ch Garantieleistungen wird die Garantiezeit nicht verlängert Es besteht auch kein Anspruch auf neue Garantieleistungen Diese Garantieerklärung ist eine freiwillige Leistung von uns als Hersteller des Geräts Die gesetzlichen Gewährleistungsrechte Nacher füllung Rücktritt Schadensersatz und Minderung werden durch diese Garantie nicht berührt Stand 03 2008 Garantieabwicklung Sollte Ihr Gerät innerhal...

Page 22: ...Mo Do 8 30 17 00 Uhr und Fr 8 30 14 00 unter folgender Rufnummer 0 21 52 2006 666 ETV Elektro Technische Vertriebsgesellschaft mbH Industriering Ost 40 D 47906 Kempen Germany Konformitätserklärung Hiermit erklärt die Firma ETV Elektro Technische Ver triebsgesellschaft mbH dass sich das Gerät AR 4021 BT in Übereinstimmung mit den grundlegenden Anforderungen der Kfz Richtlinie 2004 104 EG befindet E...

Page 23: ...AREA 13 Balance 13 Bässe 13 BEEP 13 EON TA 13 Fader 13 Höhen 13 HOUR 13 Lautstärke 12 MASK 13 PCLK 13 PI 13 P VOL 13 REG 13 RETUNE 13 TA VOL 13 TA 13 F Frequenzbereich wählen 14 G Gespeicherten Sender aufrufen 14 Gespeicherte Sender durchlaufen 15 L Lieferumfang 7 Loudness Funktion 14 P Programmtyp PTY 15 R Regionalprogramme REG 13 S Schneller Vor Rücklauf 15 Sender automatisch suchen 14 Sender ma...

Page 24: ...r el Panel Frontal 31 Sustitución de la batería del mando a distancia 32 Funcionamiento 32 Encender Apagar 32 Configuración 32 Funciones de la Radio 34 Funciones Generales del CD 35 Funciones adicionales de los CDs MP3 WMA 35 Puerto USB 36 Lector de Tarjetas SD MMC 36 Llamar a través de Bluetooth 36 Registro de dispositivos PAIRING 37 Desconexión de dispositivos Botón SCAN CON 18 37 Reconexión de ...

Page 25: ...uerte ATENCIÓN Indica una situación peligrosa potencial Si no se evita esta situación puede provocar daños Siga las instrucciones de advertencia para evitar daños NOTA Indica información adicional para facilitar el uso de esta unidad Finalidad de Uso Esta unidad está diseñada para recibir emisoras de radio FM o AM reproducir CDs de Audio reproducir ficheros de CD MP3 y WMA dispositivos USB o tarje...

Page 26: ...ltimo número seleccionado 4 PAIR MOD botón Registro de dispositivos Configurar modo 5 Botón SEL Abre los ajustes confirma 6 Receptor de IR para señales del mando a distancia 7 Pantalla 8 1 6 botones Acceder a la memoria de emisoras Introducción de números de teléfono 9 1 PAU botón Iniciar y detener temporalmente la reproducción Bo tón numérico para introducir números de teléfono 10 2 SCN botón Act...

Page 27: ...ión automáti ca Reproducción de título anterior 11 Botón 7 AF MON Botón numérico para introducir números de teléfono Enciende y apaga AF Cambia a Mono Estéreo 12 Botón 4 SHF Enciende o apaga la función de reproducción alea toria Botón numérico para introducir números de teléfono 13 Botón 5 Selecciona la carpeta anterior Botón numérico para introducir números de teléfono 14 1 botón Iniciar y detene...

Page 28: ... Antena Configuración de los Conectores ISO ISO conector A 1 No conectado 2 No conectado 3 No conectado 4 Modo continuo memoria 5 Tensión de control para electrónica motor de antena o amplificador 6 No conectado 7 12 V ACC 8 TOMA DE TIERRA ISO conector B 1 Altavoz posterior derecho 2 Altavoz posterior derecho 3 Altavoz frontal derecho 4 Altavoz frontal derecho 5 Altavoz frontal izquierdo 6 Altavoz...

Page 29: ...sté apagada En el peor de los casos esto podría descargar la batería del vehículo 4 Según el tipo de vehículo pueden producirse inter ferencias durante el uso de la radio Puede eliminar estas interferencias con un filtro de interferencias adicional Su equipo ya está equipado de serie con un filtro de interferencias Sin embargo según el vehículo pueden provocarse interferencias Dispone de filtros d...

Page 30: ... apartado Sujeción del Panel Frontal ATENCIÓN Existe riesgo de daño Para evitar dañar los cables vigile los cables cuando deslice la unidad en la carcasa Sujete el marco Extracción la Unidad Para extraer la unidad tenga en cuenta las siguientes instrucciones Quitar el marco Insertar las llaves izquierda y derecha en las ranuras correspondientes las pestañas ahora estarán dobladas hacia atrás Desli...

Page 31: ...hacer que el mando a distancia esté preparado para su uso La vida de las baterías suministradas puede acortarse debido a las condiciones de almacenamiento Abra el compartimiento 17 de batería del mando a distancia Coloque la batería en el compartimiento de batería con el polo positivo en la parte superior Cierre la compuerta de la batería de nuevo Enchufe el mando a distancia sobre la tapa del sop...

Page 32: ...lsado el botón MUT 2 para apagar la unidad Configuración Volumen AVISO Existe riesgo de daño auditivo debido al volumen alto Volúmenes altos pueden provocar daños permanentes de audición Fije un volumen moderado Apriete los botones 23 para ajustar el volumen Cambiar la unidad a silenciar Pulse el botón MUT 2 para cambiar la unidad al estado silenciar MUTE parpadea en la pantalla Vuelva a pulsar el...

Page 33: ...La unidad puede recibir datos RDS EON EON significa la transmisión de información adicional de programa dentro de un grupo de emisoras En el caso de un anuncio de tráfico TA cambiará dentro del grupo de emisoras de una retransmisión sin tráfico a la correspon diente emisora de radio de tráfico del grupo de emisoras DX La unidad intenta recibir la información EON TA de una emisora posible y así mej...

Page 34: ...cepto al configurar a BEEP OFF Acceder a una Emisora Almacenada Pulse el botón BND 26 para seleccionar la fre cuencia deseada Pulse una vez los botones numéricos 8 para acceder a la emisora respectiva Almacenamiento Automático Pulse el botón BND 26 para seleccionar la fre cuencia deseada Pulse y mantenga pulsado el botón AS PS 21 en la pantalla aparece SEARCH Después de que la función de exploraci...

Page 35: ... problema de funcionamiento de la unidad Seleccionar modo CD con CD insertado Pulse reiterativamente el botón PAIR MOD 4 hasta que en la pantalla aparezca CDP PLAY Modo Avance Retroceso Pulse los botones 23 o 23 para saltar a la pista siguiente o anterior El número de título y el tiempo de reproducción transcurrido se muestran en la pantalla Avance Retroceso Rápido Pulse y mantenga pulsado los bot...

Page 36: ...ica a través de Bluetooth no esté soportada Conexión de Dispositivos Abra la cubierta de protección del puerto USB Conecte su dispositivo USB La unidad detecta los ficheros MP3 o WMA del dispositivo y en la pantalla aparece USB PLAY La reproducción se inicia automáti camente Para evitar ensuciarlo vuelva a colocar la cubierta protectora si no conecta un dispositivo USB Función Reproducción y Búsqu...

Page 37: ...il Consulte el manual de usuario de su móvil Asegúrese de que habla hacia el micrófono integrado 24 No se puede conectar un micrófono externo Desconexión de dispositivos Botón SCAN CON 18 Los dispositivos se conectan si apaga la autorradio a través de la ignición o en la unidad Mantenga el botón SCAN CON 18 apretado para desconectar los dispositivos DISCONN se muestra en la pantalla 7 Reconexión d...

Page 38: ...el botón BND 26 Apriete brevemente Los números se borran indi vidualmente Mantenga apretado Todos los números introdu cidos se borran Para llamar al número deseado apriete después el botón 3 CALLING se muestra en la pantalla Remarcado La unidad guarda el último número marcado Para recupe rarlo siga los siguientes pasos Apriete el botón 3 dos veces LAST NUM y a conti nuación el último número de tel...

Page 39: ...ción eléctri ca es inadecuada Compruebe la insta lación eléctrica Problema Causa Acción Correctora El disco no puede car garse o está obstruido Hay un disco en el reproductor Extraiga el disco del reproductor y cargue uno nuevo Disco introducido de forma incorrecta Introduzca el disco compacto con la etiqueta mirando hacia arriba El disco está muy sucio o es defectuoso Limpie el disco o intenten r...

Page 40: ...encia 15 A máx Temperatura de Funcionamiento 5 40 C Humedad no condensación 5 90 Dimensiones L x A x A 181 x 163 x 52 mm Peso 1 33 kg Máxima potencia de salida 4 x 40 W PMPO Control de Sonido Bajos a100 Hz 10 dB Agudos a 10 kHz 10 dB Radio Rango de Frecuencia FM 87 5 108 MHz Sensibilidad FM 10 µV Frecuencia Intermedia IF FM 10 7 MHz Separación de Canales 25 dB Rango de Frecuencia AM 522 1620 kHz I...

Page 41: ... 32 BEEP 32 EON TA 33 HOUR 32 MASK 33 PCLK 33 PI 33 P VOL 32 REG 33 RETUNE 33 TA 33 TA VOL 33 Volumen 32 Configurar el Modo RADIO 33 D DISP Botón 33 E Encender 32 Entrar 35 EQ Botón 33 Extracción 29 Extracción de un CD 35 Extraer el Panel Frontal 31 F Frecuencias Alternativas AF 34 Función Antidescargas 35 Funcion Búsqueda 36 Función Loudness 33 I Instalación en una Ranura ISO 30 Introducción CD 3...

Page 42: ...Fixar Painel Frontal 49 Remover Painel Frontal 49 Substituir a pilha do controlo remoto 50 Funcionamento 50 Ligar Desligar 50 Configurações 50 Funções de Rádio 52 Funções Gerais de CD 53 Funções Adicionais CDs MP3 WMA 53 Saída USB 54 Leitor de Cartões SD MMC 54 Telefonar através de Bluetooth 54 Registar dispositivos PAIRING 55 Desligar dispositivos botão SCAN CON 18 55 Voltar a ligar dispositivos ...

Page 43: ...sar a morte ou ferimentos graves Siga as instruções deste aviso para evitar o perigo de morte ou ferimentos graves ATENÇÃO Um aviso deste nível de risco indica a hipótese de danos à propriedade Não evitar essa situação pode causar danos Siga as instruções deste aviso para evitar os danos INDICAÇÃO Uma nota indica informação adicional sobre a utili zação do aparelho Utilização a que se Destina Este...

Page 44: ...terromper o som 3 Botão Aceitar chamada ou marcar o número inserido o último número seleccionado 4 Botão PAIR MOD Registar dispositivos Define o modo 5 Botão SEL Abrir definições Confirmar 6 Receptor IR para os sinais do controlo remoto 7 Visor 8 Botões 1 6 Acede à estação memorizada Inserir números de telefone 9 Botão 1 PAU Inicia e pausa a reprodução Botão numérico para inserir números de telefo...

Page 45: ... anterior 11 Botão 7 AF MON Botão numérico para inserir números de telefone Ligar desligar AF Alterar para mono estéreo 12 Botão 4 SHF Ligar desligar reprodução aleatória Botão numérico para inserir números de telefone 13 Botão 5 Seleccionar pasta anterior Botão numérico para inserir números de telefone 14 Botão 1 Inicia e pausa a reprodução Botão numérico para inserir números de telefone 15 Botão...

Page 46: ... Não ligado 4 Contínuo positivo memória 5 Botão de tensão para antena electrónica motorizada ou amplificador de alimentação 6 Não ligado 7 12 V ACC 8 TERRA Conector ISO B 1 Coluna traseira direita 2 Coluna traseira direita 3 Coluna dianteira direita 4 Coluna dianteira direita 5 Coluna dianteira esquerda 6 Coluna dianteira esquerda 7 Coluna traseira esquerda 8 Coluna traseira esquerda AVISO Utilize...

Page 47: ...dendo do tipo do veículo podem ocorrer in terferências durante o funcionamento do rádio Estas interferências podem ser eliminadas com um filtro de ruído adicional O seu aparelho está já equipado com um filtro de ruído padrão Apesar disso as interferên cias podem ser causadas dependendo do veículo Os filtros de ruído estão disponíveis nos vendedores de acessórios para automóveis e ou no stand autom...

Page 48: ...o em Inserir Painel Frontal ATENÇÃO Possíveis danos ao cabo Para evitar danos aos cabos observe os cabos e desli ze então o aparelho na manga protectora Fixe a estrutura Remover o Aparelho Siga estas instruções para remover o aparelho Remova a estrutura Insira as chaves de instalação esquerda e direita nas ranhuras esquerda e direita as ranhuras estão agora dobradas para trás Deslize o aparelho pa...

Page 49: ...em 2 Volte a apertar os parafusos 4 Inserir a pilha no controlo remoto INDICAÇÃO Antes de utilizar o controlo remoto pela primeira vez deve inserir a pilha fornecida para que o controlo remoto esteja pronto a ser utilizado A durabilidade da pilha fornecida pode ser menor devido às condições de armazenamento Abra o compartimento da pilha 17 no controlo remo to Coloque a pilha no compartimento da pi...

Page 50: ...nviados para o aparelho através da luz de infravermelhos A trans missão dos sinais do controlo remoto para o aparelho pode ser prejudicada pela luz solar no sensor IR 6 Ligar Desligar Pressione o botão MUT 2 para ligar o aparelho O visor fica activo Mantenha pressionado o botão MUT 2 para desli gar a unidade Configurações Volume AVISO Danos de audição devidos a volume elevado O volume elevado pode...

Page 51: ...nte a pesquisa DPI As frequências alternativas com código PI diferente são excluídas da pesquisa ALL As frequências alternativas com código PI diferente e sem informação RDS com elevado nível de sinal são excluídas da pesquisa EON TA O aparelho pode receber dados RDS EON EON significa a transmissão de informação de programas adicionais dentro de um grupo de estação No caso de um anúncio de trânsit...

Page 52: ...m dos botões numéricos 8 para aceder à respectiva estação Guardar Automático Prima BND 26 para seleccionar a banda de frequência pretendida Mantenha premido AS PS 21 SEARCH é exibido O aparelho inicia a pesquisa automática Quando uma estação é encontrada pela função de análise será reproduzida durante alguns segundos antes de analisar a estação seguinte A posição respectiva pisca Prima um dos botõ...

Page 53: ...rior O número do título e a hora de reprodução decorrida são apresentados no visor Avançar Retroceder Rapidamente Mantenha premidas as teclas 23 ou 23 para iniciar a função de avançar ou retroceder rapidamente Pausa Prima PAU 9 para pausar a reprodução S PAUSE é mostrado no visor Prima novamente PAU 9 para continuar a reprodu ção Modo Repetir Prima RPT 11 para repetir a faixa actual para repetir o...

Page 54: ...maticamente Para evitar acumulação de lixo volte a colocar a tampa de protecção se não tiver nenhum dispositivo USB ligado Reprodução e Função de Pesquisa O funcionamento para reprodução de ficheiros de dispositivos média externos assim como a função de pesquisa são semelhantes aos CDs MP3 Prima repetidamente PAIR MOD 4 para seleccionar o modo USB Leitor de Cartões SD MMC INDICAÇÃO A grande varied...

Page 55: ...tivos botão SCAN CON 18 Este aparelho suporta a nova ligação automática Os requisitos são Os dispositivos já estão emparelhados O Bluetooth está activado no seu telemóvel O seu telemóvel suporta esta função Depois do auto rádio ser desligado e ligado novamente através da ignição ou do aparelho a nova ligação auto mática é activada Isto pode demorar alguns segundos CONN TRY é apresentado no ecrã 7 ...

Page 56: ... CLIP Calling Line Identification Presenta tion ID de chamada o número do contacto é apresenta do no ecrã do auto rádio Caso contrário RINGING surge no ecrã Para poder atender uma chamada recebida prima o botão 3 Pode ouvir quem lhe liga através das colunas do seu carro Transferir a chamada entre o auto rádio e o telemóvel Pode transferir a chamada novamente para o seu telemó vel Para tal mantenha...

Page 57: ...i cado Limpe o CD ou repro duza um CD diferente As teclas de função não funcionam O microcomputa dor integrado não está a funcionar devido ao ruído Prima RESET 30 O painel frontal não está instalado correctamente Remova o painel frontal prima RESET e volte a inserir o painel Problema Causa Possível Solução O rádio não funciona ou não tem pesquisa automática O cabo da antena não está ligado Insira ...

Page 58: ...ência de resposta 40 Hz 18 kHz Requisitos do formato MP3 WMA Valor de compressão 16 320 kBit s Taxa de amostra 44 1 kHz Declaração de Conformidade A ETV Elektro Technische Vertriebsgesellschaft mbH declara que o aparelho AR 4021 BT está em conformidade com os requisitos básicos da directiva de interferência rádio compatibilidade electromagnética de veículos 2004 104 EG Pode ser pedida uma cópia da...

Page 59: ...esquisar 53 G Guardar automático 52 Guardar estação 52 I Informação de trânsito TA 52 Inserir CD 53 Instalação da entrada ISO 48 Instalação Toyota ou Nissan 48 Intro 53 L Ligação dos terminais ISO 46 Ligação eléctrica da antena do carro A5 ISO A 46 Ligações do painel traseiro 46 Ligar 49 Ligar amplificador externo 46 M Modo repetir 53 P Pausa 53 Percorrer as estações guardadas 52 Pesquisa automáti...

Page 60: ... 67 Staccare il pannello anteriore 67 Sostituire la pila del telecomando 68 Funzionamento 68 On Off 68 Impostazioni 68 Funzioni radio 70 Funzioni generali del CD 71 Funzioni aggiuntive per CD di MP3 WMA 71 Porta USB 72 Lettore di schede SD MMC 72 Telefonare tramite bluetooth 72 Registrare i dispositivi PAIRING 72 Scollegare i dispositivi tasto SCAN CON 18 73 Ricollegare i dispositivi tasto SCAN CO...

Page 61: ...causarela morte o ferite gravi Seguire le istruzioni riportate nelle avvertenze per evitare il pericolo di morte e lesioni gravi ATTENZIONE Un avvertenza con questo livello di rischio indica un potenziale danno per la proprietà Non evitare questa situazione può causare danni Seguire le istruzioni di questa avvertenza per evitare danni NOTA Una nota indica l informazione aggiuntiva che facili ta l ...

Page 62: ...hiamate o comporre il numero inserito ultimo numero selezionato 4 Tasto PAIR MOD Registrare dispositivi Impostare la modalità 5 Tasto SEL Aprire le impostazioni Confermare 6 Ricevitore IR per i segnali di controllo remoto 7 Schermo 8 Tasti 1 6 Acce dere alla memoria delle stazioni Inserire numeri telefonici 9 Tasto 1 PAU Awiare e mettere in pausa la riproduzione Tasto numerico per l immissione di ...

Page 63: ... 11 Tasto 7 AF MON tasto numerico per l immissione di numeri di telefono Accensione spegnimento AF Passaggio a Mono Stereo 12 Tasto 4 SHF Attivazione7disattivazione della riproduzione casuale Tasto numerico per l immissione ei numeri di telefono 13 Tasto 5 Seleziona la cartella precedente Tasto numerico per l immissione di numeri di telefono 14 Tasto 1 Awiare e mettere in pausa la riproduzione Tas...

Page 64: ...ne dei connettori ISO Connettore ISO A 1 Non collegato 2 Non collegato 3 Non collegato 4 Plus continuo memoria 5 Voltaggio di controllo per antenna elettrica motore o amplificatore di potenza 6 Non collegato 7 12 V ACC 8 GND Connettore ISO B 1 Cassa posteriore destra 2 Cassa posteriore destra 3 Cassa anteriore destra 4 Cassa anteriore destra 5 Cassa anteriore sinistra 6 Cassa anteriore sinistra 7 ...

Page 65: ...ò essere causato per la batteria dell auto anche quando la radio è spenta Nel peggiore dei casi questo potrebbe determinare lo scaricamento della batteria dell auto 4 In base al tipo di veicolo potrebbero verificarsi interferenze durante il funzionamento della radio Queste possono essere eliminate con un filtro acustico addizionale Il set è già dotato di un filtro acustico come standard Nonostante...

Page 66: ...anteriore A come descritto in Attaccare il pannello anteriore ATTENZIONE Possibile danno ai cavi Per evitare danni ai cavi osservare i cavi quando si inserisce l unità nella pista Attaccare la montatura Rimuovere l unità Seguire queste istruzioni per rimuovere l unità Rimuovere la cornice Inserire le chiavi di installazione sinistra e destra nelle fessure sinistra e destra ora le alette sono piega...

Page 67: ...telecomando all uso La durata delle batterie fornite può diminuire a causa delle condizioni di conservazione Aprire il vano batteria 17 del telecomando Mettere la batteria nel vano batteria con il polo positi vo rivolto verso l alto Chiudere nuovamente lo scomparto della batteria Mettere il telecomando nel coperchio della staffa di montaggio finché non si blocca in posizione Immagine dell assembla...

Page 68: ...re premuto il tasto MUT 2 per spegnere l unità Impostazioni Volume AVVISO Danno all udito dovuto al volume elevato Volumi elevati possono danneggiare permanentemente il tuo udito Impostare un volume moderato Premere i tasti 23 per regolare il volume Regolare l unità su silenzioso Premere il tasto MUT 2 per disattivare l audio dell unità MUTE lampeggia sul display Premere nuovamente il tasto MUT 2 ...

Page 69: ...N EON indica la trasmissione di informazioni su altri pro grammi entro un gruppo di stazione Nel caso di un annuncio sul traffico TA passerà entro un gruppo di stazioni da una ricezione non relativa al traffico alla stazione corrispondente sul traffico del gruppo stazioni DX L unità cerca di ricevere le informazio ni EON TA da una stazione in ricezione e quindi per migliorare la qualità di ricezio...

Page 70: ...tazione successiva La rispettiva reimpostazione lampeggia Premere uno dei pulsanti numerici 8 per accedere alla stazione corrispondente Circolo tra le stazioni salvate Premere AS PS 21 Tutte le stazioni vengono riprodotte brevemente in sequenza Premere AS PS 21 quando la stazione desiderata viene raggiunta Questa stazione rimane sintonizzata Frequenze alternative AF AF è una funzione RDS Radio Dat...

Page 71: ...Premere di nuovo per tornare alla riproduzione normale Solo per file MP3 e CD nel formato MP3 tenere il tasto RPT 11 leggermente premuto per ripetere la cartella corrente D RPT e la traccia corrente sono visualizzate Premere il tasto per ripristinare la riproduzione normale Intro Premere SCN 10 Lo schermo mostra S SCAN Tutte le tracce vengono riprodotte per 10 secondi in sequenza Premere di nuovo ...

Page 72: ...la riproduzione di schede di memoria Questo non è un malfunzionamento di questa unità Collegamento Media Rimuovere il pannello di controllo vedi pagina 67 Inserire una scheda di memoria con l etichetta rivolta verso l alto nella fessura finché non si blocca con un clic Inserire nuovamente il pannello di controllo vedi pagina 67 Lo schermo mostra SD PLAY La riprodu zione di tracce MP3 o WMA sulle s...

Page 73: ...sualizzato sul display 7 Impostazioni del menu telefono Questo menu può essere aperto solo se un dispositivo è connesso con successo all autoradio Premere il tasto T MENU 25 Premere il tasto T MENU per aprire l impostazione successiva Premere i tasti 23 per cambiare l impostazione visualizzata Sono disponibili le seguenti impostazioni PRE NUM Qui si ha accesso ai 10 numeri di composizio ne rapida ...

Page 74: ...e trasferire una chiamata ad un telefono cellulare Per effettuare ciò tenere premuto il tasto T MENU 25 TRANSFER è visualizzato sul display 7 L autoradio attiva la modalità MUTE Tenere nuovamente premuto questo tasto per trasferire la chiamata all autoradio Riproduzione musicale tramite A2DP Advanced Audio Distribution Profile Questo determina un profilo Bluetooth in base al pro duttore I segnali ...

Page 75: ...nel lo anteriore premere il pulsante RESET ed installare di nuovo La radio non funziona o non c è scansione automatica Il cavo dell antenna non è collegato Inserire il cavo dell antenna ferma mente I segnali sono troppo deboli Selezionare una sta zione manualmente Problema Possible causa Soluzione La memo ria delle stazioni non funziona Il terminale 4 del connettore ISO po sitivo continuo non è ad...

Page 76: ... 44 1 kHz Dichiarazione di conformità Di seguito nel presente contesto ETV Elektro Technische Vertriebsgesellschaft mbH dichiara che il dispositivo AR 4021 BT è conforme ai requisiti di base della direttiva di interferenza radio compatibilità elettromagnetica per i veicoli 2004 104 EG Una copia della dichiarazione di conformità può essere ordinata all indirizzo summenzionato ...

Page 77: ... 68 Alti 68 Bilanciamento 68 Bassi 68 BEEP 68 EON TA 69 HOUR 69 MASK 69 PCLK 69 PI 69 P VOL 68 REG 69 RETUNE 69 Sfumatore 68 TA 69 TA VOL 69 Volume 68 Inserire CD 71 Installazione nel vano ISO 66 Installazione Toyota o Nissan 66 Intro 71 M Modalità riproduzione 71 Modalità salta 71 O Off 68 On 68 P Pausa 71 Portata di consegna 63 Programmi locali REG 69 Pulsante DISP 69 Pulsante EQ 69 Pulsante RES...

Page 78: ...Start up 85 Attach Front Panel 85 Detach Front Panel 85 Replace the remote control batteries 85 Operation 86 On Off 86 Settings 86 Radio Functions 87 General CD Functions 88 Additional Functions MP3 WMA CDs 89 USB Port 89 Card Reader SD MMC 89 Phoning via Bluetooth 90 Registering of devices PAIRING 90 Disconnect devices SCAN CON button 18 90 Reconnect devices SCAN CON button 18 90 Phone menu setti...

Page 79: ...m age to property Not avoiding such situation can cause damage Follow the instructions of this warning to avoid dam age NOTE A note indicates additional information easing the use of the device Intended Use This unit is only intended to receive FM or AM radio stations playback Audio CDs playback MP3 and WMA files from CD USB device or SD MMC memory card playback audio signals from external audio d...

Page 80: ...n Activate SCAN function Numeric button for entering telephone numbers 11 3 RPT button Activate and deactivate repeat functions Numeric button for entering telephone numbers 12 6 DIR button Select next album Numeric button for entering tele phone numbers 13 5 DIR button Select previous album Numeric button for entering telephone numbers 14 4 SHF button Activate and deactivate random playback Numer...

Page 81: ... operating mode 16 BAND LOU button End call or reject incoming call Select frequency range Switch LOUDNESS function on and off 17 Battery compartment 18 Notch for mounting on the left hand side of the steering wheel 19 Volume control 20 Notch for mounting on the right hand side of the steering wheel Installation and Connection Safety Precautions WARNING Taking the unit into operation may lead to i...

Page 82: ...rs 4 and 7 ISO A is inverted In this case the station preset can get lost To remedy invert these connections 7 ACC and 4 continuous posi tive Auto Antenna Power Supply A5 ISO A CAUTION Damage to the unit is possible Do not connect the terminal for antenna power to the power supply of the antenna Max load 100 mA The terminal for antenna power is provided for a relay controlled antenna The relay aut...

Page 83: ...ong projecting round contact on the vehicle side and a round socket on the radio side The second one is the ISO standard antenna plug 150 Ohm Adapters for both formats are offered by car accessory sellers and or your car workshop NOTE To be strictly observed for VW Audi The antenna of your vehicle may be an active antenna This requires a voltage supply only provided by the original car radios If t...

Page 84: ...ront of the unit and remove the hooks Mount the brackets B with screws on the unit D Connect External Audio Device Connect line out of the external audio device to AUX IN 16 jack on the front panel Select playback mode for external device by repeatedly pressing PAIR MOD 4 until AUX is displayed Fit steering wheel mount for remote control You can mount the remote control onto the inside of the stee...

Page 85: ...ot attached properly this can cause malfunc tions Detach Front Panel Press the release button 1 and flip the control panel down Then pull gently on the right hand side of the control panel to detach the control panel Replace the remote control batteries The battery of the remote control is a long life lithium cell If the range of the remote control becomes shorter whilst in use follow the steps be...

Page 86: ...he SEL button again to open the next setting Press the buttons 23 to change the displayed setting The following settings are possible BEEP Key tone BEEP ON The unit sounds a beep tone every time you press a button BEEP OFF The unit sounds no beep tone P VOL Adjusts the volume at which the unit should switch on AREA Region when the unit is used Europe EUR or USA NOTE Changing this setting deletes a...

Page 87: ...nformation on file names only during playback of a MP3 or WMA file NOTE If there is no corresponding information PTY NONE is shown on the display If the information is too long for the display it is displayed as scrolling text Setting the time manually in Radio Mode If the time should not be set automatically proceed as follows Press the button DISP 20 for a short while until the time appears on t...

Page 88: ...on the display The volume level is adjusted to the value set in the menu for the transmission of traffic information Briefly hold down the EQ TA 19 button during playback of traffic radio to interrupt the TA function without switching the function off General CD Functions Anti shock Function ESP Electric Shock Protection The unit is equipped with anti shock function This func tion compensates for ...

Page 89: ...ion by pressing SEL The title is searched and played USB Port NOTE The large variety of USB devices on the market prevents us from guaranteeing full compatibility with all USB devices For this reason it can happen that in exceptional cases playback problems for USB media occur This is not a malfunction of this unit Please note The USB port serves only for playback of memory media and not for charg...

Page 90: ...nnection check that the battery on your mobile phone is fully charged Some makes of mobile phones have a power saving mode Please deactivate power saving mode since otherwise there may be problems when phoning via Bluetooth To be able to conduct an incoming or outgoing conversation Bluetooth must remain activated on your mobile phone Please refer to the user manual for your mobile phone NOTE Pleas...

Page 91: ...y The numbers are deleted individually Keep pressed All entered numbers are deleted To call the desired number press afterwards the button 3 CALLING is shown on the display Redial The unit saves the last dialed number To retrieve this fol low the steps below Press the button twice 3 LAST NUM and then the last selected phone number is shown on the display Press the button 3 again to call the phone ...

Page 92: ...urnt CD Check your CD in a different player Problem Possible cause Solution Disc cannot be loaded or is ejected Temperature inside the car is too high Cool off or wait until the ambient temperature returns to normal Condensation on the laser Turn the unit off for several hours until the moisture is evaporated CD skips Installation angle over 30 Decrease installation angle to less than 30 CD dirty ...

Page 93: ...separation 25 dB Frequency range AM 522 1620 kHz IF AM 450 kHz Sensitivity AM 36 dBu CD Player S N R 55 dB Channel separation 50 dB Frequency response 40 Hz 18 kHz Requirements MP3 WMA format Compression rate 16 320 kBit s Sampling rate 44 1 kHz Declaration of Conformity Here with ETV Elektro Technische Vertriebsgesellschaft mbH declares that the device AR 4021 BT complies with the basic requireme...

Page 94: ...ation in ISO Slot 83 Installation Toyota or Nissan 84 Intro 89 L Local programmes REG 87 Loudness function 87 M Manual search 87 O Off 86 On 86 P Pause 88 Program type PTY 88 R Random playback 89 Rear panel connections 82 Removal 82 Remove CD 88 Repeat mode 88 RESET button 87 S Save station 87 Scope of delivery 81 Search Function 89 Select CD mode 88 Select frequency band 87 Skip album 89 Skip Mod...

Page 95: ...zedniego 102 Zdejmowanie panelu przedniego 103 Wymiana baterii w pilocie 103 Obsługa 103 Włączanie Wyłączanie 103 Ustawienia 103 Funkcje radiowe 105 Ogólne funkcje CD 106 Dodatkowe funkcje obsługi plików MP3 WMA 107 Port USB 107 Czytnik kart SD MMC 107 Telefonowanie za pomocą Bluetooth 108 Rejestracja urządzeń PAIRING 108 Odłączanie urządzeń przycisk SCAN CON 18 108 Ponowne podłączanie urządzeń pr...

Page 96: ...śmierć lub poważne uszkodze nie ciała w przypadku jej nieuniknięcia Aby uniknąć zagrożenia śmiercią lub poważnym uszkodzeniem ciała należy przestrzegać instrukcji podanych w ostrzeżeniu UWAGA Ostrzeżenie o poziomie zagrożenia wskazuje na możli wość uszkodzenia własności Nieuniknięcie takiej sytuacji może spowodować wystą pienie szkód Aby uniknąć zagrożenia wystąpienia szkód należy przestrzegać ins...

Page 97: ... aby obsłużyć urządzenie lub zmienić jego ustawienia Panel przedni zakładać i zdejmować tylko gdy pojazd stoi Głośność ustawić na takim poziomie aby móc na czas usłyszeć sygnały wozów strażackich policyjnych i innych Przegląd elementów obłsugi Patrz składana część okładki Radio samochodowe 1 Przycisk zdejmowania panelu przedniego 2 Przycisk MUTE Wyłącza urządzenie wycisza dźwięk 3 Przycisk Akceptu...

Page 98: ... programów Otwórz więcej ustawień 7 Przycisk 8 ED TA Numeryczny przycisk do wprowadzania numerów te lefonu Wybierz domyślne ustawienia korektora włącz i wyłącz serwis trafice radio 8 Przycisk Przycisk kratki do wprowadzania numerów telefonu Zwiększ częstotliwość Automatyczne dostrajanie Od twórz następny tytuł 9 Przycisk 0 DISP Numeryczny przycisk do wprowadzania numerów te lefonu Pokaż dodatkowe ...

Page 99: ...eśli instalują Państwo urządzenie samodzielnie należy stosować się do wszystkich instrukcji instalacji i podłączania aby zapewnić bezpieczne i bezawaryjne działanie urządzenia UWAGA Niepoprawne podłączenie może spowodować uszko dzenie urządzenia Do instalacji urządzenia należy stosować złącza ISO Specjalne łączniki samochodowe ISO dostępne są w punktach sprzedaży akcesoriów samochodowych Złącza pa...

Page 100: ...nieczna W razie wątpliwości prosimy o kontakt z autoryzowanym warsztatem samochodowym Ze względu na różne typy pojazdów oraz różnych producentów prawidłowe okablowanie złącza ISO nie jest zapewnione nawet gdy złącza wtyczki ISO pasują mechanicznie Dlatego może być konieczne aby zmienić połączenie elektryczne lub użyć adaptera specyficznego dla pojazdu WSKAZÓWKA W razie prawidłowego połączenia radi...

Page 101: ...wnątrz za pomocą śrubokrętu Sprawdzić czy tuleja jest mocno osadzona Połączyć żeńskie złącza ISO urządzenia z dwoma mę skimi złączami ISO pojazdu Podłączyć antenę do złącza antenowego znajdującego się z tyłu urządzenia W razie konieczności zabezpieczyć urządzenie przed kradzieżą Przykręcić śrubę i pasek montażowy z ele mentami montażowymi do przegrody ogniotrwałej Ostrożnie wsunąć urządzenie w tul...

Page 102: ...Umieścić nakrywkę 3 powyżej wspornika montażo wego 2 Następnie ponownie dokręcić śruby 4 Wkładanie baterii do pilota WSKAZÓWKA Przed użyciem pilota po raz pierwszy należy włożyć dostarczoną baterię aby pilot był gotowy do użytku Żywotność dostarczonych baterii może ulec skróceniu z powodu warunków przechowywania Otworzyć komorę baterii 17 na pilocie Umieścić baterie w komorze z z biegunem dodatnim...

Page 103: ...ane są sygnały pilota do urządzenia poprzez podczerwień Transmisja sygnałów z pilota na urzą dzenie może być zakłócona z powodu bezpośrednie go nasłonecznienia lub czujnika IR 6 Włączanie Wyłączanie Nacisnąć przycisk MUT 2 aby włączyć zestaw Uru chomi się wyświetlacz Przytrzymać wciśnięty przycisk MUT 2 aby wyłą czyć urządzenie Ustawienia Głośność OSTRZEŻENIE Głośne dźwięki mogą uszkodzić słuch Sł...

Page 104: ...a RETUNE Opóźnienie automatycznego wyszukiwania komuniktów o ruchu drogowym i lub informa cji o programie S krótkie po ok 30 sekundach L długie po ok 90 sekundach MASK Ustawienia maskowania stacji podczas wyszu kiwania DPI Częstotliwości alternatywne o różnym kodzie PI zostają wyłączone z wyszukiwania ALL Częstotliwości alternatywne o różnym kodzie PI i bez informacji RDS w wysokim sygnale zostają...

Page 105: ...ietlaczu pojawi się AUTO Zapamiętywanie stacji W każdym paśmie częstotliwości można zapamiętać 6 stacji Nacisnąć i przytrzymać wybrany przycisk numerycz ny 8 ok 2 sekundy aby zapisać bieżącą stację Po udanym zapisaniu usłyszymy sygnał dźwiękowy oprócz ustawienia BEEP OFF Dostęp do pamięci stacji Wcisnąć BND 26 aby wybrać żądane pasmo czę stotliwości Wcisnąć jeden z przycisków numerycznych 8 aby ur...

Page 106: ...óżnice w jakości pomiędzy płytami dostępnymi na rynku oraz płytami nagranymi przez użytkownika Poza tym przemysł muzyczny nie stosuje ustalonych standardów ochrona przed kopiowaniem Z tego powodu w wyjątkowych przypadkach może się zdarzyć że wystąpią problemy z odtwarzaniem płyt audio oraz płyt z plikami MP3 WMA Nie świadczy to o złym działaniu urządzenia Wybór trybu CD z włożoną płytą CD Wcisnąć ...

Page 107: ...anych z pamięci ą a nie celem ładowania urządzeń zewnętrznych jak np smartfony Tylko niskie zasilanie 100 mA może być zapewnione Ten port USB nie jest przeznaczony do użycia na przykład z zewnętrznymi dyskami twardymi 2 5 pokazujący mi rozruch natężenia do 1100 mA Należy użyć dostarczonego gniazdka jack typu AUX IN celem odtwarzania muzyki na smartofonie lub też urządzeniach typu iPod lub iPhone o...

Page 108: ...komórkowego Aby zagwarantować optymalne połączenie spraw dzić czy bateria w telefonie komórkowym jest naładowana do pełna Niektóre rodzaje telefonów wyposażone są w tryb wygaszania Prosimy wyłączyć tryb wygaszania po nieważ mogą pojawić się problemy podczas telefono wania przez Bluetooth WSKAZÓWKA Aby móc przeprowadzić rozmowę przychodząca lub wychodzącą urządzenie Bluetooth musi pozostać aktywne ...

Page 109: ... przychodzące lub wychodzące rozmowy CALL END pojawia się na wyświetlaczu WSKAZÓWKA Aby odrzucić przychodzącą rozmowę nacisnąć ponownie przycisk BND 26 Rozmowy wychodzące Nacisnąć przycisk 3 DIAL pojawia się na wy świetlaczu Numer telefonu wprowadzony jest za pomocą przyci sków numerycznych Wprowadzony numer telefonu pojawia się na wyświetlaczu radia samochodowego WSKAZÓWKA Jeśli wprowadzono jeden...

Page 110: ...nta Niewłaściwe naprawy mogą spowodować poważne zagrożenie dla użytkownika oraz uszkodzenie urządzenia Usuwanie usterek Problem Możliwa przyczyna Rozwiązanie Nie można włączyć urzą dzenia Stacyjka samo chodu nie jest włączona Jeśli zasilanie jest poprawnie podłączone do złącza akcesoriów samochodowych przekręcić kluczyk w stacyjce do położenia ACC Brak dźwięku Poziom głośności jest ustawiony na mi...

Page 111: ...y zakupu W tym okresie będziemy bezpłatnie usuwać w terminie 14 dni od daty dostarczenia wadliwego sprzętu z kartą gwarancyjną do miejsca zakupu wszystkie uszkodzenia powstałe w tym urządzeniu na skutek wady materiałów lub wadliwego wykonania naprawiając oraz wymieniając wadliwe części lub jeśli uznamy za stosowne wymieniając całe urządzenie na nowe Sprzęt do naprawy powinien być dostarczony w kom...

Page 112: ...szkodowania są wykluczone chyba że prawo przewiduje inaczej Rosz czenia wykraczające poza tą umowę nie są uwzględniane przez tą gwarancję Gwarancja na sprzedany towar konsumpcyjny nie wyłącza nie ogranicza ani nie zawiesza uprawnień kupującego wynikających z niezgodności towaru z umową Gwarancja oraz zawarte w niej warunki obowiązują na terenie Rzeczpospolitej Polskiej Deklaracja Zgodności Firma E...

Page 113: ...enie pomiędzy albumami 107 Przewijanie w przód w tył 106 Przycisk DISP 104 Przycisk EQ 104 Przycisk RESET 105 T Tryb powtarzania 106 Tryb przechodzenia 106 U Ustawienia AREA 104 Balans 103 BEEP 104 EON TA 104 Głośność 103 HOUR 104 MASK 104 Niskie tony 103 PCLK 104 PI 104 P VOL 104 REG 104 RETUNE 104 TA 104 TA VOL 104 Tłumik nastawny 103 Wysokie tony 103 W Wkładanie płyty 106 Włączanie 103 Wybór pa...

Page 114: ... Industriering Ost 40 47906 Kempen Telefon 02152 2006 666 Hotline etv de GARANTIE KARTE 24 Monate Garantie gemäß Garantie Erklärung Kaufdatum Händlerstempel Unterschrift Elektro technische Vertriebsgesellschaft mbH Industriering Ost 40 47906 Kempen AR 4021 BT ...

Reviews: