www.adventistsat.com
Toll Free 866-552-6882
27
Completing the Installation
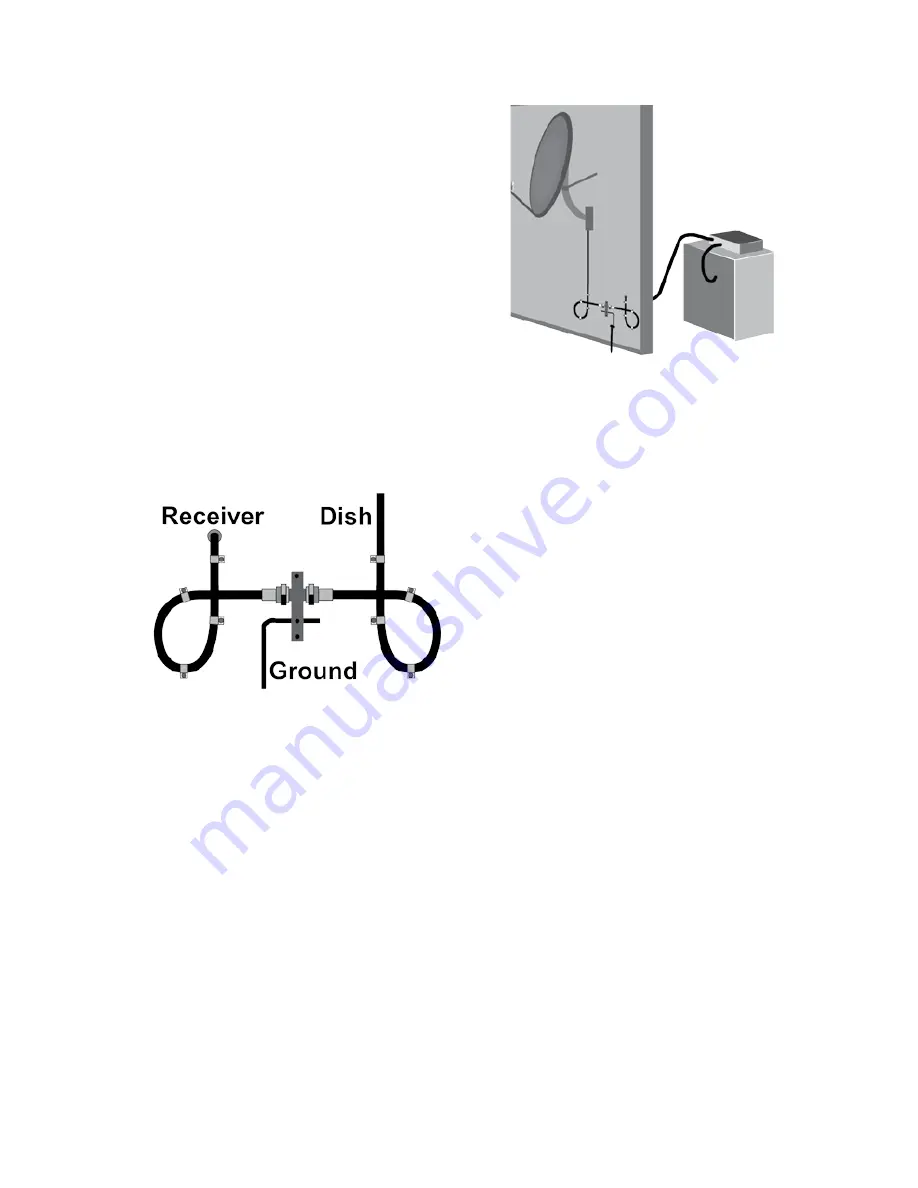
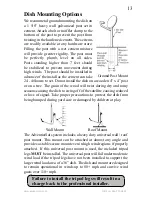
Carefully route the coax cable from
the dish to the ground block then
to the satellite receiver. Secure all
cables using appropriate cable clips
and nylon zip ties. Avoid using
wire staples as they can dimple or
penetrate the cable and can cause
loss of signal! Form drip loops and
cable loops as needed to prevent
water from running down the cables and entering cable connection
fittings or into wall penetrations. Remember to seal all exterior wall
and/or roof holes with a quality sealant or silicone caulking.
Install the grounding block and
wire while observing all NEC,
N
ational
E
lectrical
C
ode and local
codes. Connect the ground wire to
the structure ground. If you are
unsure of how to properly ground
your satellite system, please
consult with a local professional.
Copies of the NEC are often
available at your local library or
online.
Important Notice:
AdventistSat recommends that you DO
NOT use existing coaxial cabling that has been pre-wired or
previously used in your home. Often these cables are not rated for
satellite applications or have splitters and other devices that are not
compatible with a AdventistSat satellite system. Always connect the
RG-6 type coax cable directly from the satellite dish LNBF through
the grounding block and attach to the LNBF IN Digital connection
on the rear of the Satellite Receiver.
Cable splitters or any other devices in the coax line may cause the
satellite receiver to shut down or malfunction. Do not use any device
in the coax line unless approved for satellite installation. Multiple
receiver installations should use a multiple output LNBF to avoid
programming conflicts between the receivers.


