41
Chapter 4
7.
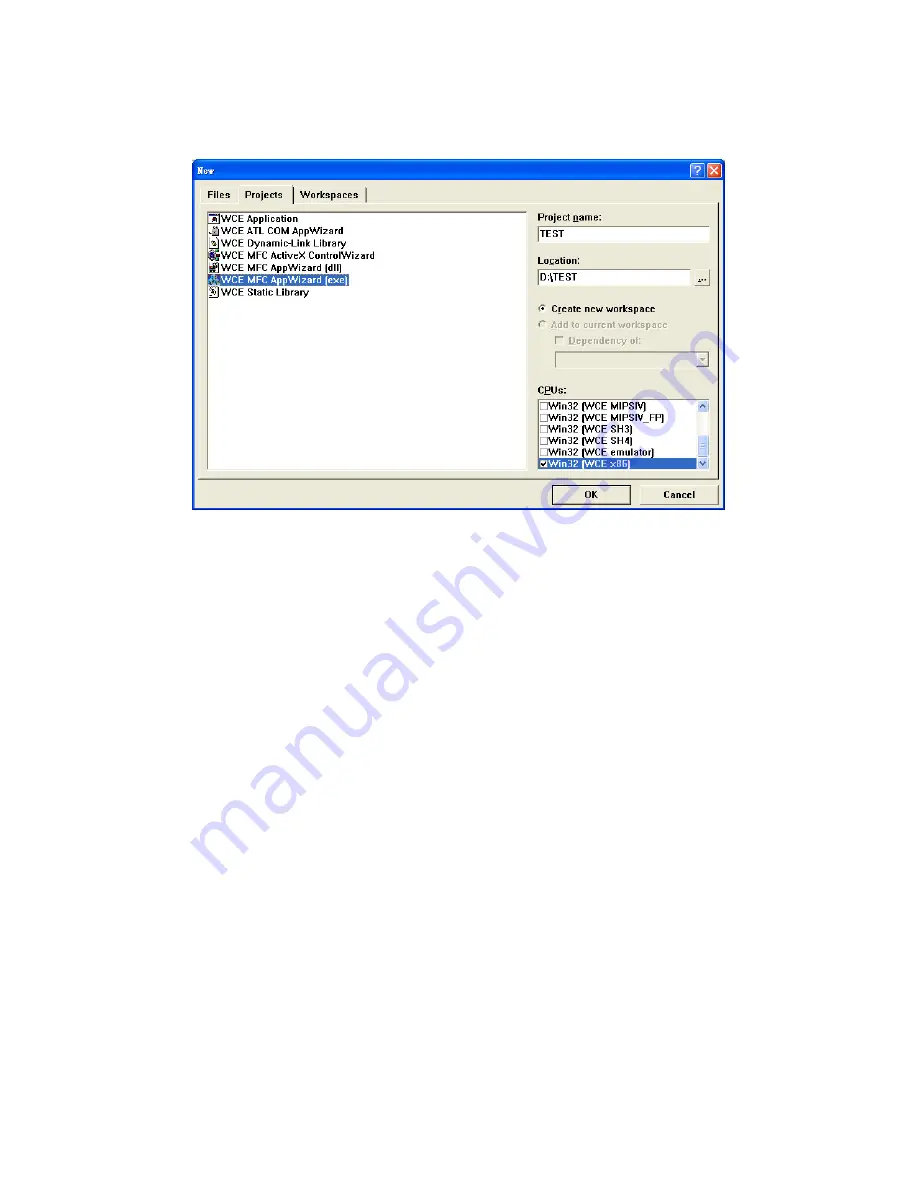
Select “File”->”New” to open a new project. Select your project
type in the left side of the window and enter the new project name/
location in the right side of the window.
Figure 4.42: Starting a New Project
8.
Select “TPC-1260H” in main window of embedded Visual C++.
Note
For the CPU type, Win32 (WCE X86) must be
selected.
Summary of Contents for TPC-1260H
Page 20: ...TPC 1260H User Manual 8...
Page 21: ...2 CHAPTER 2 System Setup This chapter provides a brief explana tion for operating TPC 1260H...
Page 25: ...13 Chapter2 Figure 2 5 Touch Screen Calibration 1 Figure 2 6 Touch Screen Calibration 2...
Page 26: ...TPC 1260H User Manual 14...
Page 27: ...2 CHAPTER 3 System Engine...
Page 55: ...2 APPENDIX A Serial Port Settings...
Page 57: ...45 AppendixA Figure A 1 Device Manager Figure A 2 COM5 Properties...
Page 58: ...TPC 1260H User Manual 46...
Page 59: ...2 APPENDIX B Fuse Specifications...
Page 61: ...2 APPENDIX C Watchdog Timer Programming...
Page 68: ...TPC 1260H User Manual 56...
Page 73: ...2 APPENDIX E HDD Kit Assembly...
Page 81: ...69 AppendixF Figure F 3 Install License Agreement Figure F 4 Install Completed...
Page 84: ...TPC 1260H User Manual 72 Figure F 8 Standard Calibration 1 Figure F 9 Standard Calibration 2...
Page 86: ...TPC 1260H User Manual 74 Figure F 11 Advanced Calibration 1 Figure F 12 Advanced Calibration 2...
Page 90: ...TPC 1260H User Manual 78...


