Chapter 2 Installation
27
2.14 ATX power control connector (JP1, J1)
2.14.1 ATX feature connector (J1) and soft power
switch connector (JP1)
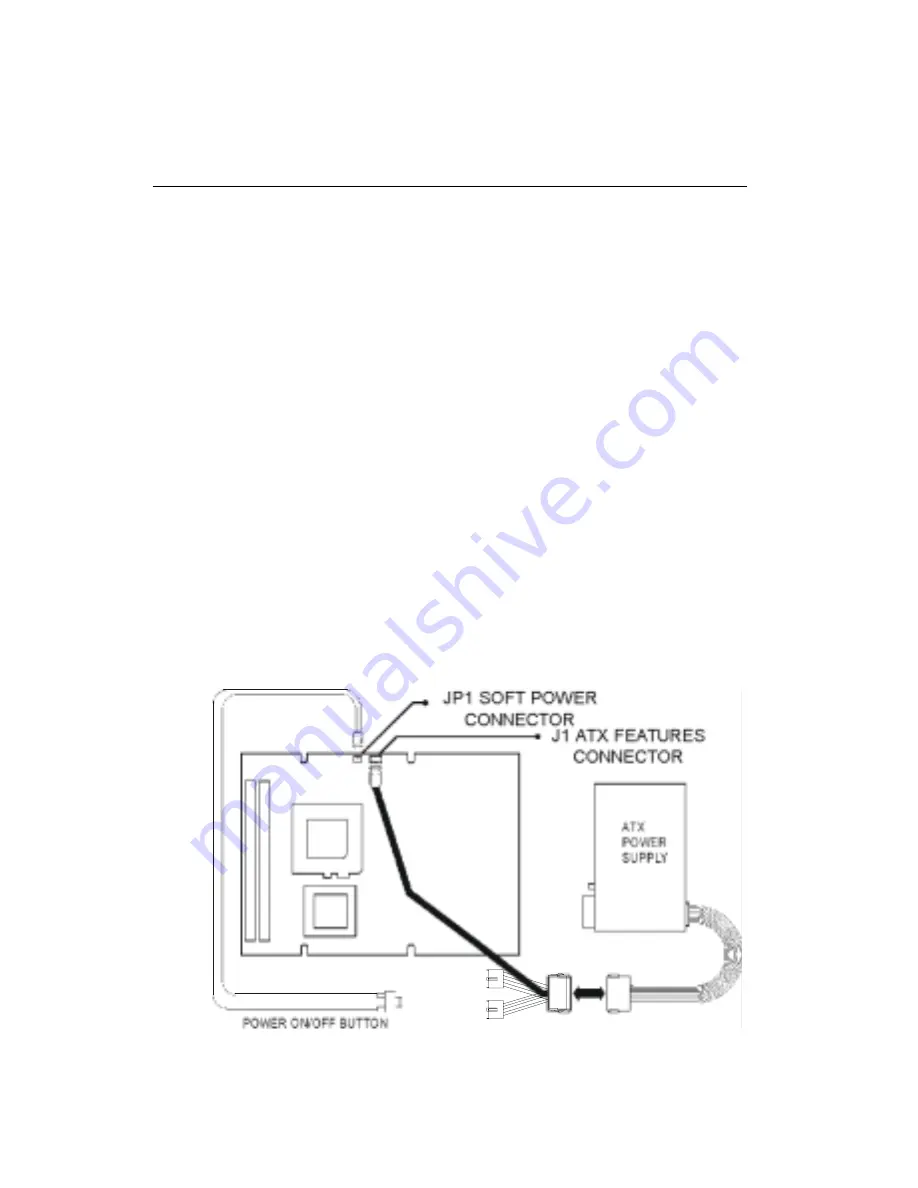
The PCM-5864/E/L can support an advanced soft power switch
function, if an ATX power supply is used. To enable the soft
power switch function:
1. Get the specially designed ATX-to-PS/2 power cable
(PCM-5864/E/L optional item, part nos. 1700000450 and
1700000452).
2. Connect the 3-pin plug of the cable to J1 (ATX feature
connector).
3. Connect the power on/off button to JP1. (A momentary type of
button should be used.)
Important: Make sure that the ATX power supply can take at
least a 10 mA load on the 5 V standby lead
(5VSB). If not, you may have difficulty powering
on your system.
Figure 2-4: Wiring for ATX soft power switch function
Summary of Contents for PCM-5864
Page 12: ......
Page 20: ...8 PCM 5864 E L User s Manual...
Page 24: ...12 PCM 5864 E L User s Manual 2 3 Locating jumpers Figure 2 1 Locating jumpers...
Page 26: ...14 PCM 5864 E L User s Manual 2 4 2 Solder side Figure 2 3 Locating connectors solder side...
Page 50: ...38 PCM 5864 E L User s Manual...
Page 58: ...46 PCM 5864 E L User s Manual...
Page 59: ...Award BIOS Setup This chapter describes how to set BIOS configuration data C H A P T E R 4...
Page 83: ...Video Introduction Installation of video capture driver for Windows 95 98 6 C H A P T E R...
Page 88: ...76 PCM 5864 E L User s Manual...
Page 89: ...Audio Introduction Installation of audio driver for Windows 95 98 NT 7 C H A P T E R...
Page 92: ...80 PCM 5864 E L User s Manual...
Page 100: ...88 PCM 5864 E L User s Manual...
Page 104: ...92 PCM 5864 E L User s Manual...
Page 108: ...96 PCM 5864 E L User s Manual...
Page 135: ...Optional Extras A P P E N D I X E...
Page 138: ...Mechanical Drawings A P P E N D I X F...
Page 139: ...128 PCA 5864 E L User s Manual F 1 Component side...
Page 140: ...Appendix F Mechanical Drawings 129 F 2 Solder side...
Page 141: ...130 PCA 5864 E L User s Manual...


