background image

11

PCIE-1805 User Manual

Chapter 2

Installation

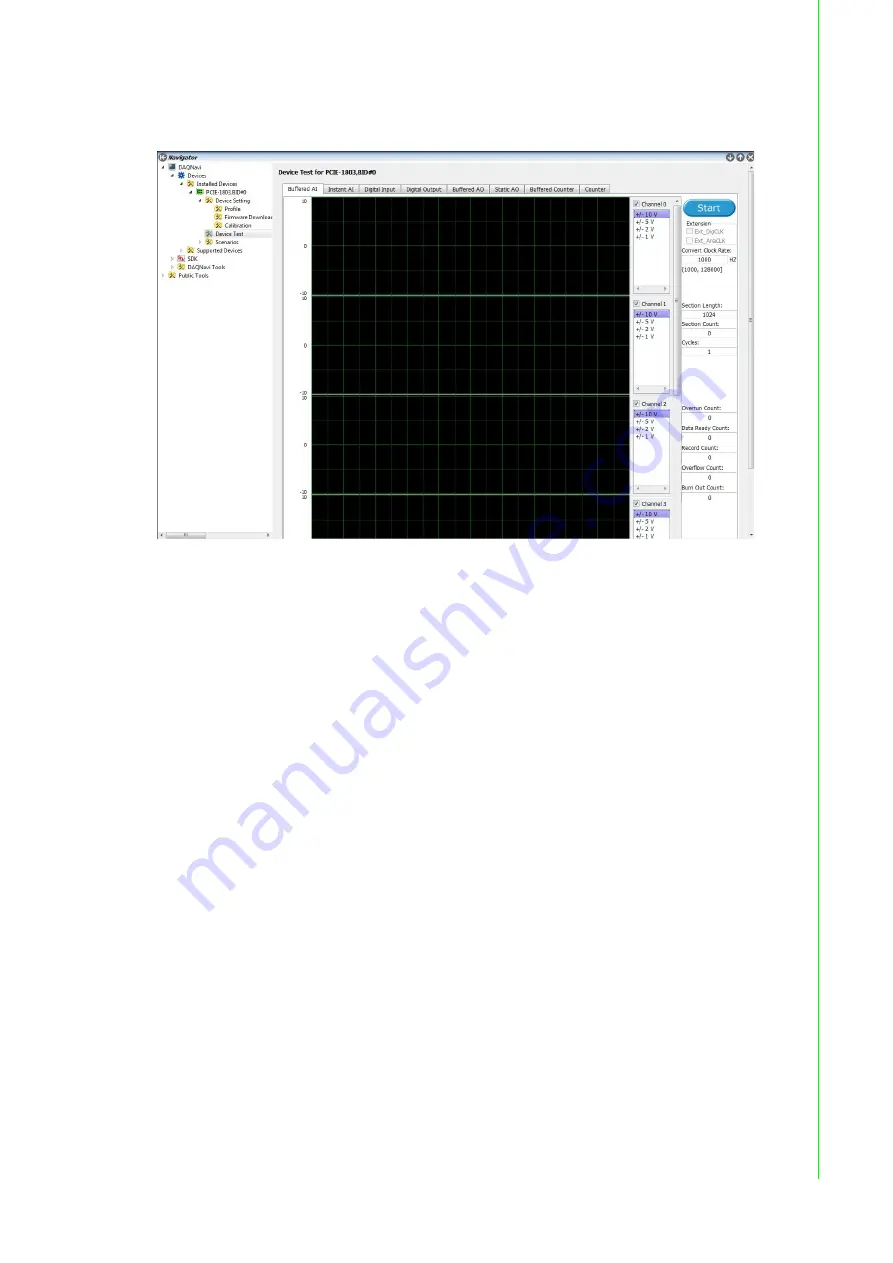
After your card is properly installed and configured, you can go to the Device Test
page to test your hardware by using the testing utility supplied.

Figure 2.3 The Device Testing of PCIE-1805

For more detailed information, refer to the DAQNavi SDK Manual or the User Inter-
face Manual in the Advantech Navigator.

Summary of Contents for PCIE-1805

Page 1: ...User Manual PCIE 1805 32 ch 16 bit 1 MS s Analog Input PCI Express Card ...

Page 2: ...stallation Advantech assumes no liability under the terms of this warranty as a consequence of such events Because of Advantech s high quality control standards and rigorous testing most of our customers never need to use our repair service If an Advantech product is defec tive it will be repaired or replaced at no charge during the warranty period For out of warranty repairs you will be billed ac...

Page 3: ... of your peripheral attachments Description of your software operating system version application software etc A complete description of the problem The exact wording of any error messages Packing List Before setting up the system check that the items listed below are included and in good condition If any item does not accord with the table contact your dealer imme diately PCIE 1805 DA C card Star...

Page 4: ...PCIE 1805 User Manual iv ...

Page 5: ...1 Board ID SW1 15 Table 3 1 Board ID Setting SW1 15 3 3 Signal Connections 16 Figure 3 2 62 pin I O Connector Pin Assignments 16 3 3 1 I O Connector Signal Description 17 3 3 2 Measurement Mode Selection 18 3 3 3 Analog Input Connections 18 Figure 3 3 Differential Input Channel Connections 19 Figure 3 4 Differential Input Channel Connection Floating Signal Source 19 Figure 3 5 External Clock Sourc...

Page 6: ...1 Analog Input Operation 30 B 1 1 AI Hardware Structure 30 B 1 2 Analog Input Ranges and Gains 30 B 1 3 AI Trigger Modes 31 B 1 4 AI CONV Clock Source 33 B 1 5 AI Trigger Source 34 Table B 1 Analog Input Data Format 34 Table B 2 Full Scale Values for Input Voltage Ranges 34 ...

Page 7: ...Chapter 1 1 Introduction This chapter introduces PCIE 1805 and its typical applications Sections include Features Applications Installation Guide Software Overview Roadmap Accessories ...

Page 8: ...assignment are automatically controlled by software No jumper or switch is required for user configu ration Onboard Buffer Memory There is a 4k sample buffer for AI on PCIE 1805 This is an important feature for faster data transfer and more predictable performance Configurable Measurement Mode PCIE 1805 provides a function current measurement of ranging 0 20mA or 4 20mA for users to choose from It...

Page 9: ...dvantech website Personal computer or workstation with a PCI Express interface running Windows 10 8 and 7 Shielded Cable PCL 10162 optional Wiring Board ADAM 3962 optional Other optional components are also available for enhanced operation DAQ Navi LabView or other 3rd party software After you get the necessary components and maybe some of the accessories for enhanced operation of your multifuncti...

Page 10: ...PCIE 1805 User Manual 4 Figure 1 1 Installation Flow Chart ...

Page 11: ...Studio NET Visual C Visual Basic Delphi and C Builder The step by step instructions on how to build your own applications using each development tool is given in the Device Drivers Manual A rich set of example source code is also provided for your reference Programming Tools Programmers can develop application programs with their favorite development tools Visual Studio NET Visual C and Visual Bas...

Page 12: ... usage and parameters of each function please refer to the Using DAQNavi SDK chapter in the DAQNavi SDK Manual Troubleshooting DAQNavi Device Drivers Error Driver functions will return a status code when they are called to perform a certain task for the application When a function returns a code that is not zero it means the function has failed to perform its designated function To troubleshoot th...

Page 13: ...Chapter 2 2 Installation ...

Page 14: ...cts to ensure proper installation Avoid physical contact with materials that could hold static electricity such as plastic vinyl and Styrofoam Whenever you handle the card grasp it only by its edges DO NOT TOUCH the exposed metal pins of the connector or the electronic components 2 2 Driver Installation We recommend you install the driver before you install the PCIE 1805 card into your system sinc...

Page 15: ...he system registry These settings will be used when you call the APIs of Advantech Device Drivers Setting Up the Device 1 To set up the I O device for your card you must first run the Advantech Naviga tor program by accessing Start Programs Advantech Automation DAQNavi Advantech Navigator 2 You can then view the device s already installed on your system if any on the Installed Devices list box If ...

Page 16: ...ser Manual 10 Configuring the Device Go to the Device Setting to configure your device Here you can configure not only the Analog Input of PCIE 1805 but also Digital Input Output Figure 2 2 The Device Setting page ...

Page 17: ...stalled and configured you can go to the Device Test page to test your hardware by using the testing utility supplied Figure 2 3 The Device Testing of PCIE 1805 For more detailed information refer to the DAQNavi SDK Manual or the User Inter face Manual in the Advantech Navigator ...

Page 18: ...PCIE 1805 User Manual 12 ...

Page 19: ...ions This chapter provides useful information about how to connect input and output signals to the PCIE 1805 card via the I O con nector Sections include Overview Board ID Settings Signal Connections Field Wiring Considerations ...

Page 20: ...ctly A good signal con nection can avoid unnecessary and costly damage to your PC and other hardware devices This chapter provides useful information about how to connect input and output signals to the PCIE 1805 card via the I O connector 3 2 Switch and Jumper Settings Please refer to Figure 3 1 for jumper and switch locations on PCIE 1805 Figure 3 1 Connector and Switch Locations ...

Page 21: ...ith different device numbers The default value of board ID is 0 and if you need to adjust it to other value please set the SW1 by referring to Table 3 1 Default Setting is 0 Table 3 1 Board ID Setting SW1 SW1 Position 1 Position 2 Position 3 Position 4 BoardID Bit0 Bit1 Bit2 Bit3 0 ON ON ON ON 1 ON ON ON OFF 2 ON ON OFF ON 3 ON ON OFF OFF 4 ON OFF ON OFF 5 ON OFF ON OFF 6 ON OFF OFF ON 7 ON OFF OF...

Page 22: ...IE 1805 is a 62 pin connector that allows you to connect to accessories with the PCL 10162 shielded cable Figure 3 2 shows the pin assignments for the 62 pin I O connector on the PCIE 1805 and Table 3 3 shows its I O connector signal description Figure 3 2 62 pin I O Connector Pin Assignments ...

Page 23: ... 15 AI16 I 13 Analog input channel 16 AI17 I 34 Analog input channel 17 AI18 I 12 Analog input channel 18 AI19 I 33 Analog input channel 19 AI20 I 11 Analog input channel 20 AI21 I 32 Analog input channel 21 AI22 I 10 Analog input channel 22 AI23 I 31 Analog input channel 23 AI24 I 9 Analog input channel 24 AI25 I 30 Analog input channel 25 AI26 I 8 Analog input channel 26 AI27 I 29 Analog input c...

Page 24: ...nal source is connected to a local ground the signal source is ground referenced Therefore the ground of the signal source and the ground of the card will not be exactly the same voltage The difference between the ground volt ages forms a common mode voltage Vcm To avoid the ground loop noise effect caused by common mode voltages you can connect the signal ground to the Low input Figure 3 3 shows ...

Page 25: ... erroneous voltage readings You must therefore reference the sig nal source against the AGND Figure 3 4 shows a differential channel connection between a floating signal source and an input channel on the PCIE 1805 In this figure each side of the floating signal source is connected through a resistor to the AGND This connection can reject the common mode voltage between the signal source and the P...

Page 26: ...sample clock uses a 100 MHz time base Conversions start on the ris ing edge of the counter output You can use software to specify the clock source as internal and the sampling frequency to pace the operation The minimum frequency is 5 96 S s the maximum frequency is 1 MS s According to the sampling theory Nyquist Theorem you must specify a frequency that is at least twice as fast as the input s hi...

Page 27: ...ck input signal You can use software to specify the clock source as external The sampling frequency is always limited to a maximum of 10 MHz for the external AI sample clock input signal Figure 3 5 External Clock Source Connection Trigger Sources Connections External Digital TTL Trigger For analog input operations an external digital trigger event occurs when the PCIE 1805 detects either a rising ...

Page 28: ...ing machines since they may cause strong electromagnetic interference Keep the analog sig nal cables away from any video monitor since it can significantly affect a data acquisition system If the cable travels through an area with significant electromagnetic interference you should adopt individually shielded twisted pair wires as the analog input cable This type of cable has its signal wires twis...

Page 29: ...Appendix A A Specifications ...

Page 30: ...PCIE 1805 User Manual 24 A 1 Function Block ...

Page 31: ...ed by all enabled channels Sample clock source Programmable internal source 100 MHz n where n 100 16777216 External source 0 1 MHz Trigger mode Start trigger delay to start trigger stop trigger delay to stop trigger Maximum working voltage for all analog inputs 11 V for all ranges Common mode rejection ratio CMRR at 60 Hz 85 dB Input impedance AI to AGND 1 000 GΩ in parallel with 9 pF A to A 1 000...

Page 32: ... 15 Offset error Operating temperature within 5 C of last auto calibration temperature 2 5 μA Over full operating temperature range 10 μA A 2 4 Dynamic Performance A 3 Triggers A 3 1 Analog Trigger 3 dB bandwidth 3 MHz RMS Noise 0 1 mV Effective number of bits ENOB 17 5 Bits Crosstalk at 1kHz Adjacent Channels 75 dB Non adjacent Channels 77 dB Trigger function Start trigger delay to start trigger ...

Page 33: ...nimum input voltage 0 5 V Propagation delay 100 ns 5 V 200 mA max 12 V 100 mA max Form factor x1 PCI Express specification v1 1 compliant Slot compatibility x1 x4 x8 and x16 PCI Express slots Power Consumption 3 3 V 300 mA typ 320 mA max 12 V 70 mA typ 90 mA max Printed circuits board dimensions 168 99 mm 6 6 3 9 in I O connector 62 pin D sub 1 Operating temperature 0 to 60 C 32 to 140 F Storage t...

Page 34: ...PCIE 1805 User Manual 28 ...

Page 35: ...Appendix B B Operation Theory ...

Page 36: ...l to match the input range of A D converter AI converter conceives the rectified voltage from PGIA and transfers it into the corresponding digital data format Trigger Clock control logic enables disables the whole process and deter mines acquisition timing interval B 1 2 Analog Input Ranges and Gains The PCIE 1805 can measure both unipolar and bipolar analog input signals A unipo lar signal can ra...

Page 37: ...e selection An extra 24 bit counter is dedicated to delay trigger mode and about trigger mode Figure shows the four different trigger modes Start Trigger Acquisition Mode Start trigger acquisition starts when the PCIE 1805 detects the trigger event and stops when you stop the operation The CONV CLKs before Trigger will be blocked out You can set post trigger acquisition mode by software ...

Page 38: ...t designate the size of the allocated memory and the amount of samples to be snatched after the trigger event happens The about trigger acquisition starts when the first CONV CLK signal comes in Once a trigger event happens the on going data acquisition will continue until the designated amount of CONV CLKs have been reached When the PCIE 1805 detects the selected about trigger event the card keep...

Page 39: ...d with 32 bit divider The maximum frequency is 250 KS s According to the sampling the ory Nyquist Theorem you must specify a frequency that is at least twice as fast as the input s highest frequency component to achieve a valid sampling For example to accurately sample a 20 kHz signal you have to specify a sampling frequency of at least 40 kHz This consideration can avoid an error condition often ...

Page 40: ...E 1805 detects a transition from above a threshold level to below a threshold level falling edge or a transition from below a threshold level to above a threshold level rising edge User should connect analog signals from external device or analog output channel on board to external input signal ATRG0 1 On the PCIE 1805 the threshold level is set using a dedicated 16 bit DAC By software you can pro...

Page 41: ...35 PCIE 1805 User Manual Appendix B Operation Theory ...

Page 42: ...ations are subject to change without notice No part of this publication may be reproduced in any form or by any means electronic photocopying recording or otherwise without prior written permis sion of the publisher All brand and product names are trademarks or registered trademarks of their respective companies Advantech Co Ltd 2020 ...

Reviews: