ITA-2000 User Manual
/ 用户手册
70
B.1.3
Send
/ 发送
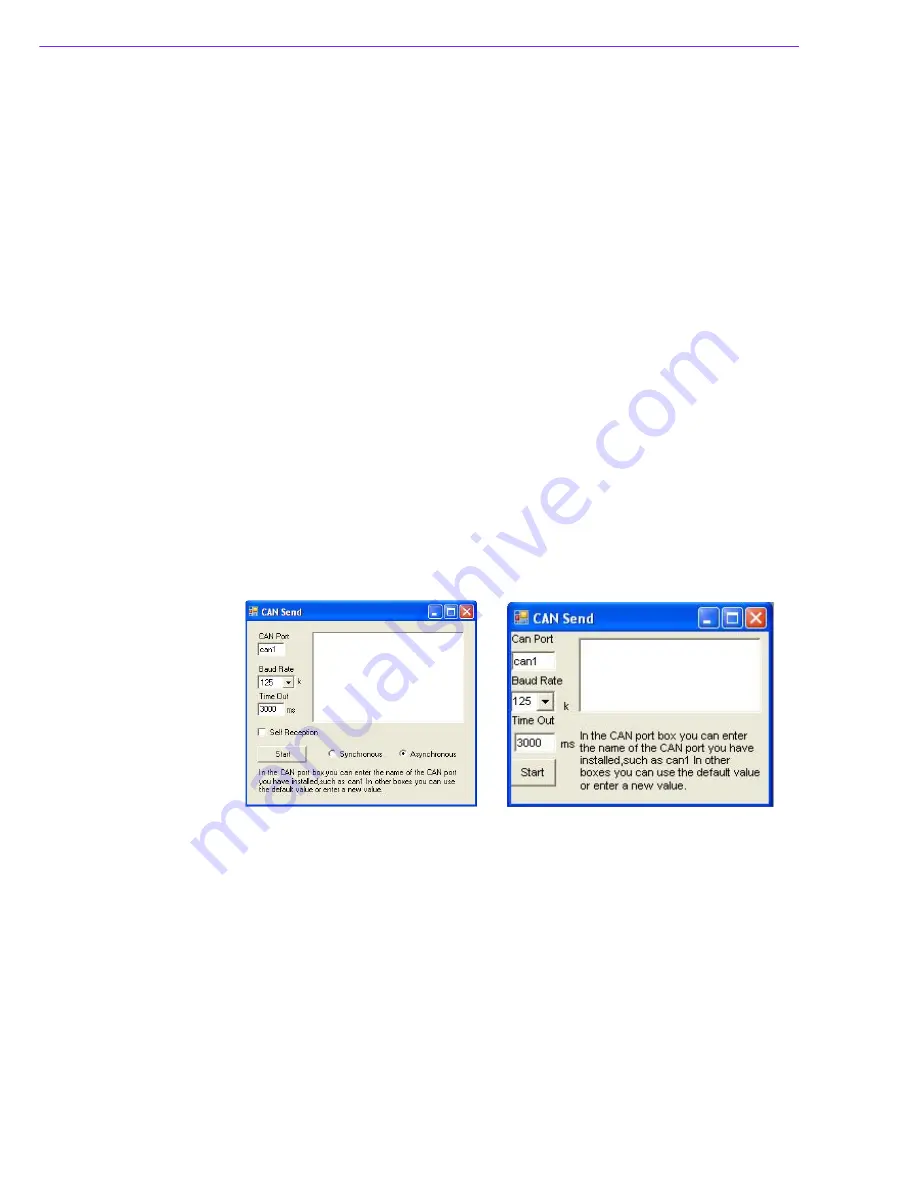
Before you begin, please enter the name of the port you have installed in the textbox
of CAN Port, such as can0, can1, etc. Select value of the Baud Rate that you want in
dropdown list of Baud Rates (The default value is 125 k). Type in the timeout value in
Timeout field (The default value is 3000 ms). Selecting Self Receive check box can
realize the self reception function. On WDM platform, the user can select either syn-
chronous mode or asynchronous mode. While on CE platform, only synchronous
mode is supported. After configuring the above items, users can click "Start" button to
send data (100 frames are sent by default).
After clicking the "Start" button, the name of the button will change to "Stop". At the
same time, results of sent frames will be shown in the textbox on the right. Users can
click the "Stop" button to stop sending frames (100 frames are sent by default) during
the process, then the name of the button will return to "Start" for the next send opera-
tion.
开始前,请在 “CAN Port”文本框中输入已安装端口名,如 can0、can1 等。在 “Baud
Rate”下拉列表中选择想要的波特率值 (默认值为 125 K)。在 “Timeout”区域输入
超时值 (默认为 3000 ms)。选定 “Self Receive”复选框启用自发自收功能。在 WDM
平台中,用户可选择 “synchronous”(同步)或 “asynchronous”(异步)模式。在
CE 平台中,仅支持 “synchronous”模式。完成上述设置后,用户可点击 “Start”按
钮开始发送数据 (默认发送 100 帧)。
点击 “Start”按钮后,按钮名称变为 “Stop”。同时帧发送结果也将显示在右边的文
本框中。用户可在发送过程中点击 “Stop”按钮停止帧发送 (默认发送 100 帧),然
后按钮名将重新变为 “Start”,准备下一次发送。
Figure B.2 CAN Send test of WDM&CE
/CAN WDM&CE 发送测试
Summary of Contents for ITA-2000
Page 8: ...ITA 2000 User Manual viii...
Page 12: ...ITA 2000 User Manual xii...
Page 16: ...ITA 2000 User Manual 4 1 5 Dimension Diagram Figure 1 1 Dimension diagram...
Page 28: ...ITA 2000 User Manual 16...
Page 29: ...Chapter 3 3 BIOS Operation BIOS This chapter describes how to set BIOS configuration data BIOS...
Page 60: ...ITA 2000 User Manual 48...
Page 61: ...Chapter 5 5 System Setup This chapter introduces the instal lation process...
Page 67: ...Appendix A A Programming the Watchdog Timer...
Page 79: ...Appendix B B Examples of the CAN Transfer tool CAN...

