background image

LESSON 11

278

Adding Audio Tracks and Subtitles

3

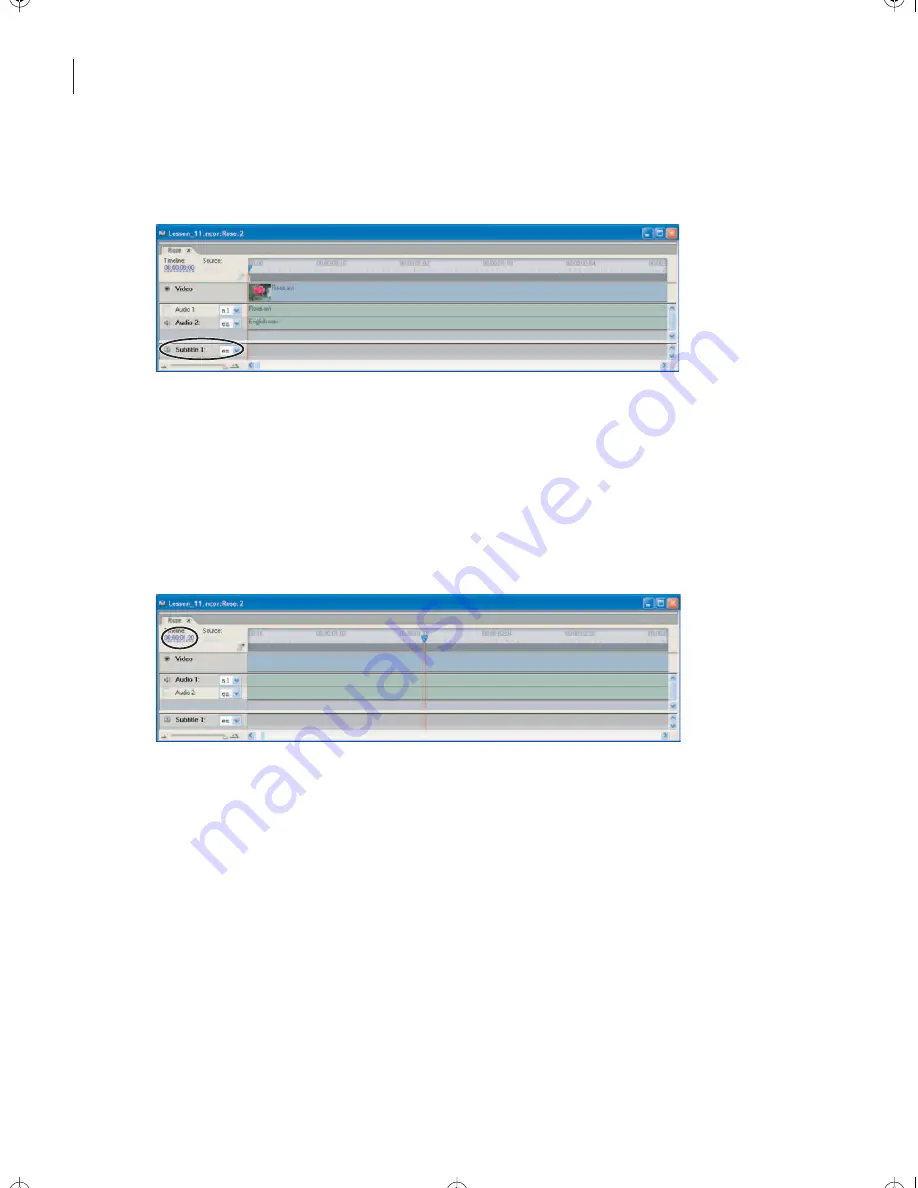
Choose en-English from the pop-up menu next to the Subtitle 1 name in the Timeline 

window.

4

Move the current-time indicator to the beginning of the timeline.

5

Click the Play button in the Monitor window, and click the Pause button when the 

voice-over begins.

Note: If the Monitor window isn’t open, choose Window > Monitor. 

6

Move the current-time indicator to the point in the timeline where the voice-over 

begins (about 01:20). 

7

With the text tool, click an insertion point in the lower part of the video in the Monitor 

window.

8

Choose Window > Character to open the Character palette. 

Encore_CIB.book  Page 278  Saturday, September 20, 2003  1:56 PM

Peachpit Press/Scott Design

Summary of Contents for ENCORE DVD

Page 1: ...Classroom in a Book www adobepress com Encore_CIB book Page i Saturday September 20 2003 1 56 PM Peachpit Press Scott Design...

Page 2: ...o compression technology is licensed by Fraunhofer IIS and Thompson All other trademarks are the property of their respective owners Contains an implementation of the LZW algorithm licensed under U S...

Page 3: ...s 15 Importing a layered Photoshop file as a menu 17 Setting start and end behaviors 19 Setting behaviors for remote control buttons 20 Previewing the project 21 Burning the DVD 22 Review questions 23...

Page 4: ...to timelines 78 Repositioning overlapping objects 80 Previewing the project 82 Review questions 83 Lesson 04 Using Adobe Encore DVD Templates Getting started 88 Exploring the Library palette 90 Modify...

Page 5: ...overrides 136 Working with multiple menus 137 Setting default end actions 138 Setting links for the main menu 140 Using the pick whip 143 Setting overrides 144 Previewing the project 148 Making a DVD...

Page 6: ...remiere Pro 201 Updating an AVI file in Adobe Encore DVD 202 Creating links and behaviors 203 Previewing the project 205 Burning the disc 205 Review questions 206 Lesson 09 Working with Adobe After Ef...

Page 7: ...Setting behaviors for a slideshow 258 Previewing the project 260 Burning the DVD 260 Review questions 260 Lesson 11 Adding Audio Tracks and Subtitles Getting started 266 Including audio tracks in a p...

Page 8: ...Encore_CIB book Page viii Saturday September 20 2003 1 56 PM Peachpit Press Scott Design...

Page 9: ...loration and experimentation You can follow the book from start to finish or do only the lessons that correspond to your interests and needs Prerequisites Before beginning to use Adobe Encore DVD Clas...

Page 10: ...hoose Start Programs Adobe Encore DVD 1 0 Installing the fonts you ll use in Classroom in a Book projects The fonts used in the lessons in this book are included on the Adobe Encore DVD application DV...

Page 11: ...Adobe Encore DVD User Guide which is included with the Adobe Encore DVD software contains a complete description of all features in the software Online Help an online version of the user guide is acce...

Page 12: ...ith Adobe Encore DVD you can easily put the pieces together to create a simple DVD In this lesson you ll learn about the core tools in Adobe Encore DVD as you create a project from start to finish Enc...

Page 13: ...ncore DVD project from start to finish You ll create a new project import the assets and menu for the project create links and behaviors preview the DVD and burn the DVD Make sure you know the locatio...

Page 14: ...es of files in the project InAdobe Encore DVD you can work with many types of audio video and still image files Adobe Encore DVD workspace not all windows and palettes appear at all times A Toolbox B...

Page 15: ...ntrols L Exit Here M Exit and Return 5 Move the cursor over the buttons next to the chapter names As you move the cursor over a button a white border appears around it 6 Click the Part 1 button A vide...

Page 16: ...ine plays from the Chapter 2 marker D to the end and then the Main menu reappears When the third button is activated the Video_1 timeline plays from the Chapter 3 marker E to the end and then the Main...

Page 17: ...d down the Ctrl key while you select Intro m2v Intro wav and Video_01 avi Holding down the Ctrl key lets you select multiple files at once 4 Click Open The files you selected appear in the Project win...

Page 18: ...imeline F Source G Tracks H Zoom slider You ll need to name the timeline The Properties palette displays the attributes for the item currently selected If the Properties palette isn t open choose Wind...

Page 19: ...e Project window and drag it onto the video track in the Timeline window 4 Select the Intro wav file in the Project window and drag it onto the Audio 1 track in the Timeline window Encore_CIB book Pag...

Page 20: ...in the video track to which you want to link buttons or other navigational behaviors You can add chapter points in the Timeline window In this project you want to create links to three different chap...

Page 21: ...ndow open 3 Move the current time indicator to the left edge of the timeline The time displayed should be 00 00 00 00 An initial chapter point is automatically created at the beginning of every timeli...

Page 22: ...w and save the project The Monitor window closes automatically when you close the Timeline window Importing a layered Photoshop file as a menu One of the most powerful features of Adobe Encore DVD is...

Page 23: ...ection tool in the toolbox Then select Part 1 in the Menu Editor window A bounding box appears around the button and the text Part 1 4 If the Properties palette is not open choose Window Properties to...

Page 24: ...example you need to determine which timeline or menu runs when the DVD is first inserted into the player and which timeline or menu follows it For this project you want the Introduction timeline to ru...

Page 25: ...nished playing the Main menu will appear The Part 1 button will be selected by default 5 Save the project Setting behaviors for remote control buttons Next you will define the behaviors for the Title...

Page 26: ...roject window select the Video_01 timeline In the Properties palette choose Main One from the Menu Remote pop up menu If the viewer clicks the Menu button on the DVD player s remote control while the...

Page 27: ...Preview window The Main menu should appear 4 While the video is playing click the Title button at the bottom of the Project Preview window The Introduction timeline should play 5 Click the Exit and Re...

Page 28: ...tation for your recorder for assistance 5 Insert a blank disc into the recorder and click Next Note If you click Next too quickly you may see a Device Not Ready dialog box Click OK to let your compute...

Page 29: ...on the DVD An imported menu is used as a menu from which viewers can navigate to content 3 Create a chapter point to define a location in a video track to which you want to link a menu button or atta...

Page 30: ...Adobe Encore DVD provides all the tools you need to create menus without ever leaving the application In this lesson you ll type directly onto menus import backgrounds add buttons and more Encore_CIB...

Page 31: ...to your menu Getting started In this lesson you ll create a new Adobe Encore DVD project using graphic and video files included on the Adobe Encore DVD Classroom in a Book DVD Make sure you know the...

Page 32: ...ntents the video clips still images and audio clips A single menu may serve as a table of contents for the entire disc or the DVD may include multiple menus serving different purposes at different poi...

Page 33: ...OK to accept NTSC as the television standard A new Project window appears Now you ll create a new menu 2 Choose Menu New Menu The Menu Editor window appears displaying the default menu which is named...

Page 34: ...w to ensure that it s active Then type Maintenance in the Name field of the Properties palette 4 Click in the Project window The menu name is automatically updated in both the Project window and the t...

Page 35: ...ly into the menu and then move it to the appropriate position 1 Select the text tool from the toolbox and click in the Menu Editor window A blinking insertion point appears 2 Type Horn Maintenance 3 C...

Page 36: ...o close the Color Picker The NTSC color set is a subset of colors optimized for television viewing You ve created a text block using the text tool to type and format text Now you want to position the...

Page 37: ...en you make the changes the settings become the default settings for new text Now you ll set the defaults for the button text 10 In the Character palette choose Minion Pro for the font Bold Condensed...

Page 38: ...rder appears inside the menu representing the Title Safe area the part of the menu that will be visible on a television screen Keep all the text inside that border to ensure that all viewers can acces...

Page 39: ...es of the menu A gray background appears behind the black menu 5 Drag the Gradients psd file from the Project window into the Menu Editor window With the selection tool position the new layer to fill...

Page 40: ...l you burn the DVD 7 Select the Gradients psd layer in the Layers palette Then choose Object Arrange Send to Back The Gradients layer moves beneath the text layers and its order changes in the Layers...

Page 41: ...m click the middle box next to the layer name in the Layers palette so that a padlock icon appears When a layer is locked you cannot modify it Adding drop shadows to text You ll add drop shadows to th...

Page 42: ...te and then press the Ctrl key while you select the others Note There are four text layers Be sure to select them all 5 Choose Object Drop Shadow Click OK to accept the default settings Drop shadows a...

Page 43: ...u created earlier into buttons 1 With the direct select tool select the three text blocks Press the Ctrl key to select multiple objects 2 Choose Object Align Left The text blocks are aligned on the le...

Page 44: ...subpicture is a graphic overlay that you can use to change the appearance of a button when the viewer moves the mouse over it or selects it You can create subpictures from buttons in Adobe Encore DVD...

Page 45: ...eate subpictures for the other two buttons Assigning color groups for subpictures When you add subpictures to buttons the default subpicture colors are applied To apply different colors to the subpict...

Page 46: ...Color Set and click OK to return to the Menu Color Set dialog box 4 In the Highlight Group 1 section click the Color 1 swatch The Color Picker opens 5 Choose a red color or type 215 35 and 56 in the...

Page 47: ...elect the Maintenance menu to make it active 8 In the Properties palette choose Horn Color Set from the Color Set pop up menu The new subpicture color appears in the Menu Editor window Note If you don...

Page 48: ...Ctrl key while you select the three AVI files in the Project window 2 Click the New Timeline button at the bottom of the Project window The Timeline window opens with tabs for three timelines Each AV...

Page 49: ...pens after the timeline finishes playing Here the DVD will return to the Maintenance menu after each video is finished If you want every timeline to return to the main menu after it finishes playing y...

Page 50: ...g the project Before you burn a DVD make sure the project is configured properly It should look and behave just like the one you previewed at the beginning of this lesson 1 Choose File Preview If the...

Page 51: ...l cause the DVD to play incorrectly return to the project and fix them before burning the disc Adobe Encore DVD can identify broken links unset links and timelines or menus to which there is no naviga...

Page 52: ...dgeting Bit budgeting or estimating the amount of space your project will occupy on DVD is an important part of planning Bit budgeting helps you strike a balance between the quantity and quality of co...

Page 53: ...ontent in that area will be visible 4 Select a layer in the Layers palette choose Object Arrange and then choose Bring to Front Send to Back Bring Forward or Send Backward 5 Select the text layer in t...

Page 54: ...can take advantage of the numerous layer styles and other design features in Photoshop to create exactly the menu you want and know that it will retain its appearance and formatting when you import it...

Page 55: ...le create buttons using layer sets and import the file as a menu inAdobe Encore DVD Then you ll use tools in Adobe Encore DVD to modify the menu and link its buttons to timelines All the graphic and v...

Page 56: ...with Photoshop As you ve seen in the first two lessons Adobe Encore DVD shares some features with Photoshop For example it includes a limited Layers palette and you can create and edit text for menus...

Page 57: ...necessary separate instructions are provided for the two versions of Photoshop Creating a menu background in Photoshop To create a menu in Photoshop you ll create a new image and apply a background co...

Page 58: ...ort it into Adobe Encore DVD later 5 Choose File Open Navigate to the Lesson 03 folder in the Open dialog box Then hold down the Ctrl key while you select Small_giraffe psd Small_gorilla psd and Small...

Page 59: ...layer appears in the Layers palette it s named Giraffe image 8 Use the move tool to position the Giraffe layer in the lower left area of the image 9 Arrange the windows so that both the Main psd and S...

Page 60: ...an Adobe Encore DVD so you can get just the effect you want Adobe Encore DVD recognizes the formatting and displays the text correctly and you can always return to Photoshop to edit the text or its fo...

Page 61: ...the double arrow icon to switch the two colors If the colors in the toolbox are not black and white press the D key on your keyboard to quickly set the colors to the default foreground black and backg...

Page 62: ...tion shown here 7 Select the Gorilla image layer in the Layers palette Then with the horizontal type tool click an insertion point to the right of the gorilla s head 8 Type the word Gorilla and press...

Page 63: ...elements on your monitor may appear slightly different from those in this book depending on the version of Photoshop you are using and whether Pixel Aspect Ratio Correction is on or off For this less...

Page 64: ...80 pt for the type size and 64 pt for the leading 3 Click the Paragraph tab to make the Paragraph palette active and then click the Left Align Text option 4 Type Animal and press Enter Then type the w...

Page 65: ...r Picker opens 7 Click in the upper right corner of the color field to select a bright red color If you prefer you can specify the color numerically in the Color Picker We used R 205 G 0 B 0 Click OK...

Page 66: ...s the effects accurately and you can return to Photoshop to edit the layer styles at any time You ll apply a drop shadow effect to the Animal Facts text block 1 Select the Animal Facts text layer in t...

Page 67: ...e Note Be sure to select the Giraffe image layer and not the Giraffe text layer 4 Click the Add a Layer Style button at the bottom of the Layers palette and choose Outer Glow The Layer Style dialog bo...

Page 68: ...word Facts in your image With the Color Picker open move the cursor over the word Facts until it turns into the eyedropper tool Click on the word Facts Click OK to close the Color Picker To learn more...

Page 69: ...ayer Style dialog box A red glow appears around the giraffe 9 Repeat steps 3 8 for the Gorilla image layer and the Jaguar image layer so that a red glow appears around all three animals Encore_CIB boo...

Page 70: ...t the name begins with Adobe Encore DVD recognizes layer sets whose names begin with as buttons About layer styles You can apply shadows glows bevels embossed effects and more using layer styles in Ph...

Page 71: ...te meaning that it is included in the layer set 4 Drag the Giraffe image layer onto the folder for the Giraffe Button layer set Because the name of the layer set begins with Adobe Encore DVD will reco...

Page 72: ...utton when the viewer mouses over or activates it 1 Select the Giraffe image layer in the Layers palette and then choose Layer Duplicate Layer Menu Item Photoshop Element Layer Name Prefix Example But...

Page 73: ...egins 1 Adobe Encore DVD recognizes layers whose names begin with as subpictures The new subpicture layer is a copy of the Giraffe image layer so it includes the Outer Glow layer style You will remove...

Page 74: ...ill In the Fill dialog box choose Foreground Color from the Use pop up menu and set the Opacity value to 100 Then click OK 7 The giraffe image is filled with the foreground color If the entire layer i...

Page 75: ...obe Encore DVD will use the color and transparency values of the Photoshop layer when it creates subpictures 9 Repeat steps 1 8 to create subpictures for the Gorilla image layer and the Jaguar image l...

Page 76: ...If the layers are named and organized appropriately you re ready to import the menu into Adobe Encore DVD 1 In Adobe Encore DVD choose File New Project Click OK to accept NTSC as the television standa...

Page 77: ...re DVD because all of the Photoshop layer information has been preserved Editing a menu in Photoshop The Outer Glow layer style helps to define the shape of the giraffe but the image still seems to la...

Page 78: ...s it in the Sources Menus folder in the Adobe Encore DVD project folder Changes you make to this file in Photoshop affect the menu in your Adobe Encore DVD project but do not affect the original menu...

Page 79: ...change The giraffe image has better contrast 6 Save the file in Photoshop and then close it Return to Adobe Encore DVD In Adobe Encore DVD the menu has updated to reflect the change you made in Photos...

Page 80: ...ch video file The Monitor window also opens 3 If the Properties palette isn t open choose Window Properties 4 In the Project window select the Giraffe timeline the Gorilla timeline and the Jaguar time...

Page 81: ...meline and the Jaguar button to the Jaguar timeline 9 Save the file Repositioning overlapping objects The buttons have large bounding boxes so they re probably overlapping You ll preview the buttons a...

Page 82: ...wn below 3 Close the Project Preview window 4 Press the Shift key and click the three buttons in the Menu Editor window Notice that even though the buttons are irregularly shaped they have rectangular...

Page 83: ...configured correctly the Main menu appears The Giraffe button is highlighted 2 Click the Giraffe button The Giraffe timeline should play and then the DVD should return to the main menu 3 Click the oth...

Page 84: ...h layer sets will Adobe Encore DVD recognize as buttons 4 Which layers will Adobe Encore DVD recognize as subpictures 5 How can you edit an Adobe Encore DVD menu in Photoshop Review answers 1 When you...

Page 85: ...one of the menu templates included with Adobe Encore DVD You can choose the menu buttons and images you want to use from the Library palette and then customize them to create a unique look Encore_CIB...

Page 86: ...ary palette Paste items into multiple menus Build a DVD image Getting started In this lesson you ll create a new Adobe Encore DVD project using graphic and video files included on the Adobe Encore DVD...

Page 87: ...ttons and the first button is highlighted 5 Click the Message from Pete button A new menu with four buttons appears 6 Click the Back button to return to the main menu 7 Click the Mission Statement but...

Page 88: ...round layer is listed in the Layers palette 4 Click the Library tab to open the Library palette Library palette A Show Menus B Show Buttons C Show Images D Place E Replace F New Menu G Add Item H Dele...

Page 89: ...oshop files constructed of layers and layer sets named using Adobe Encore DVD naming conventions 7 Select the Blue Grid Menu psd file 8 Click the New Menu button at the bottom of the Library palette T...

Page 90: ...elete the selected menus you can click the Delete button at the bottom of the Project window or press the Delete key on your keyboard Note Items in the default Adobe Encore DVD library are stored in t...

Page 91: ...as its own color definitions and opacity settings for all three colors For example using Photoshop you can create a subpicture composed of three elements such as a check mark a button outline and the...

Page 92: ...ns You ll delete the buttons you don t need 4 With the selection tool select the Languages button and the Behind the Scenes button 5 Press the Delete key on your keyboard The Play Movie and Special Fe...

Page 93: ...reposition the text so that it is positioned as shown below 10 In the Layers palette expand the Play Movie layer set and select the text layer named play movie Note To expand a layer set click the tri...

Page 94: ...f the Properties palette isn t open choose Window Properties 14 With the selection tool select the first button in the Menu Editor window In the Properties palette rename the button Message Give menus...

Page 95: ...the same template To create a consistent look for your DVD project you can use the same template to create all its menus You ll start with the same template but you ll make different changes to it 1...

Page 96: ...t the text and replace it in the Menu Editor window without selecting the text layer in the Layers palette However it s easy to accidentally create a new empty text block if you click the text tool ou...

Page 97: ...ample you can add images or buttons from the Library palette For this menu you ll create another submenu from the same template deleting the buttons and replacing them with an image 1 Select the Sky U...

Page 98: ...rties palette 7 Expand the Background Details layer set in the Layers palette and then select the Background layer 8 Select the Blue Grid BG psd file in the Library palette 9 With the Background layer...

Page 99: ...uently in the Library palette Additionally you can easily position common elements such as a company logo in multiple menus Add the MHQ company logos to the Library palette for use in this project 1 C...

Page 100: ...y palette and click the Place button at the bottom of the Library palette The Place button adds the selected item to the active menu 5 Click the Show Safe Area button at the bottom of the Menu Editor...

Page 101: ...version 7 Select the MHQ_logo psd file in the Library palette 8 Make sure the original logo is still selected in the Menu Editor window and then click the Replace button at the bottom of the Library p...

Page 102: ...tem in one menu you can quickly add it to other menus in the same position 13 Save the project Linking menus to each other Link the menus to each other just as you would if you created them from scrat...

Page 103: ...ey as you select the Cardkey avi Exits avi and Intro avi files Click Open 2 In the Project window select the Cardkey avi Exits avi and Intro avi files and choose Timeline New Timeline The three video...

Page 104: ...o for the font Bold Condensed for the font style 48 for the type size and white for the color Select NTSC Colors Only Click the Align Center option 4 With the text tool click inside the box you just c...

Page 105: ...uttons and menus Tabs in the Project window help you organize your assets and see how they are linked 1 In the Project window click the Menus tab The Menus tab lists only the menus included in the pro...

Page 106: ...n the lower frame of the Menus tab select the Back button In the Properties palette choose Security Update Default from the Link pop up menu 4 Click the other menus to check for unlinked buttons 5 Cli...

Page 107: ...consistent and that the links behave as you expect them to 1 Choose File Preview to open the Project Preview window 2 Click the Message from Pete button to open the Message menu Click the buttons to v...

Page 108: ...ick Next Ensure that there is sufficient space on the drive you specify 4 Review the information in the Make DVD Image Summary dialog box 5 Click Build Burning a DVD from a DVD image file You can use...

Page 109: ...lick the New Library Item button at the bottom of the Library palette and then select the item you want to add in the New Library Item dialog box 2 You can store background images buttons other images...

Page 110: ...ates 5 To replace an item first select it in the Menu Editor window Then select the replacement item in the Library palette and click the Replace button Encore_CIB book Page 112 Saturday September 20...

Page 111: ...to provide a convenient way to view rough video clips When speed is your priority use the shortcut features built into Adobe Encore DVD to streamline your workflow Encore_CIB book Page 115 Saturday Se...

Page 112: ...y palette Import items directly into the Library palette Simultaneously create buttons and timelines and links between them Arrange resize and position buttons in a menu Add data files to a disc Burn...

Page 113: ...ludes several menus buttons and images in its Library palette You can add your own assets to the Library palette simply by dragging them there Because you can use items in the Library palette in any p...

Page 114: ...brary palette lists all the menus buttons and images in the library When you deselect the Show Buttons and Show Images buttons only the menus are displayed Notice that one of the menu names is precede...

Page 115: ...it is available for this project To make this menu available for future projects you will add it to the Library palette 6 Drag the Capstan Main psd file from the Project window to the Library palette...

Page 116: ...ame it Lesson_05 ncor Importing items into the Library palette You can also add items to the Library palette without first adding them to your project As with the default menu you can also set a defau...

Page 117: ...ght click the Capstan Button psd file in the Library palette and choose Set as Default Button Two asterisks appear before Capstan Button psd changing its name to Capstan Button psd Creating buttons in...

Page 118: ...veral tasks when you dragged the video asset onto the Menu Editor window The default button appears in the menu A new timeline was created for the video asset The button was linked to the new timeline...

Page 119: ...Additionally the buttons are a little too small for this menu so you ll resize them 1 Using the selection tool select the three buttons in the Menu Editor window They may already be selected Press the...

Page 120: ...will appear on a television screen anything outside the guides may not 5 Drag each of the buttons to the right side of the menu within the safe area It doesn t matter which order the buttons are in 6...

Page 121: ...e buttons The buttons in this project retain their sharpness as you resize them because they were created using vector masks layer styles and live text layers in Adobe Photoshop A vector mask creates...

Page 122: ...tte 4 With the text tool select the word Button on the top button and type the name of the street shown in the Link field of the Properties palette In the illustration Dibble St is the top button If y...

Page 123: ...he menu The menu contains a company name but no title You ll add a title to the menu to help the viewer understand the contents of the DVD 1 Drag the text tool to create a rectangle in the left side o...

Page 124: ...button to play the appropriate video The timeline should play and then return to the main menu 3 Click the Remote Control Title Button and Remote Control Menu Button buttons while the timelines are pl...

Page 125: ...nt files to a CD The quality will equal that of a DVD 1 In the Disc tab choose 650 MB or 700 MB from the disc size pop up menu depending on the capacity of your blank CD 2 Click Build Project If promp...

Page 126: ...eated for the video asset A new button is created using the default button in the Library palette The button is linked to the timeline The End Action field for the timeline is set to return to the men...

Page 127: ...default end action assigned For greater flexibility Adobe Encore DVD lets you override that default end action when the timeline is accessed in different ways Encore_CIB book Page 133 Saturday Septem...

Page 128: ...First Play action Many DVD projects include multiple menus that link to the same timelines you may not want the timeline s behavior to be the same each time Adobe Encore DVD lets you specify overrides...

Page 129: ...ton is highlighted 5 Click the Play All Outtakes button Three videos play in sequence After each video has finished playing the next video plays automatically After the third video plays the main menu...

Page 130: ...for each timeline or menu but you may want a timeline or menu to behave differently depending on the way it was accessed For example in this lesson you want all three videos to play in sequence when t...

Page 131: ...yers that are named according to Adobe Encore DVD naming conventions Adobe Encore DVD automatically converts the files to menus and converts the layers to buttons and subpictures as appropriate When y...

Page 132: ...or Setting default end actions You will set a default end action for each timeline The default end action determines what happens when the timeline ends if no override is specified 1 Right click in th...

Page 133: ...4 Choose Window Properties to open the Properties palette if it isn t already open It displays the properties for the Kiss timeline 5 In the Properties palette choose Door Chapter 1 from the End Actio...

Page 134: ...ported as layers but the buttons aren t linked to anything yet You ll link the buttons in the main menu first 1 Click the Outtakes_main tab in the Menu Editor window 2 With the selection tool right cl...

Page 135: ...line includes multiple chapters click the arrow to the left of the timeline s name to display them You may then select a specific chapter 4 With the selection tool right click the Individual Outtakes...

Page 136: ...oject yet you ll preview the links from the Outtakes_main menu before moving on to link the buttons in the next menu Note The Preview feature works only if a menu or timeline has been set as First Pla...

Page 137: ...on to the Outtakes_main menu 1 Click the Outtakes_Indiv tab in the Menu Editor window If the tab isn t available double click the Outtakes_Indiv menu in the Project window 2 With the selection tool se...

Page 138: ...activated you want each timeline to play separately and then return to the Outtakes_Indiv menu Therefore you ll link the buttons to the timelines and then specify overrides to perform end actions that...

Page 139: ...appear immediately after the Kiss timeline has finished playing You will create an override to set this behavior 4 Drag the Override pick whip from the Properties palette to the Outtakes_Indiv menu i...

Page 140: ...ttons associated with the Outtakes_Indiv menu appear in the pane below the menus 7 Select the The Kiss button in the Menu Editor window again Drag the Override pick whip from the Properties palette to...

Page 141: ...v The Door Now you will set the links and overrides for the other two buttons 8 Click the Timelines tab in the Project window The three timelines appear The tabs in the Project window give you additio...

Page 142: ...s and overrides are working as you intend them to The project should look like the completed project you previewed at the beginning of the lesson 1 Choose File Preview The Project Preview window opens...

Page 143: ...er and click Next Ensure that you have sufficient space on the drive you specify 3 Review the information in the Make DVD Folder Summary dialog box and then click Build Review questions 1 How many end...

Page 144: ...then select the destination for the link Select the button in the Menu Editor window and then choose the destination from the Link pop up menu in the Properties palette Select the button in the Menu E...

Page 145: ...ing audio or video clips in the background or buttons for your menu In Adobe Encore DVD you can also use thumbnails of video clips for buttons to give viewers a glimpse of what they ll see if they cli...

Page 146: ...specially if the footage or audio provides a hint of what s to come The audio may be music sounds or even someone talking while the menu is displayed You can create buttons that include thumbnail imag...

Page 147: ...d the first button is selected Note If the background of the menu isn t moving choose File Render Motion Menus and select Preview When Complete 5 Click the Play Movie button A video with four sections...

Page 148: ...ter each video plays the thumbnail menu reappears 8 Close the Project Preview window and the Lesson_07_end Project window Assembling your assets Before you create your motion menu you will gather the...

Page 149: ...File Import as Asset Navigate to the Lesson 07 folder Select the Cardiac_cycle avi file Click Open Note If the Import as Asset command is dimmed click the Project window to make it active 4 In the Pro...

Page 150: ...vie the image fades to black and remains black for about two seconds You will trim the excess black footage 7 Move the current time indicator to 37 00 8 In the Timeline window position the cursor over...

Page 151: ...r point for each of the four sections in the movie 1 Move the current time indicator to the first frame in the timeline 2 Select the chapter point marker at 00 00 The chapter point marker is a polygon...

Page 152: ...current time indicator to be positioned You can scroll rapidly through the timeline to the new position When you click the timeline the current time indicator moves there Specify a numeric value in th...

Page 153: ...ove the current time indicator to 11 21 There are several different ways to move the current time indicator to different points on the timeline See Moving the current time indicator on page 160 to lea...

Page 154: ...yet been transcoded Therefore you can create a chapter point wherever you want it When Adobe Encore DVD transcodes the AVI file it automatically creates a GOP header at every chapter point you ve set...

Page 155: ...ovie button 4 In the Properties palette choose Cardiac_cycle Stage 1 from the Link pop up menu When the Play Movie button is activated the entire movie will play 5 In the Project window make sure the...

Page 156: ...n the Layers palette The Layers palette lists the Background layer and the Background layer set Click the eye icon to hide and reveal the Background layer set and the Background layer 3 Select the Bac...

Page 157: ...ound for the main menu 6 In the Project window select the Cardiac_main menu 7 In the Properties palette drag the Video field pick whip to the Cardiac_background avi file in the Project window To use a...

Page 158: ...ake any adjustments such as changing the number of times it loops 1 Choose File Render Motion Menus Click Preview When Complete in the dialog box that contains the status bar When Adobe Encore DVD fin...

Page 159: ...for a moment or the video may pause The looping point should be less obvious on the disc after you burn the final DVD project but it may still be apparent To avoid or minimize the pause design the ba...

Page 160: ...transcodes it when you burn the disc You can transcode assets directly from the Project window Upon transcoding a file Adobe Encore DVD updates the project link so that it points to the transcoded fi...

Page 161: ...ded asset to the original asset right click it in the Project window and choose Revert to Original 3 If necessary stretch the Project window so that you can see the Transcode Settings column The Proje...

Page 162: ...nu with thumbnail layers Just as you can designate Adobe Photoshop layers as buttons and subpictures you can also designate layers as thumbnails for use in buttons The Library palette in Adobe Encore...

Page 163: ...l is red just to help you identify it Adobe Encore DVD will ignore the red color 4 Exit Photoshop without saving the file Creating thumbnails from frames in a timeline In this project you ll create th...

Page 164: ...Encore DVD 2 In the Project window double click the Cardiac_cycle timeline 3 Move the current time indicator to 00 00 4 Drag the chapter point marker at 00 00 to the rectangle for the Stage 1 button...

Page 165: ...ok A thumbnail version of the first frame of the video appears in the button 5 Drag the other three chapter point markers to their respective buttons Encore_CIB book Page 173 Saturday September 20 200...

Page 166: ...re the appropriate frame 6 Zoom the timeline out to its maximum size Zooming lets you select single frames in the timeline with greater accuracy 7 Scroll until the Stage 4 chapter point is visible in...

Page 167: ...h section of the movie the buttons don t appear consistent To make the buttons consistent set a different frame to appear in the thumbnail without changing the frame that plays when the button is acti...

Page 168: ...ave the project Setting behaviors You ve created the thumbnails Now you ll set behaviors to ensure that viewers return to the thumbnail menu after they view a video using a thumbnail button 1 In the M...

Page 169: ...lick the Menus tab Only the menus in the project appear in the Menus tab 4 Select the Cardiac_thumb menu The lower pane lists all the buttons contained in the selected menu You can use this pane to or...

Page 170: ...the thumbnail menu will appear after the video is played from one of the thumbnail buttons 7 In the Menu Editor window click the Cardiac_main tab 8 Select the Play Stages button 9 In the Properties pa...

Page 171: ...and choose Preview From Here By choosing Preview From Here you can begin previewing the project from the point you selected without having to navigate through other menus The menu opens and the thumbn...

Page 172: ...ceed click Build Review questions 1 How can you trim a video clip in Adobe Encore DVD 2 What is a motion menu 3 How does Adobe Encore DVD recognize thumbnail layers 4 What must you do before previewin...

Page 173: ...n select Animate Buttons in the Properties palette and then specify how long you want the video to play and how many times it should loop 6 AVI files are not DVD compliant so you must transcode them i...

Page 174: ...miere Pro together to achieve the best quality video and to arrange it in the most accessible way The Edit Original command in Adobe Encore DVD lets you return to Premiere quickly to make changes to t...

Page 175: ...d in Adobe Encore DVD Getting started Before you assemble your DVD project you can edit and polish your video assets in Adobe Premiere Pro You ll prepare an MPEG 2 file and an AVI file in Premiere Pro...

Page 176: ...ll as a Back button 6 Click the thumbnail buttons in the menu to play the same video with different starting points 7 Click the Back button to return to the first menu 8 Click the Excerpt button A lon...

Page 177: ...i file navigate to the Premiere Source folder and select the file The Premiere Pro project opens with oneAVI file in the Timeline window If the Timeline window is not visible double click Sequence 01...

Page 178: ...ves to 03 21 6 Choose Marker Set Sequence Marker Unnumbered Premiere Pro places a marker in the timeline at 03 21 7 Change the current time to 12 20 8 Choose Marker Set Sequence Marker Unnumbered 9 Re...

Page 179: ...k OK 5 Name the file Trailer_markers and click Save Premiere Pro renders the file which may take a few minutes The timeline is exported as an MPEG 2 file that can be imported into Adobe Encore DVD Pre...

Page 180: ...n you burn a DVD Because there is no need to convert MPEG 2 files you can burn DVDs more quickly when you use them An MPEG 2 file has a smaller file size than an AVI file exported from the same Premie...

Page 181: ...tor window opens 7 Click the Zoom out icon in the bottom left corner of the Timeline window so that you can see the entire video track The four markers you created in Premiere Pro appear in the timeli...

Page 182: ...Adobe Encore DVD is a Windows only application you can use it to burn DVDs that contain video files you ve saved in Mac OS or in QuickTime format Open the video file in Premiere Pro and export it as a...

Page 183: ...Menu 2 Navigate to the Lesson 08 folder Select Chapters psd and click Open The menu opens in the Menu Editor window It includes four buttons shaped as coffee cups which you will link to chapter point...

Page 184: ...ight cup chapter point 4 to the lower right cup and chapter point 5 to the lower left cup When you click a button the video will play from the point in the timeline associated with the marker to the e...

Page 185: ...Chapters 1 from the End Action pop up menu When the timeline finishes the menu will reappear 9 Save the project Previewing the project You ve set the links for the Chapters menu Before you continue wi...

Page 186: ...layer should be rectangular If the layer is not rectangular Adobe Encore DVD calculates the smallest rectangle in which the image could fit The video remains rectangular regardless of the shape of the...

Page 187: ...you ll export the excerpt video as an AVI file 1 Open Premiere Pro 2 Click Open Project in the Welcome to Adobe Premiere Pro dialog box 3 Navigate to the Lesson 08 folder Select Scene01 prproj and cl...

Page 188: ...Area Bar from the Range pop up menu 9 Select Export Video and Export Audio 10 Choose Project from the Embedding Options pop up menu and then click OK When Premiere Pro renders the AVI file informatio...

Page 189: ...ll remove the portion of the clip that shows the tombstones You could use Adobe Encore DVD to trim the in point or the out point of a video but you need to use Premiere Pro to remove a section from th...

Page 190: ...y Using the ripple edit tool in Premiere Pro The ripple edit tool lets you trim a clip within a timeline and then adjusts the clips that follow You will use the ripple edit tool to remove the tombston...

Page 191: ...right edge of the audio track is even with the right edge of the video track 7 Save the project Updating an AVI file in Adobe Encore DVD You ll export the movie again and then return to Adobe Encore D...

Page 192: ...et the behaviors for the menu buttons and timelines 1 Click the Project window to make it active Then choose File Import as Menu and select Main psd Click Open A new menu with two buttons appears in t...

Page 193: ...oose Main Chapters from the End Action pop up menu in the Properties palette When the Scene01 timeline finishes playing the Main menu will display with the Chapters button highlighted 8 Choose Main Ch...

Page 194: ...he Project window right click the Main menu and choose Set as First Play When the DVD is inserted the Main menu will appear on the television or monitor 2 Choose File Preview The Project Preview windo...

Page 195: ...information in the Make DVD Disc Summary dialog box When you are ready to proceed click Build Review questions 1 How can you include chapter point markers in an MPEG 2 file you export from Premiere P...

Page 196: ...files When you use MPEG 2 files you can burn the DVD more quickly because Adobe Encore DVD does not need to convert the files The files are more secure because they cannot be edited as easily in video...

Page 197: ...Effects into your DVD project Add special effects in After Effects import the file into Adobe Encore DVD and then return to After Effects at any time to make additional changes Encore_CIB book Page 2...

Page 198: ...nu to provide subpictures You ll use graphic and video files included on the Adobe Encore DVD Classroom in a Book DVD Make sure you know the location of the files you need for Lesson 9 For help see Co...

Page 199: ...s Menu Navigate to the Lesson 09 folder and import the Zephyr psd file The menu appears in Adobe Encore DVD 3 Click on the menu in the Menu Editor window and then open the Layers palette The menu incl...

Page 200: ...es the layers as subpictures because their names begin with 1 5 Make the Character palette active by clicking the Character tab Then choose OCR A Std for the font Medium for the font style and 36 for...

Page 201: ...09 ncor Modifying a Photoshop file in After Effects Now you ll import the same Photoshop file into After Effects and save it with a 10 second duration 1 Open After Effects 2 After Effects opens with a...

Page 202: ...ort the Photoshop file into After Effects the duration of the new composition and each of its layers will be eight seconds 6 Select Comp 1 in the Project window and choose Edit Clear The Project windo...

Page 203: ...ere is only one file in the Project window you didn t import the layered Photoshop file as a composition step 7 Delete the file and re import it as a composition 9 In the Project window double click t...

Page 204: ...cts You imported a static Photoshop menu file Now you ll animate the file so that the buttons and title move during the four seconds that the menu plays 1 In the Timeline window move the current time...

Page 205: ...nge the position manually by selecting and dragging the title in the Comp window Or you can click the numbers in the timeline and type new values 7 Move the Kiteboard layer set to 710 240 Also move th...

Page 206: ...e same value as the keyframes in the 01 00 frame You want the layers to stay in the same position from 01 00 to 03 00 4 Click an empty area on the timeline to deselect the keyframes at 03 00 Then pres...

Page 207: ...e interesting you will change the keyframes so that the title and buttons move at different times Times are suggested in these instructions but the exact times of the keyframes isn t critical You can...

Page 208: ...ition Preview RAM Preview The title and buttons move into the screen from the right at intervals and exit the screen according to the keyframes you ve created 6 Save the After Effects project Renderin...

Page 209: ...Click the value next to Render Settings for your project 3 Choose Best from the Quality pop up menu and Full from the Resolution pop up menu Then click OK Encore_CIB book Page 223 Saturday September 2...

Page 210: ...se Project Link from the Embed pop up menu Embedding a project link ensures that you can return to the After Effects file to edit it from Adobe Encore DVD even though you ll be placing a rendered movi...

Page 211: ...deo Output section of the Output Module Settings dialog box 7 Choose No Compression from the Compressor pop up menu and click OK Click OK to close the Output Module Settings dialog box Encore_CIB book...

Page 212: ...s project and close it Note It is important to close the After Effects project Importing an After Effects movie into Adobe Encore DVD You ll import the movie into Adobe Encore DVD as an asset Though y...

Page 213: ...Menu Editor window 5 Click the arrow next to the Kiteboard layer set to expand it Then delete the text layer in it named Kiteboard The kiteboard text disappears from the Menu Editor window but the Kit...

Page 214: ...ighlight button at the bottom of the Menu Editor window to see the subpictures 8 Press the Alt key while you drag the Zephyr_background avi file from the Project window into the Menu Editor window Enc...

Page 215: ...he Zephyr_background avi file should be listed in the Video field in the Properties palette If it isn t press the Alt key as you drag the Zephyr_background avi file into the Menu Editor window again 1...

Page 216: ...ake a selection 3 Choose File Render Motion Menus If File Render Motion Menus is dimmed go to step 4 4 Choose File Preview 5 Close the Project Preview window and save the project Editing a file in Aft...

Page 217: ...n the original project version click Yes An untitled version of the After Effects file opens 3 In the Timeline window select the Background Zephyr psd layer 4 Choose Edit Duplicate A new duplicate lay...

Page 218: ...to create a keyframe 10 Drag the current time indicator to the left about 10 frames 01 20 11 Set the Opacity to 0 A new keyframe is automatically created 12 Move the current time indicator to about 0...

Page 219: ...Double click Output Module and then click Format Options in the Video Output section 5 Choose No Compression from the Compressor pop up menu and click OK 6 Choose Project Link and Copy from the Embed...

Page 220: ...r motion menus again so that the file appears correctly in the preview you deleted the Video link and re created it 5 Choose File Preview 6 Move the mouse over the buttons to see the subpictures appea...

Page 221: ...Sailboard button to Sail Chapter 1 6 Click the Timelines tab in the Project window 7 Select the Kite and Sail timelines In the Properties window choose Zephyr Default from the End Action pop up menu 8...

Page 222: ...enu from After Effects how can you include subpictures Review answers 1 Select the AVI file in the Project window in Adobe Encore DVD and then choose Edit Edit Original 2 A motion menu is quite simply...

Page 223: ...deo Using Adobe Encore DVD you can create a menu for each image to allow the viewer to navigate through the slideshow or create a timeline from the images for a slideshow that advances automatically E...

Page 224: ...eline from a set of still images Trim video clips to match an audio file Organize assets in folders Getting started In this lesson you ll create slideshows using graphic and video files included on th...

Page 225: ...the Meet the Executive Team button Click the Next button in the first two menus to progress through the slideshow Click the Menu button in the last slideshow menu to return to the main menu 6 Click th...

Page 226: ...VD choose File New Project Click OK to accept NTSC as the television standard 2 Choose File Import as Menu Navigate to the Lesson 10 folder Select the Main psd CFO psd Marketing psd and President psd...

Page 227: ...ady been created for this slideshow The buttons are layered Photoshop files Because they are not part of a Photoshop menu you must import them into the Library palette to retain the layers If you impo...

Page 228: ...of the Library palette The button you selected appears on the menu 2 Use the Place button to add the other two buttons to the menu 3 Click the Show Safe Area button at the bottom of the Menu Editor w...

Page 229: ...enter command If you accidentally choose Object Align Center choose Edit Undo and then choose Object Align Middle Now ensure that the spacing between the buttons is even 6 With all three buttons selec...

Page 230: ...ional buttons to appear in the same place on each slide Adobe Encore DVD makes it easy to copy objects in exactly the same location from one menu to another Copy and paste all three buttons to the oth...

Page 231: ...inking menus to each other The Menu button behaves the same way on each slideshow menu but the Prev and Next buttons should have different behaviors depending on the menu The slideshow menus will appe...

Page 232: ...and link it to Marketing Menu Button 7 Click the Marketing tab in the Menu Editor window This will be the last slide so you do not need the Next button 8 Select the Next button with the selection too...

Page 233: ...se File Preview 13 Click the Meet the Executive Team button and then click the navigation buttons you just created to proceed through the slideshow Be sure to test the Prev and Menu buttons as well as...

Page 234: ...ck the President tab in the Menu Editor window and open the Properties palette Notice that Hold Forever is selected next to the Duration field With the current settings you need to click on a navigati...

Page 235: ...nt menu appears as the audio file plays When the audio file ends the screen turns black 2 Close the Project Preview window Obviously you don t want the screen to turn black leaving the viewer with no...

Page 236: ...display only the menus for this project 2 Holding down the Ctrl key select the CFO Marketing and President menus in the Project window 3 In the Properties palette choose Main Presentation Button from...

Page 237: ...or each image and you can t include a continuous audio track throughout the slideshow If you instead use timelines for slideshows navigation is more limited but you have more control over how the slid...

Page 238: ...t all of the assets and menus in the Project window except for the Main menu file and drag them into the Executive folder The Executive folder now holds all the files you used to create the first slid...

Page 239: ...t the Q2_Earnings wav file and click Open The file you imported is added to the Presentation folder in the Project window 9 Choose File Import as Asset 10 Navigate to the Presentation folder in the Le...

Page 240: ...ct window and click the Create a New Timeline button at the bottom of the Project window A new timeline is created with the WAV file in the Audio 1 track First you will adjust the default duration of...

Page 241: ...ck and drag the edge to the current time indicator You ve shortened the slide so that the next slide will appear when you hear next slide in the audio 7 Drag Slide2 tif to the video track just to the...

Page 242: ...the video track at once The slides will appear in alphanumeric order in a single timeline It is important to create the timeline first If instead you select all of the slides and then create a new tim...

Page 243: ...enu If you want to create a looping self running slideshow set the end action of the timeline to the first chapter point of the same timeline 3 In the Project window click the Menus tab Select the Mai...

Page 244: ...are appropriate 3 Save the project Burning the DVD Burn the DVD using the Build DVD command 1 Choose File Build DVD Make DVD Disc 2 Choose Current Project from the Create Using pop up menu and specif...

Page 245: ...slideshow is viewed when you create it as a timeline and you can add an audio track that plays continuously However viewers have less control over the navigation and timing 3 Position the buttons on o...

Page 246: ...are designed for more than one audience You can add audio tracks and subtitle tracks for different languages accessible through menus you create in Adobe Encore DVD Encore_CIB book Page 265 Saturday...

Page 247: ...the Monitor window Import subtitles from a text script Assign a language to a subtitle track Change the duration or timing of a subtitle Link buttons to subtitles Getting started In this lesson you ll...

Page 248: ...Project Preview window opens and a menu appears The menu has two buttons 5 Click the Languages button Click the two language buttons in the menu to play the same video with different language voice o...

Page 249: ...ll add two different language tracks for a single video track The viewer will then be able to choose a language First import the assets 1 In Adobe Encore DVD choose File New Project Click OK to accept...

Page 250: ...tracks When you create the timeline for the Rose avi file its audio track will also appear in the timeline You ll add an audio track for the English wav file you imported 1 In the Project window sele...

Page 251: ...e audio track The speaker icon to the left of Audio 2 indicates that Audio 2 is the active audio track Only one audio track can be active at a time 6 Choose en English from the pop up menu to the righ...

Page 252: ...the Rose timeline even though it isn t set as first play Use the Preview From Here command to begin previewing your project exactly where you want to without having to navigate through menus The firs...

Page 253: ...e audio tracks Now you will link the buttons in the Language menu to them 1 Open the Language menu in the Menu Editor window if it isn t already open 2 With the selection tool right click the Dutch bu...

Page 254: ...ction tool right click the English button in the menu and choose Link To The Specify Link dialog box appears 5 Select the Rose timeline Then choose 2 from the Audio pop up menu at the bottom of the di...

Page 255: ...lighted 9 Save the project Name it Lesson_11 ncor Adding a main menu In this project viewers can choose either a soundtrack language or a language for subtitles You ll add a main menu to help viewers...

Page 256: ...Dutch from the Link pop up menu When the viewer activates the Languages button the Language menu will appear with the Dutch button highlighted 4 Click the Language tab in the Menu Editor window 5 Sel...

Page 257: ...ed 6 In the Project window right click the Roses_main menu and choose Set as First Play When the DVD is inserted into the player the Roses_main menu will appear on the screen 7 Choose File Preview 8 C...

Page 258: ...ou can use subtitles to enable viewers to follow dialogue even when they are hearing impaired or do not speak the language used in the audio soundtrack Or you can use subtitles to emphasize points mad...

Page 259: ...click the Pause button when the voice over begins Note If the Monitor window isn t open choose Window Monitor 6 Move the current time indicator to the point in the timeline where the voice over begin...

Page 260: ...Center option 10 Type This is one of the most classic and then press Enter 11 Type roses that I have developed The text appears over the video 12 Press the Ctrl button The cursor turns into an arrow D...

Page 261: ...rst voice over sentence plays and disappears after a few seconds 14 Save the project Modifying the appearance of subtitles You can change the color of the subtitles to ensure that they are visible as...

Page 262: ...oose Group 3 The color of the subtitle changes If the subtitle blends in with the video image you can change the color to enhance the legibility If further color changes are needed you can choose Edit...

Page 263: ...g the edge of the bar to the 06 00 point You ve changed the in point of the subtitle so it will appear on screen longer You can change the out point the same way place the cursor over the right edge u...

Page 264: ...yping subtitles can become tedious for a long or complex video It s often more efficient to import the subtitles from a text file 1 Click the Rose timeline to make it active and then choose Timeline I...

Page 265: ...the Monitor window isn t open choose Window Monitor The video plays and the subtitles appear on screen There is a misspelled word in the third subtitle You ll need to edit it 6 Move the current time i...

Page 266: ...btitle is to disappear and the subtitle text itself To see a subtitle script from which you can model your own open the English_subtitles txt file in the Lesson11 folder in a text editor such as Windo...

Page 267: ...es button the video will play with the Dutch soundtrack and English subtitles 6 Hold down the Shift key as you select both buttons in the Menu Editor window 7 In the Properties palette choose Subtitle...

Page 268: ...navigate through the menus Verify that the audio and subtitle tracks play when they should 3 Close the Project Preview window when you re done Note If the subtitles don t display in the Preview windo...

Page 269: ...ndow 3 Only one audio track can play at a time If you want to play both music and a voice over for example merge the audio files in an audio editing application before you import the file into Adobe E...

Page 270: ...Classroom in a Book www adobepress com Encore_CIB book Page i Saturday September 20 2003 1 56 PM Peachpit Press Scott Design...

Page 271: ...o compression technology is licensed by Fraunhofer IIS and Thompson All other trademarks are the property of their respective owners Contains an implementation of the LZW algorithm licensed under U S...

Page 272: ...s 15 Importing a layered Photoshop file as a menu 17 Setting start and end behaviors 19 Setting behaviors for remote control buttons 20 Previewing the project 21 Burning the DVD 22 Review questions 23...

Page 273: ...to timelines 78 Repositioning overlapping objects 80 Previewing the project 82 Review questions 83 Lesson 04 Using Adobe Encore DVD Templates Getting started 88 Exploring the Library palette 90 Modify...

Page 274: ...overrides 136 Working with multiple menus 137 Setting default end actions 138 Setting links for the main menu 140 Using the pick whip 143 Setting overrides 144 Previewing the project 148 Making a DVD...

Page 275: ...remiere Pro 201 Updating an AVI file in Adobe Encore DVD 202 Creating links and behaviors 203 Previewing the project 205 Burning the disc 205 Review questions 206 Lesson 09 Working with Adobe After Ef...

Page 276: ...Setting behaviors for a slideshow 258 Previewing the project 260 Burning the DVD 260 Review questions 260 Lesson 11 Adding Audio Tracks and Subtitles Getting started 266 Including audio tracks in a p...

Page 277: ...Encore_CIB book Page viii Saturday September 20 2003 1 56 PM Peachpit Press Scott Design...

Page 278: ...room in a Book 62 Adobe Premiere Pro creating sequence markers in 187 editing projects from Adobe Encore DVD in 200 embedding project information when exporting files from 199 exporting an AVI file fr...

Page 279: ...t 47 chapter point markers importing from Premiere Pro 187 chapter points about 12 15 adding 15 adding quickly 17 creating 159 inserting in MPEG 2 files 162 linking to thumbnail buttons 194 naming 159...

Page 280: ...ned 108 setting 19 46 setting default 138 setting for a timeline 162 setting for multiple timelines at once 46 setting overrides for 136 Exit and Return button in Project Preview window 22 Exit Here b...

Page 281: ...rting buttons to retain layers 243 importing items into 120 replacing items in a menu using 99 103 setting the default button 121 setting the default menu 118 viewing thumbnails 91 Link pop up menu 46...

Page 282: ...ng 167 previewing 166 movie importing into Adobe Encore DVD 226 modifying in After Effects 230 rendering in After Effects 222 See also video moving Adobe Encore DVD project to a different drive 48 tex...

Page 283: ...e about 13 naming a menu in 31 opening 13 using the pick whip 143 Q QuickTime files converting 193 R rectangular pixels 57 region code assigning 206 remote control emulating in Project Preview window...

Page 284: ...ng in a timeline 280 Swatches palette in Photoshop 73 T templates creating menus from 93 customizing 93 using menus in Library palette as 91 text adding drop shadows to 38 aligning 40 changing the col...

Page 285: ...modified in After Effects 233 file modified in Premiere Pro 202 V vector masks using Photoshop to create buttons in different shapes 197 using to create resizable buttons 125 vertical text creating 32...

Reviews: