P
ART
REPLACEMENT
C
ONTROLLER
BOARD
REPLACEMENT
38
AlphaXpress 8731 Sign Installation and Maintenance Manual (pn 1508610601 rev. A)
Î
To set the IP address for the new Controller #1 board
Note:
To assign an IP address, the IP Set Utility program must be installed on the computer that will be
communicating to the sign. Contact Adaptive Technical Services at (800) 558-7022 or (414) 357-
2020 if you do not have this program.
1.
Using a null modem cable, connect a laptop computer to the controller #1 at P3 (next to the Reset
button). See “Controller #1 and #2” on page 27 for the P3 location.
2.
Open the IP Set Utility program — select
Start > Programs > IPSetUtility > IP Set Utility.
3.
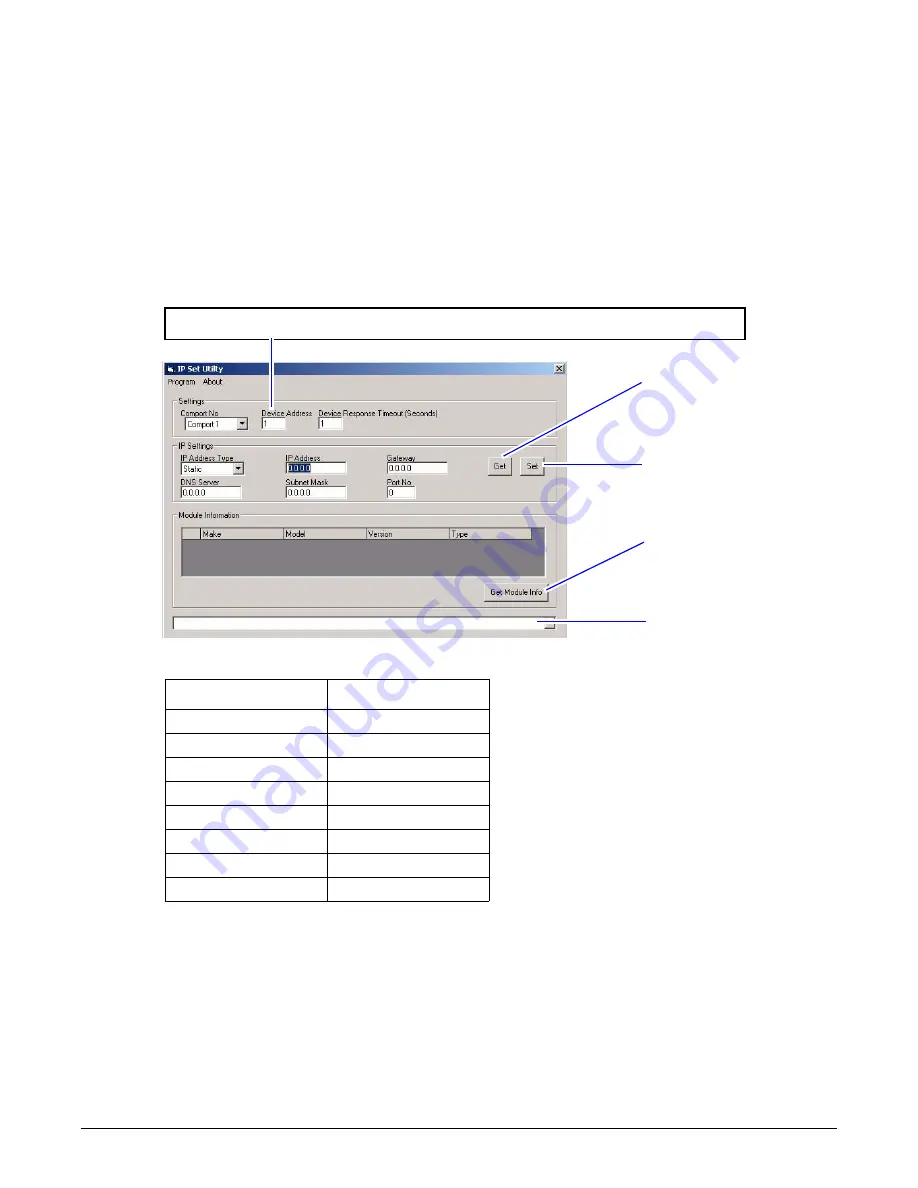
Enter the appropriate information in the
IP Set Utility
Note:
If the controller is operational (LED 1 is normally flashing), use
Get
to verify if the sign’s IP
address can be retrieved.
Figure 31.
Setting the IP address for the controller.
4.
Click
Set
to set the IP address (each sign must have a unique IP address).
5.
After the IP address is set, detach the computer from the controller board and reset the controller.
6.
Close the sign and apply power. Verify communications and ensure proper operation.
Get retrieves IP
information from the sign
Set assigns IP information
to the sign
Get Module Info retrieves
information about the sign
The status bar displays
important information about
the status of the information
being assigned to or retrieved
from the sign
Important: Verify that the device address matches the controller address on the SW1 dip switch
Example: if SW1 has positions 1 and 4 on, then it is set to serial/device address 9.
DIP switch positions
Equivalent decimal values
1
1
2
2
3
4
4
8
5
16
6
32
7
64
8
*
* For two controller sign configuration, then position
#8 is always ON for controller #1 (firmware is the
same in both controller #1 and #2).
See “Ground controller (Controller #3) board
replacement” on page 39 for controller #3 settings.


