


33
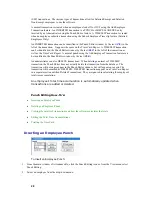
Additional Options
Options are available on some of these reports to have them sorted by various fields and to report
on either all of the employees, the employees assigned to a particular shift or individual
employees.
T
T
o
o
G
G
e
e
n
n
e
e
r
r
a
a
t
t
e
e
a
a
R
R
e
e
p
p
o
o
r
r
t
t
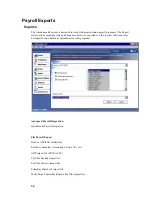
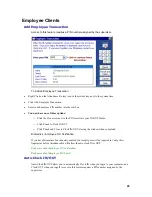
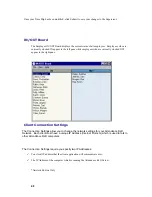
1. From the main window of Attendance Rx, click the Reports icon, or click on the View menu and
choose Reports.
2. Select the type of report you wish to print.
3. Select the filter criteria when applicable. This includes All Employees, Individual Employee(s), or
Individual Shift or Salaried Employee.
4. If Individual Employee(s) is selected, select the employee(s)'s name. If Individual Shift is selected,
select the shift number.
5. If you are generating either Hours Summary or Time Card reports, select either the current, previous or
one of the available Archived Pay Periods.
6. Select the output (where you want the report to go). Choices include Print, Preview, or Export.
7. Select the method by which you want the report sorted if appropriate. Methods available include First
name, Last name, badge number, employee number or shift.
8. Select the Print button if you wish to print a hard copy of the report.
9. Select the Preview button to view the report on the PC screen.
10. Select the Export
button to create a ASCII report file or send the data to a Payroll program. The default
extension for the created file will be "RPT". The created file can be viewed later by clicking on the
View File button and then selecting a previously saved "RPT" file.
11. Select Close to return to the main window of Attendance Rx.
F
F
u
u
t
t
u
u
r
r
e
e
T
T
r
r
a
a
n
n
s
s
a
a
c
c
t
t
i
i
o
o
n
n
s
s
R
R
e
e
p
p
o
o
r
r
t
t
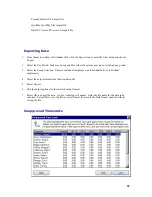
The Transaction Report shows all transactions that have been entered via Time slip submission,
Manual Punch or User Edit that occur after the end of the current pay period. These transactions
will automatically be properly inserted into the appropriate pay period as it becomes current.
•
From the main window of Attendance Rx, click the Reports icon, or click on the
View menu and choose Reports.
•
Select Time Card for your Report Type and select Future for your Pay Period.
•
Select Preview or Print to view the information.
•
Select an option from the left hand menu to exit this screen.