151
Chapter 4
Wireless Failure
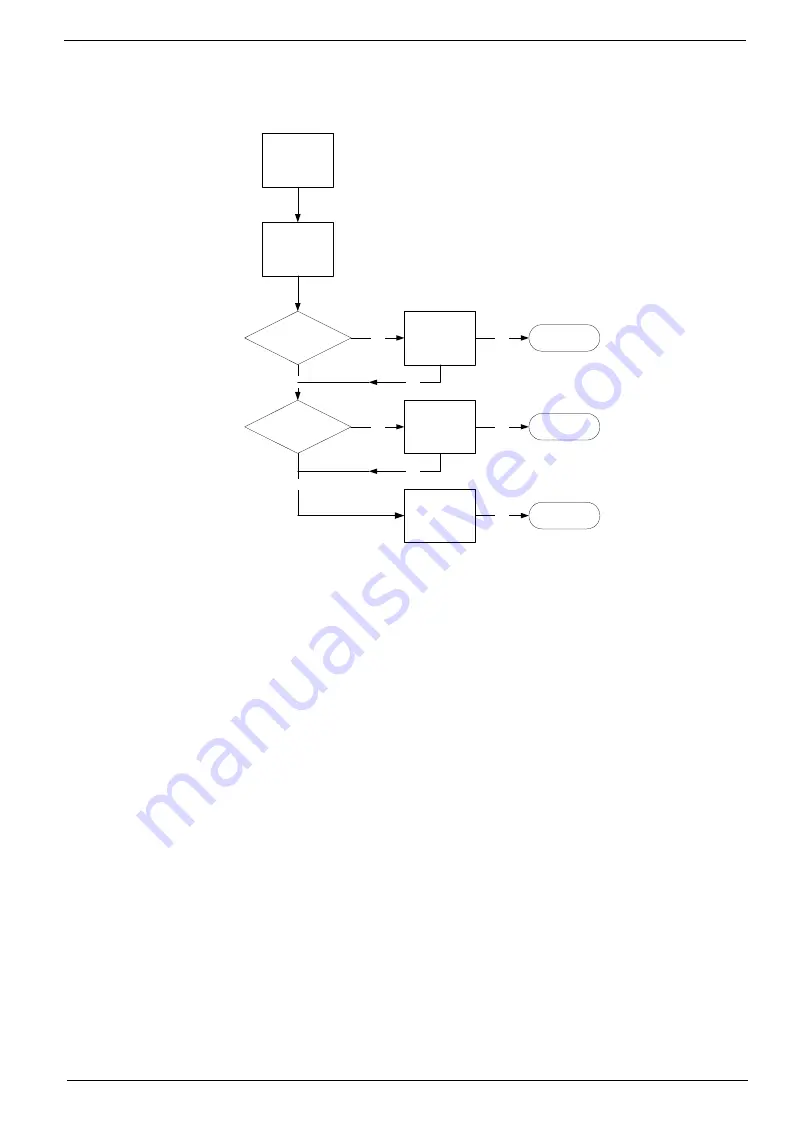
If the wireless functionality fails, use the following flowchart to determine the required action:
Speaker Failure
If sound problems are experienced, perform the following actions one at a time to correct the problem.
1.
Reboot the computer.
2.
Navigate to
Start
´
Control
Panel
´
System
and
Maintenance
´
System
´
Device
Manager
. Check
the Device Manager to determine that:
•
The device is properly installed.
•
There are no red Xs or yellow exclamation marks.
•
There are no device conflicts.
•
No hardware is listed under Other Devices.
3.
Roll back the audio driver to the previous version, if updated recently.
4.
Remove and reinstall the audio driver.
5.
Ensure that all volume controls are set mid range:
a.
Click the volume icon on the taskbar and drag the slider to 50. Ensure that the volume is not muted.
b.
Click Mixer to verify that other audio applications are set to 50 and not muted.
6.
Navigate to
Start
´
Control
Panel
´
Hardware
and
Sound
´
Sound
. Ensure that Speakers are selected
as the default audio device (green check mark).
NOTE:
If Speakers does not show, right-click on the
Playback
tab and select
Show
Disabled
Devices
(clear by default).
7.
Select Speakers and click
Configure
to start
Speaker
Setup
. Follow the onscreen prompts to configure
the speakers.
8.
Remove and recently installed hardware or software.
START
Check WLAN
cable connection
Wirelss
function failure
Reconnect
cable correctly
Check WLAN
module
Replace
WLAN module
Close
Close
Close
OK
NG
OK
OK
NG
NG
Replace
Mainboard
OK
NG
OK
Summary of Contents for ZX4800 Series
Page 6: ...VI Laptopblue ...
Page 10: ...X Table of Contents Laptopblue ...
Page 47: ...Chapter 2 37 Laptopblue ...
Page 53: ...43 Chapter 3 4 Lift the ODD bezel away 5 Close the ODD assembly Laptopblue ...
Page 57: ...47 Chapter 3 5 Forcefully pry the rear cover from the assembly i ii iii iv Laptopblue ...
Page 59: ...49 Chapter 3 4 Disconnect the audio cable from the audio board Laptopblue ...
Page 62: ...Chapter 3 52 7 Remove the HDD module from the bracket Laptopblue ...
Page 74: ...Chapter 3 64 15 Lift the mainboard shielding away from the chassis Laptopblue ...
Page 76: ...Chapter 3 66 4 Lift the WLAN module away Laptopblue ...
Page 82: ...Chapter 3 72 4 Remove the fan Laptopblue ...
Page 87: ...77 Chapter 3 4 Remove the cables from the guide clips Laptopblue ...
Page 97: ...87 Chapter 3 4 Lift the power board away from the bezel Laptopblue ...
Page 100: ...Chapter 3 90 4 Disconnect the webcam cable Laptopblue ...
Page 121: ...111 Chapter 3 13 Connect the LVDS cable 14 Adhere the LVDC cable protective cover Laptopblue ...
Page 138: ...Chapter 3 128 4 Connect the left and right touchscreen sensor cable connectors Laptopblue ...
Page 143: ...133 Chapter 3 4 Connect the two 2 LCD to inverter board cables 1 and 2 1 2 Laptopblue ...
Page 155: ...145 Chapter 3 4 Close the ODD Laptopblue ...
Page 193: ...183 Appendix B Laptopblue ...
Page 196: ...186 Laptopblue ...
Page 197: ...187 Laptopblue ...
Page 198: ...188 Laptopblue ...


