3 System upgrades
38
Installing additional hard disk drives with
carriers in the optional bay cage
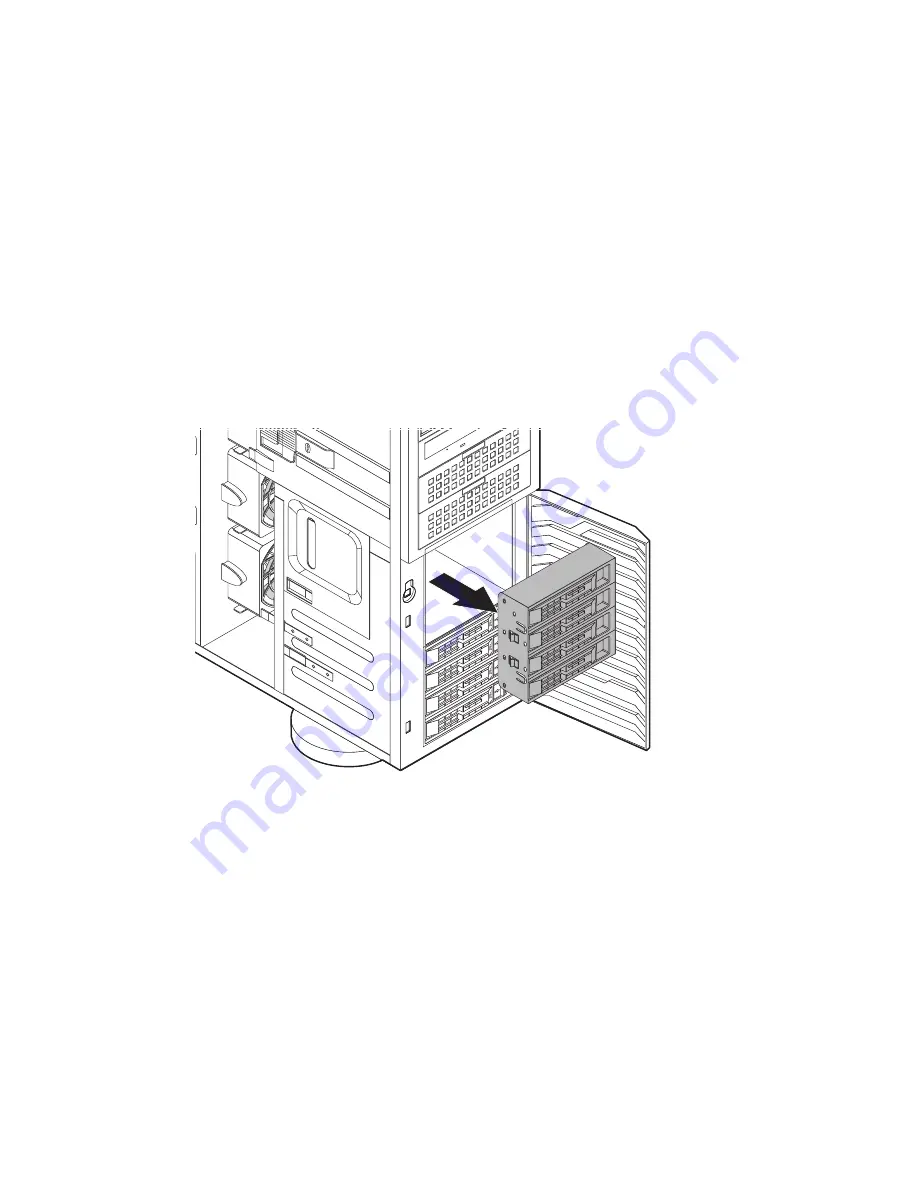
If you intend to install an additional HDD, you first need to remove the hard
disk drive cover from the hard drive bay.
1
Observe the ESD precautions described on page 26.
2
Observe the pre-installation instructions described on page 26.
3
Remove the side panel described on page 28.
4
Unlock the bezel door then pull it open.
5
Pull the HDD cover straight out of the drive bay.
3.5-inch HDD bays
Summary of Contents for AT350 F2 Series
Page 1: ...AT350 F2 Series Service Guide ...
Page 14: ...xiv ...
Page 15: ...1 System tour ...
Page 17: ...3 External and internal structure Front panel With 3 5 inch HDD bays ...
Page 30: ...1 System tour 16 ...
Page 31: ...2 System setup ...
Page 39: ...3 System upgrades ...
Page 82: ...3 System upgrades 68 ...
Page 83: ...4 System BIOS ...
Page 106: ...4 System BIOS 92 Server Management ...
Page 113: ...99 Boot Manager Use this feature to overwrite the original boot sequence ...
Page 116: ...4 System BIOS 102 ...
Page 117: ...5 System troubleshooting ...
Page 128: ...5 System troubleshooting 114 ...
Page 129: ...Appendix A Server management tools ...
Page 135: ...Appendix B Rack mount configuration ...
Page 146: ...Appendix B Rack mount configuration 132 ...
Page 147: ...Appendix C Acer Smart Console ...
Page 164: ...Appendix C Acer Smart Console 150 SSL Certificate Users Port IP Access Control Fan Mode ...
Page 232: ...218 ...


