


8
Chapter 1
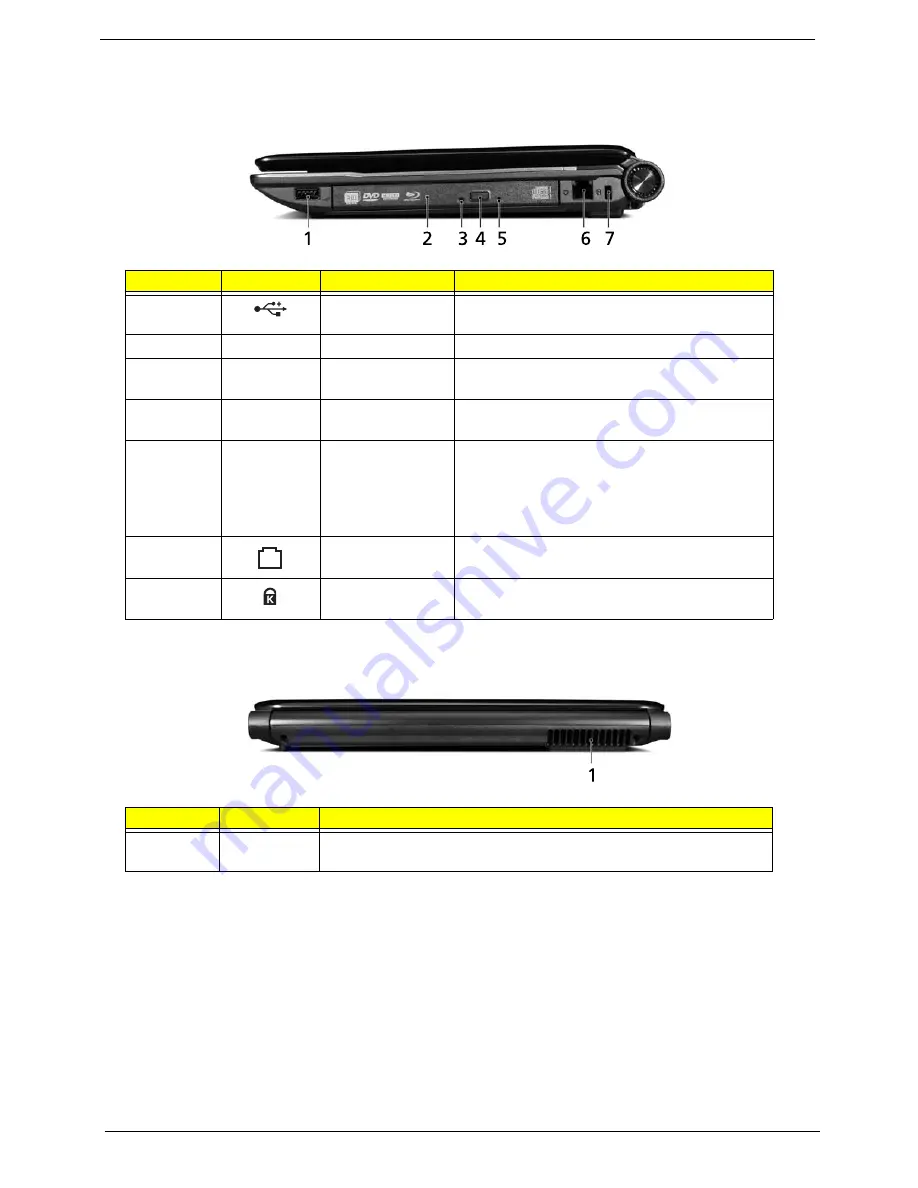
Right View
Rear View
No.
Icon
Item
Description
1
USB 2.0 port
Connect to USB 2.0 devices (e.g. USB mouse,
USB camera).
2
Optical drive
Internal optical drive; accepts CDs or DVDs.
3
Optical disk access
indicator
Lights up when the optical drive is active.
4
Optical drive eject
button
Ejects the optical disk from the drive.
5
Emergency eject
hole
Ejects the optical drive tray when the computer is
turned off.
Note:
Insert a paper clip into the emergency eject
hole to eject the optical drive tray when the
computer is off.
6
Modem (RJ-11)
port
Connects to a phone line.
7
Kensington lock
slot
Connects to a Kensington-compatible computer
security lock.
No.
Item
Description
1
Ventilation
slots
Enable the computer to stay cool, even after prolonged use.
Summary of Contents for Aspire 4240 Series
Page 6: ...VI ...
Page 10: ...X Table of Contents ...
Page 14: ...4 Chapter 1 System Block Diagram ...
Page 45: ...Chapter 2 35 A progress screen displays ...
Page 50: ...40 Chapter 2 2 In DOS mode run the MAC BAT file to write MAC values to eeprom ...
Page 57: ...Chapter 3 47 5 Remove the HDD Cover as shown ...
Page 98: ...88 Chapter 3 4 Lift the bezel away from the panel ...
Page 101: ...Chapter 3 91 4 Lift the LCD Panel out of the casing as shown ...
Page 125: ...Chapter 3 115 4 Replace the single securing screw ...
Page 146: ...136 Chapter 3 ...
Page 176: ...166 Chapter 5 ...
Page 189: ...Chapter 6 179 ...
Page 208: ...Appendix A 198 ...
Page 220: ...210 Appendix B ...
Page 222: ...212 Appendix C ...


