


144
Chapter 4
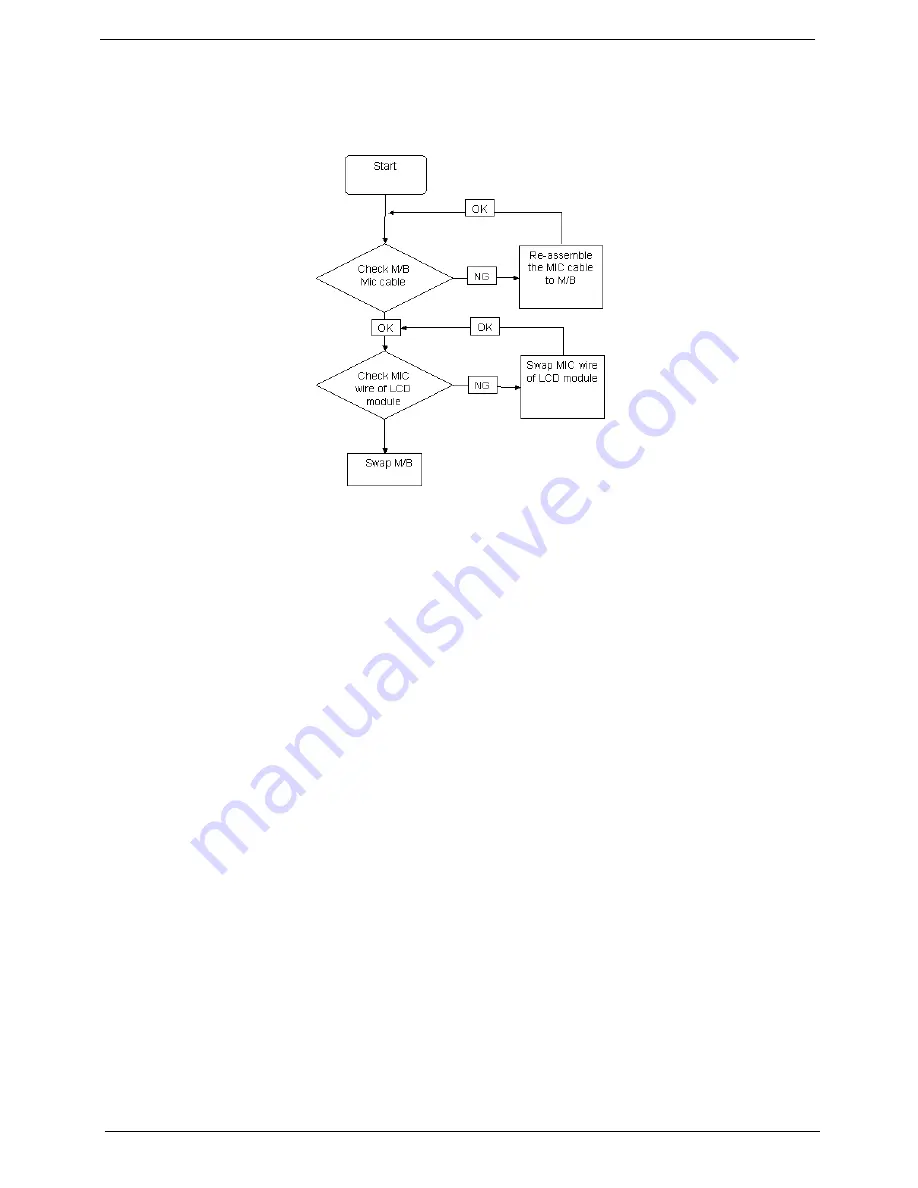
Internal Microphone Failure
If the internal
Microphone
fails, perform the following actions one at a time to correct the problem. Do not
replace a non-defective FRUs:
Microphone Problems
If internal or external
Microphones
do no operate correctly, perform the following actions one at a time to
correct the problem.
1.
Check that the microphone is enabled. Navigate to
Start
´
Control
Panel
´
Hardware
and
Sound
´
Sound
and select the
Recording
tab.
2.
Right-click on the
Recording
tab and select
Show
Disabled
Devices
(clear by default).
3.
The microphone appears on the
Recording
tab.
4.
Right-click on the microphone and select
Enable
.
5.
Select the microphone then click
Properties
. Select the
Levels
tab.
6.
Increase the volume to the maximum setting and click
OK
.
7.
Test the microphone hardware:
a.
Select the microphone and click
Configure
.
b.
Select
Set up microphone
.
c.
Select the microphone type from the list and click
Next
.
d.
Follow the onscreen prompts to complete the test.
8.
If the Issue is still not resolved, see “Online Support Information” on page 211.
Summary of Contents for Aspire 4240 Series
Page 6: ...VI ...
Page 10: ...X Table of Contents ...
Page 14: ...4 Chapter 1 System Block Diagram ...
Page 45: ...Chapter 2 35 A progress screen displays ...
Page 50: ...40 Chapter 2 2 In DOS mode run the MAC BAT file to write MAC values to eeprom ...
Page 57: ...Chapter 3 47 5 Remove the HDD Cover as shown ...
Page 98: ...88 Chapter 3 4 Lift the bezel away from the panel ...
Page 101: ...Chapter 3 91 4 Lift the LCD Panel out of the casing as shown ...
Page 125: ...Chapter 3 115 4 Replace the single securing screw ...
Page 146: ...136 Chapter 3 ...
Page 176: ...166 Chapter 5 ...
Page 189: ...Chapter 6 179 ...
Page 208: ...Appendix A 198 ...
Page 220: ...210 Appendix B ...
Page 222: ...212 Appendix C ...


