


EXC-500 MICROSCOPE SERIES
ACCU-SCOPE
®
73 Mall Drive, Commack, NY 11725 • 631-864-1000 • www.accu-scope.com
14
ADJUSTMENT & OPERATION
(continued)
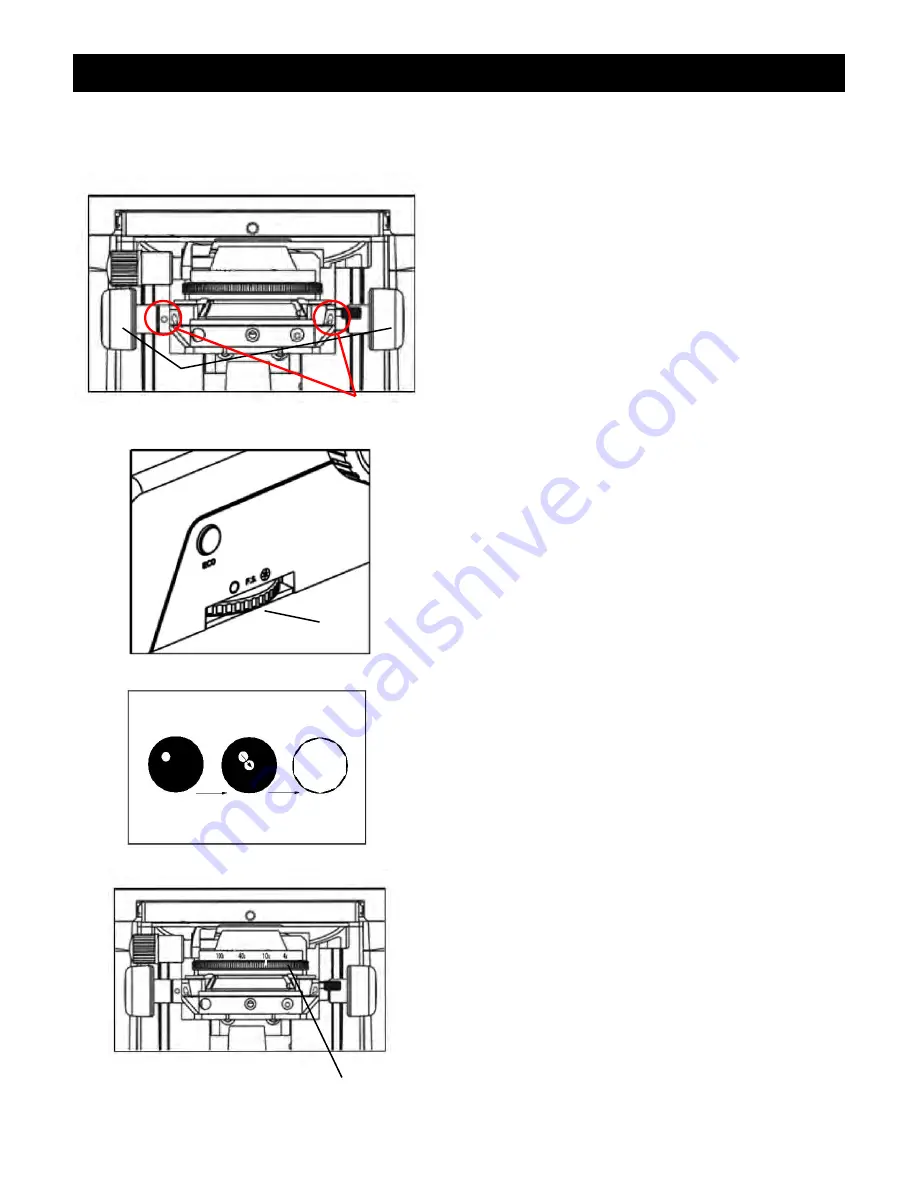
Centering the Condenser -
(Fig. 21-23)
The top height of the condenser was pre-set at the factory.
It is adjustable using the condenser adjustment knobs on
either side of the condenser. To adjust, follow the steps
below.
Rotate either of the condenser knobs
①
to raise it to the
highest position.
Rotate the 10x objective into the light path and focus the
specimen.
Rotate the field iris diaphragm adjustment ring
②
to put
the field iris diaphragm to the smallest position.
Rotate the condenser knob and adjust the image to be its
sharpest.
Using the Hex wrench provided, adjust the center
adjustment screws
③
and move the specimen to the
center of the field of view.
Open the field iris diaphragm gradually. If the image is in
the center all the time and inscribed to the field of view, the
condenser has been centered correctly.
On the front of the condenser, select the number that
matches your objective lens.
Adjusting the Aperture Diaphragm –
(Fig. 24)
The aperture size is increased or decreased by rotating
the condenser aperture diaphragm ring
①
. When the
aperture is closed, the brightness and resolution are
decreased but the contrast and range of focus are
increased. If the aperture diaphragm is opened, the
brightness and resolution are increased; however, the
contrast and range of focus are diminished. For optimal
viewing conditions set the condenser aperture diaphragm
ring
to match the magnification of the objective in the
optical path.
①
②
Fig. 21
Fig. 22
③
Fig. 23
Fig. 22
Fig. 24
①


