


EXC-500 MICROSCOPE SERIES
ACCU-SCOPE
®
73 Mall Drive, Commack, NY 11725 • 631-864-1000 • www.accu-scope.com
10
DETAILED ASSEMBLY
(continued)
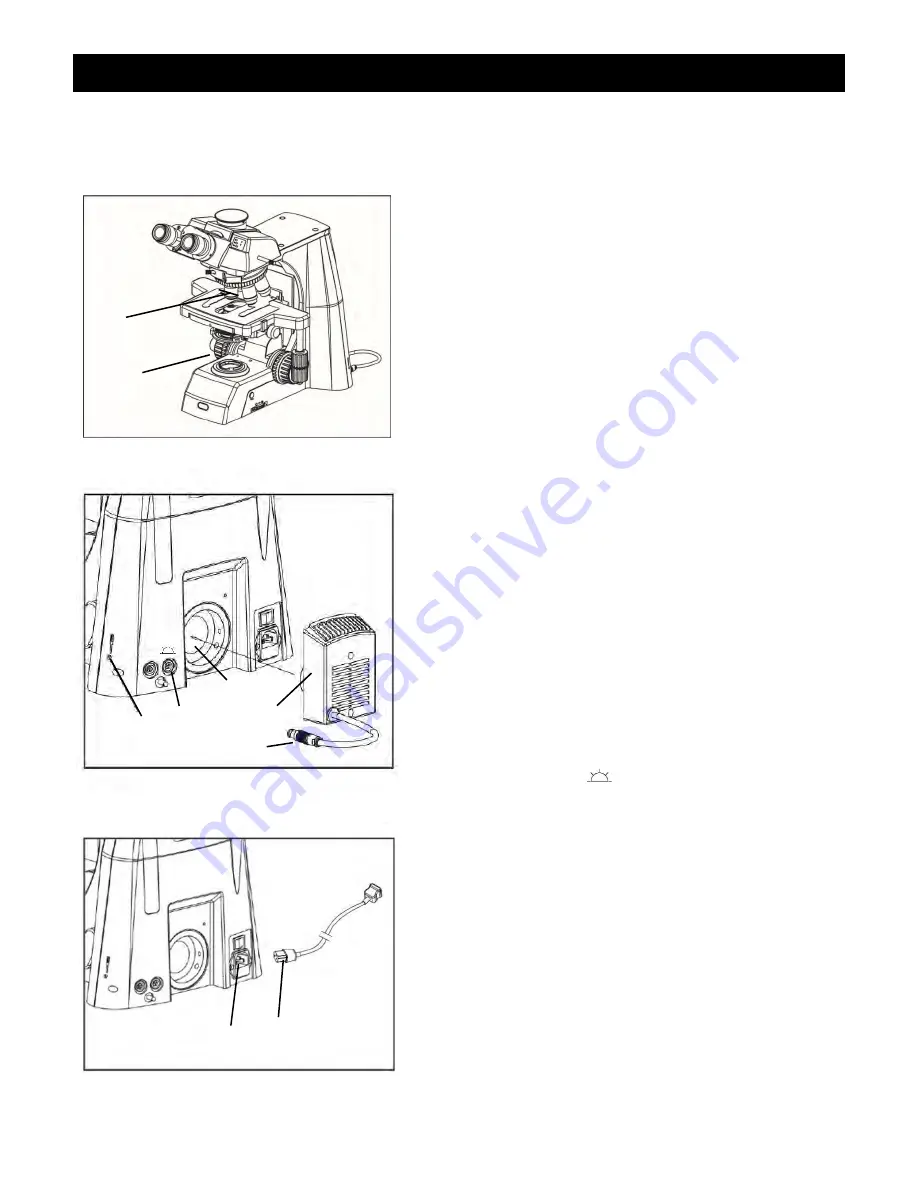
Installing the Objectives -
(Fig. 10)
Rotate the coarse focusing knob
①
to lower the stage to its
lowest position.
Install the objectives into the nosepiece
②
from the lowest
magnification to the highest in a clockwise direction
beginning with the first empty objective receptacle in front.
Install each objective by using two hands to position and
gently screw in the objective in a clockwise direction into the
threads of the nosepiece receptacle.
NOTE:
Never force any objectives onto the threads of the
nosepiece, and do not over-tighten.
Installing the LED Lamp Housing -
(Fig. 11)
Using the Hex wrench loosen the lock screw
①
for the LED
lamp housing.
Align and install the lamp housing
②
with the opening
③
in
the back of the stand as shown.
Retighten the lock screw
①
.
Align the red dot on the LED lamp housing cable plug
④
with
the red dot on the top of the lamp housing port
⑤
on the back
of the microscope and slide the plug into the port for
transmitted illumination (
).
Installing the Power Cord -
(Fig. 12)
Align and plug the female end
①
of the power cord into the
power cord socket
②
on the back of the microscope.
Plug the other end into a grounded (3-prong) outlet.
NOTE:
Always use the power cord that is provided with your
microscope; using a different power cord may damage your
microscope. Should you need a replacement, contact your
authorized ACCU-SCOPE dealer or call ACCU-SCOPE
at 1-631-864-1000 for a dealer nearest you.
①
②
Fig. 10
①
②
③
Fig. 11
⑤
④
Fig. 12
①
②